
Turning a folder of photos into a video slideshow with music
A stack of holiday photos or product shots becomes far more useful when it plays as a video. This guide covers everything the slideshow maker offers - per-photo timing, cropping, the Ken Burns drift, soundtrack mixing, shape and resolution options, and the export itself. A full worked example runs through a set of fifteen travel photos from drop to download.
Who needs a photo slideshow and why
Real estate agents put together property tours from listing photos. Teachers build recap videos from whiteboard snapshots. Families turn trip albums into something they can share on a group chat without sending forty separate images. Small businesses create product highlight reels for social media from the same studio shots they already have.
In every case the starting point is still images and the ending point is a video file. The tool here does that conversion in your browser, with enough control over timing, motion and layout to produce something that looks deliberate rather than thrown together.
Adding photos and putting them in order
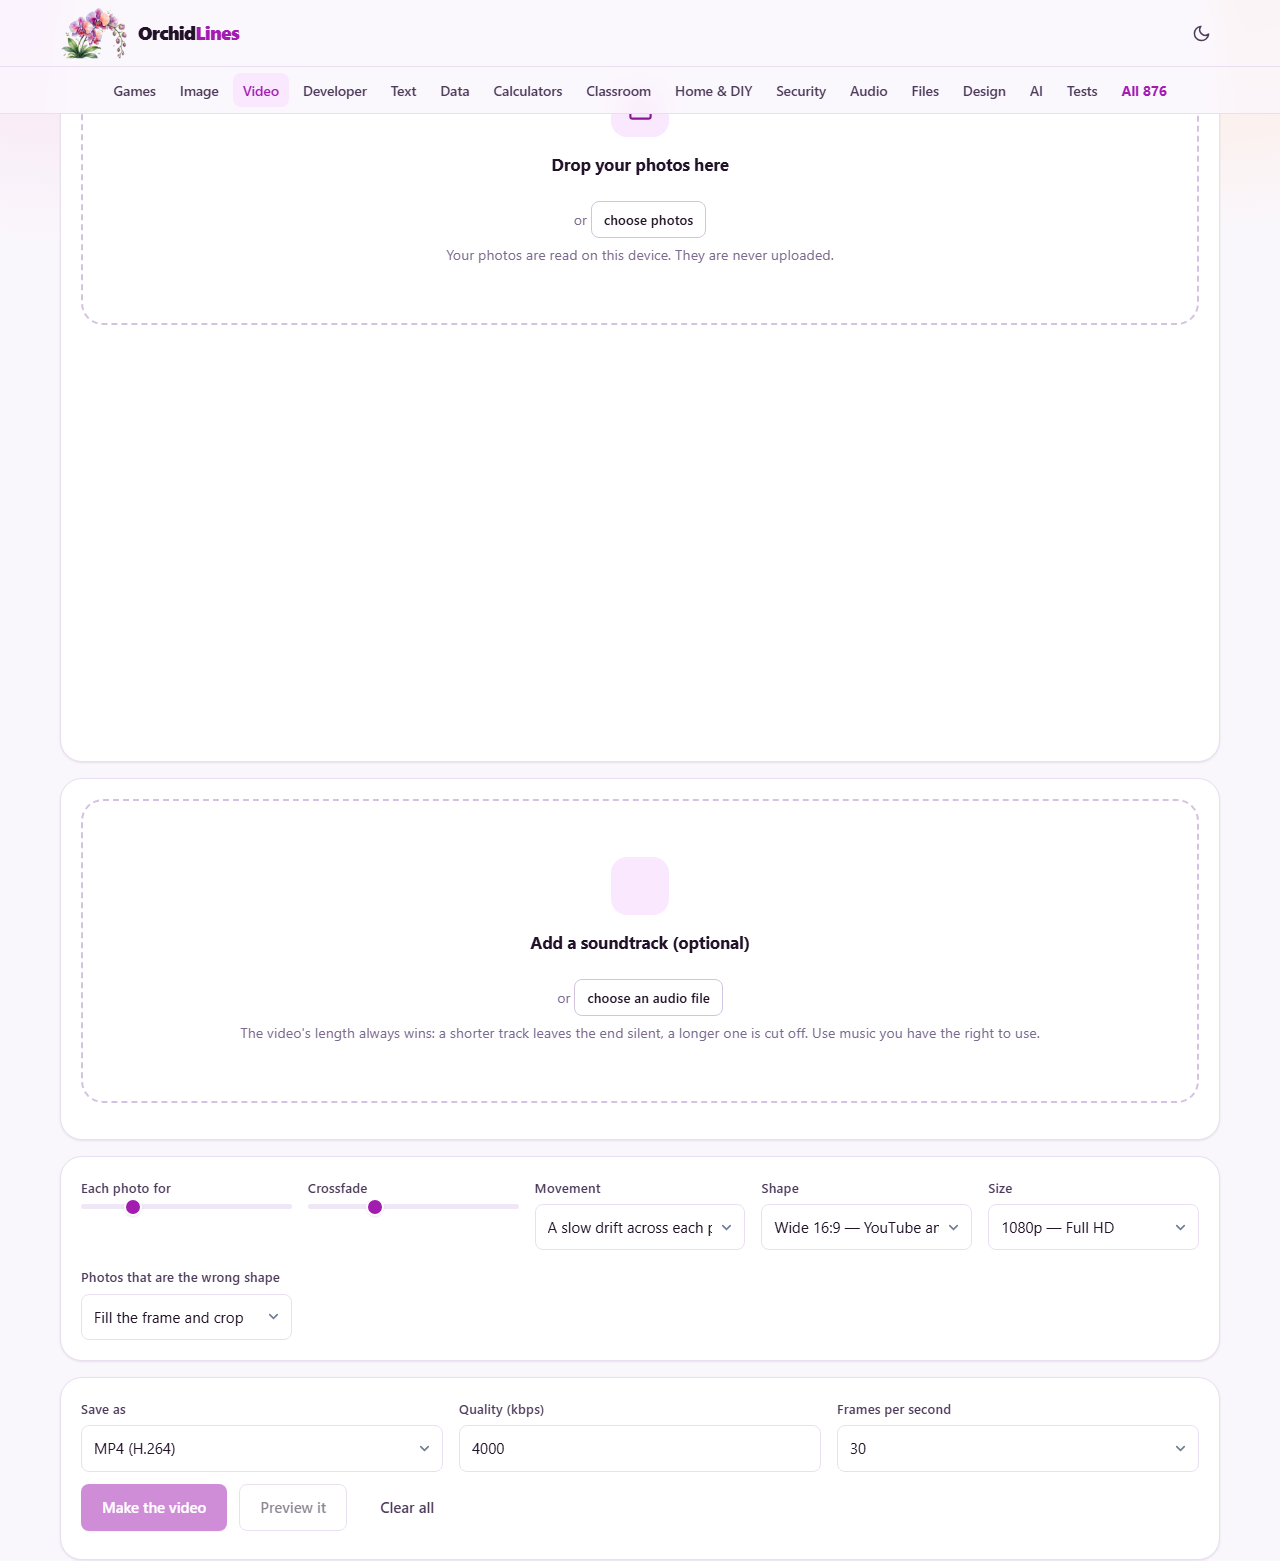
Drop your photos onto the box or press choose photos to open a file picker. Most image formats work, including HEIC files from iPhones. The photos appear in a list in the order they were dropped.
If anything landed in the wrong place, use the arrow buttons on each row to move it up or down. The order in the list is the order they will play. Renaming your files to start with 01, 02, 03 before you drop them saves a lot of rearranging here.
Each row shows a small thumbnail, the filename and a place to type a custom duration for that single photo. Leave it empty and the photo follows the global slider. Type a number and that photo holds for exactly that many seconds, regardless of what the slider says.
Setting the pace with the timing controls
The slider labelled Each photo for runs from 1 to 10 seconds and defaults to 3. Three seconds feels brisk when you are choosing the setting, but on screen it is a comfortable pace. Five seconds starts to drag. One second is only useful for a rapid montage where the viewer is not expected to read anything.
Below that, Crossfade controls how photos blend into each other. The slider runs from 0 to 2000 milliseconds and defaults to 600. At zero the cut is hard - one frame the photo is there, the next it is gone. At 600 milliseconds there is a gentle overlap where one photo fades out while the next fades in. Higher values produce a dreamier look but eat into the display time.
The total length of the video is worked out and shown before you press anything. It is roughly the number of photos times the seconds each, adjusted for the crossfade overlap. Check this number before exporting a long slideshow, because the export takes about as long as the video lasts.
Motion, shape and resolution
The Movement dropdown has three options. A slow drift across each photo applies a gentle pan - also known as the Ken Burns effect - that makes still images feel alive. A slow zoom in pushes gradually into the centre of each photo. Still keeps everything frozen, which suits diagrams or text-heavy slides.
Shape picks the aspect ratio. Wide 16:9 is the standard for YouTube and television. Tall 9:16 fits Reels, Shorts and TikTok. Square 1:1 suits older feed posts. Portrait 4:5 is for Instagram portrait posts. Classic 4:3 matches older screens. Cinematic 21:9 gives a wide film bar look.
Size sets the output resolution. The options run from 480p up to 4K, with 1080p selected by default. Higher resolutions need more time and more from your computer. A 4K export of a thirty-photo slideshow can take several minutes. Preview at 1080p first, then re-export at 4K only when you are happy with everything else.
Handling photos that do not match the frame
When a photo's shape does not match the chosen aspect ratio, the dropdown labelled Photos that are the wrong shape decides what happens. Fill the frame and crop scales the photo up so it fills the entire frame, then cuts off the edges. Fit them in on a blurred copy shows the full photo at its real shape, with a soft blurred version of itself filling the background. Fit them in on a plain colour does the same but uses a solid colour behind the photo instead.
The Background colour picker sets that plain colour. The default is black, which works well for most photo sets. A white background suits product shots on a clean studio look.
Each photo also has a Crop button on its row. Press it to zoom into a part of the photo and choose what stays in frame. The crop works alongside the drift motion, so you can start from a cropped view and still have the slow pan across it.
Adding a soundtrack
A second drop zone accepts an audio file. Drop in a music track or press choose an audio file. The video's length always controls the result. If the music track is shorter than the slideshow, the end plays in silence. If the track is longer, it is cut off when the video ends.
The audio is decoded and mixed directly in your browser. It is never sent anywhere. This also means that the responsibility for music rights is yours. Platforms check uploaded audio automatically and may mute or claim revenue on a video that uses a copyrighted track. Use music you own, or something from the licensed library on the platform you are uploading to.
If you do not want any sound at all, simply skip this step. The exported video will be silent.
Export settings and the download
The Save as dropdown picks the container format. The Quality field sets the video bitrate in kilobits per second, defaulting to 4000. Higher values mean a larger file but sharper output. For social media uploads, 4000 is generous. For archival or presentation work, push it to 8000 or higher.
Frames per second offers 24, 30 and 60, with 30 as the default. The drift and crossfade animations look smoother at higher frame rates but the file grows. Thirty is a safe middle ground.
Press Preview it to watch the slideshow on screen without recording. This plays through the whole thing and lets you check the pace, the crop and the transitions before committing to the export. When you are satisfied, press Make the video. A progress bar shows how far along the recording is. The export runs in real time, so a two-minute slideshow takes two minutes to finish. Keep the tab open and in front while it runs.
Worked example: fifteen travel photos
You have fifteen photos from a weekend trip and want to send them as a one-minute video. Drop all fifteen onto the page. They appear in the list.
Set Each photo for to 4 seconds. Fifteen photos at four seconds each is sixty seconds before crossfades. Leave Crossfade at 600 milliseconds. Set Movement to A slow drift across each photo. Set Shape to Wide 16:9 and Size to 1080p.
One photo is a tall portrait shot of a building. Press Crop on its row. Zoom in slightly and drag the photo so the building's entrance is centred. Close the crop dialog. Set Photos that are the wrong shape to Fill the frame and crop so the rest of the portrait shots fill naturally.
Drop in an audio file of a sixty-second guitar loop. The audio row appears showing the filename and length. Press Preview it. Watch the slideshow play through. The pace feels right and the drift adds life to each shot.
Press Make the video. The progress bar fills over about sixty seconds. When it finishes, a download link appears. The file is an MP4, roughly 30 megabytes at 4000 kbps. Send it to the group chat.
Mistakes that waste your time
Exporting at 4K before previewing at 1080p is the biggest one. A 4K export of a long slideshow can take ten minutes. If the timing or order is wrong you have to redo it all. Always preview first.
Leaving five seconds per photo on a thirty-photo slideshow produces a two-and-a-half minute video that feels slow. Cut to three seconds and see if the pace improves. Most viewers lose interest after ninety seconds.
Forgetting that the export runs in real time and switching to another tab is a common trap. Browsers throttle background tabs, which can cause the recording to stutter. Keep the tab visible and active for the entire export.
Privacy and local processing
Your photos, your audio track and the finished video never leave your computer. The tool draws each photo onto a canvas, records the canvas output as a video stream, mixes in the audio locally, and hands you the result as a file download. No server is involved at any point.
This means there is no upload wait, no file size cap, and no risk of your personal photos sitting on somebody else's server. You can check this yourself by loading the page, disconnecting from the internet, and running the whole process. It works exactly the same.