
How to combine several video clips into one continuous file
This guide covers every part of joining video clips together, from loading and ordering them to setting crossfades, handling clips of different sizes, and saving the result. You will see a worked example and learn how to avoid the problems that come up when clips do not match each other.
What the Video Joiner is for
The Video Joiner takes two or more video clips and puts them end to end in a single file. What comes out is one continuous video, not a playlist. There is no gap between the parts unless you add one on purpose.
This comes up in many situations. A wedding video was recorded in five separate takes and needs to be one file for the photographer. A teacher has three short screen recordings that need to play as one lesson. A content creator shot an intro, a middle and an outro separately and now needs to stitch them together before sharing.
- Putting parts of a presentation into one recording.
- Combining clips from several phones taken at the same event.
- Adding an intro bumper to the front of an existing video.
- Joining a set of short takes into one smooth sequence.
- Placing a title card before a finished clip.
Adding clips and setting the order
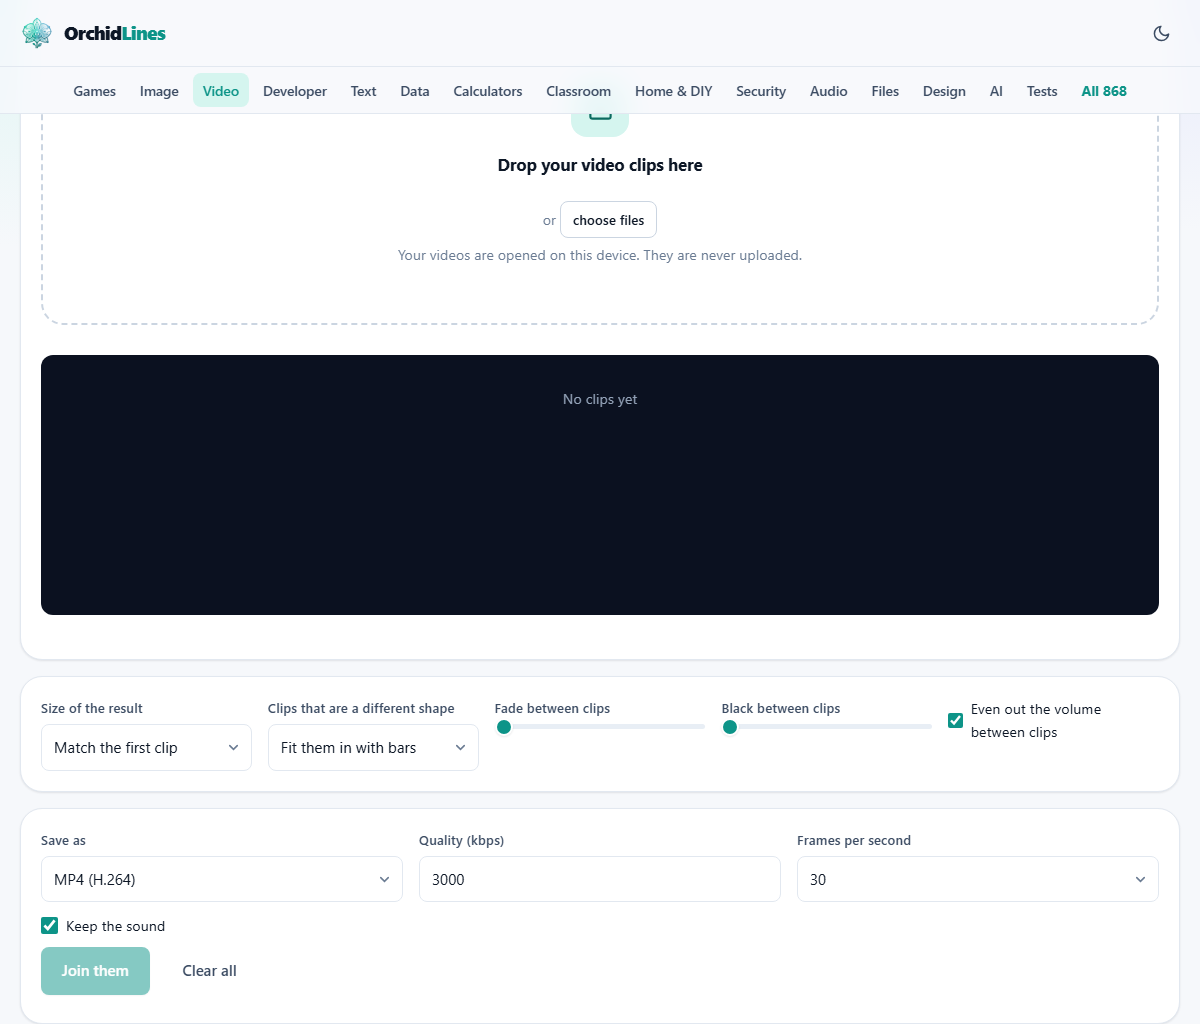
Drag your video files onto the drop area, or press choose files. You can drop them all at once or add them in batches. Each file appears in a list below the drop zone.
The order in the list is the order they will play. If a clip landed in the wrong spot, use the arrow buttons on its row to move it up or down. A remove button drops a single clip. The Clear all button empties the whole list so you can start over.
The preview area shows whichever clip you select, so you can check that you have the right files before spending time on the export.
Choosing the size of the finished video
The dropdown labelled Size of the result sets how big the output frame will be. Match the first clip uses whatever the first clip in the list measures. Match the largest clip picks the widest and tallest dimensions from all your clips. The fixed sizes, 1920 by 1080 and 1280 by 720, give a standard result no matter what you feed in.
When the first clip sets the size, every later clip is drawn into that frame. If the second clip is larger, the extra area is cropped or scaled down. If it is smaller, the extra space is filled. This is why the order of your clips matters even beyond the story they tell.
Dealing with clips that are different shapes
Clips do not always match. A phone video is tall and narrow. A webcam recording is wide. A screen capture might be square. The Clips that are a different shape dropdown handles this.
Fit them in with bars keeps the whole picture and adds black bars on the sides or top and bottom. This is letterboxing, and it is the safest choice because nothing is hidden. Fill the frame and crop zooms in until the frame is full, cutting away the edges. This looks cleaner but you may lose important parts of the picture. Stretch them - it will look wrong does exactly what it says. It pulls the picture to fit, and faces and text will look distorted.
For most jobs, bars are the right answer. Use crop only when you are sure the edges do not matter.
Fades and gaps between the clips
Two sliders shape what happens at each join. Fade between clips adds a crossfade where one clip fades down while the next fades up. The slider runs from zero to two thousand milliseconds. Half a second, which is 500 milliseconds, is enough to soften a hard cut between two shots that were filmed at different times or angles.
Black between clips inserts a stretch of solid black between one clip and the next. This also runs from zero to two thousand milliseconds. A short pause of a few hundred milliseconds gives the viewer a breath between parts. A full two seconds works as a scene break.
The two controls do not stack on each other. You get either a fade or a gap, depending on which slider is above zero. If both are above zero, the fade takes effect. Set the gap to zero before adjusting the fade if you want a clean overlap.
Output settings: format, quality and frame rate
The Save as dropdown lists the formats your browser can write. MP4 works on nearly everything. WebM is smaller but not every device plays it. For anything you are sending to someone else, MP4 is the safer pick.
Quality (kbps) controls how much data the encoder spends per second. The default of 3000 gives good results for most footage. Lower it to 1500 if the clips are simple - screen recordings with little motion, for example. Raise it to 5000 or higher for fast moving sports or nature footage.
Frames per second offers 24, 30 and 60. If your clips were all shot at 30, keep it there. Mixing clips at different frame rates is one of the harder problems. The output uses whichever rate you set, and clips that were shot at a different rate get frames added or dropped to match.
A checkbox labelled Keep the sound mixes the audio from all clips into the result. Another checkbox, Even out the volume between clips, adjusts the loudness so a quiet clip does not disappear next to a loud one.
A worked example: three clips from a birthday party
You have three clips. The first is a 1080p landscape shot from a camera, twenty seconds long. The second is a 4K vertical clip from a phone, eight seconds long. The third is a 720p landscape clip from another phone, fifteen seconds long.
Drop all three in. Move them into the right order. Set Size of the result to Match the first clip, which is 1920 by 1080. Set Clips that are a different shape to Fit them in with bars so the tall phone clip appears centred with black bars on the sides.
Set Fade between clips to 500 milliseconds. Leave the format on MP4 at 3000 kbps and 30 frames a second. Keep the sound ticked. Press Join them.
The progress bar runs for about forty three seconds, which is the total length of the finished video. The result is a single MP4 that plays all three parts in order with a gentle half second fade between each one.
Problems that come up and how to handle them
- The export takes a long time. It runs at the speed of the finished video. A ten minute result takes ten minutes. Test with short clips first to get the settings right.
- One clip looks stretched. The shape setting was left on Stretch. Change it to Fit them in with bars.
- The join between two clips looks jerky. The clips had different frame rates. There is no perfect fix, but putting the odd one last makes the change less noticeable.
- The audio jumps in volume at the join. Tick Even out the volume between clips. It brings loud and quiet clips closer together.
- The browser tab slowed down during export. Browsers throttle background tabs. Keep the tab in the front while it runs.
When a different approach makes more sense
The Video Joiner places clips end to end. It does not overlay them, split the screen, or mix them side by side. For picture in picture or split screen layouts you need a full video editor.
If you only need to cut a single clip shorter rather than join several together, the video trimmer on this site is a simpler choice. If you need to add music or remove the sound, the mute and replace tool handles that.
All the work happens on your own machine
Your clips are never sent to a server. The browser opens each file, plays them onto a canvas, and records the result as a new video. You can disconnect from the internet after the page loads and nothing changes. Every frame is drawn and recorded right there on your own machine.
There is no watermark, no sign up, and no limit on the number of clips you can join. Once you close the tab, the clips and the joined file are gone from memory.