
Three ways to get pictures out of a video, and when each is right
A video is a few thousand pictures shown quickly, and there are three useful ways to get some of them back out: as an animated GIF, as still files you can keep, or as a contact sheet that shows the whole clip on one page. All three read the frames the same way, on your own device, and differ only in what they do with them.
Which of the three you want
Whatever you want out of the video, you start the same way. Drag your file onto the drop area, or press choose a file. MP4, WebM, MOV, M4V and MKV all work, along with anything else your browser can play. There is no size limit from the page itself, though a very long recording takes longer if you ask for many frames. If a result comes out blank, your browser could not decode the file. Convert it to MP4 with another tool first. Some codecs, especially older ones, are not supported in every browser.
The video then opens in a player you can scrub through like any other. A line underneath shows the file name, the file weight, the length, and the picture size in pixels. Read that line before you set anything. The picture size tells you the largest width worth asking for, and the length tells you how far apart evenly spaced frames will land.
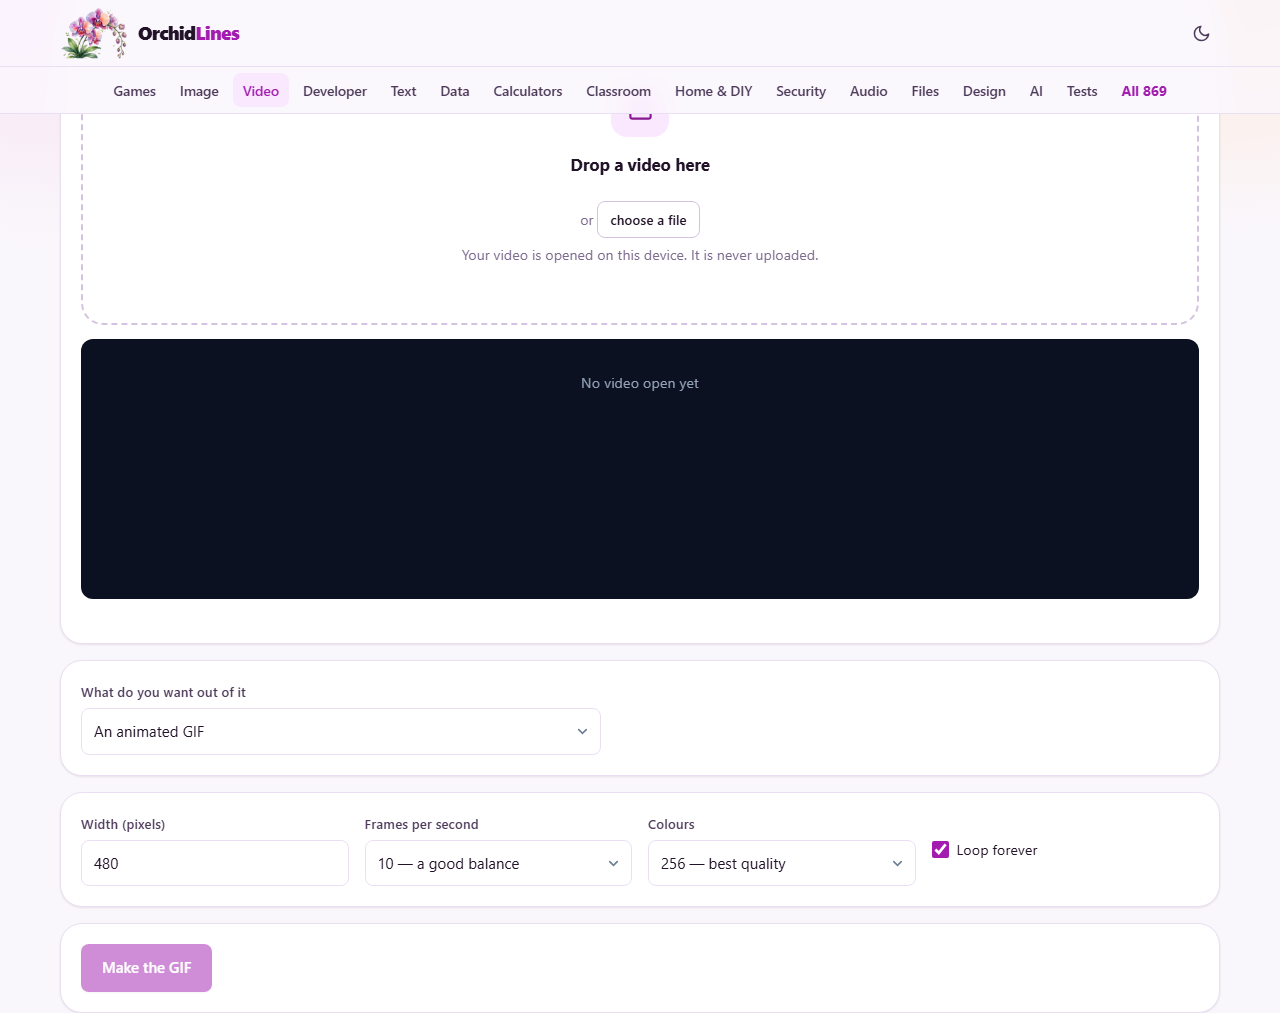
Next comes the picker labelled What do you want out of it. It offers an animated GIF, still pictures, or a contact sheet. The settings below change to match, and the main button renames itself: Make the GIF, Get the pictures or Build the sheet.
All three read the video the same way. Your browser opens the file from your own disk. A hidden video element seeks to each moment, draws that frame onto a canvas, and moves on to the next. No bytes leave your machine. The seek is fast because the browser jumps to the nearest keyframe and then decodes forward a few frames, rather than playing the whole video. That is why a hundred frames from an hour-long recording can finish in seconds. Because everything runs locally, no server sets a file size limit. The only limit is your browser's memory, and a two-hour 4K file is fine.
You can check that promise yourself. Load the page, disconnect from the internet, then open a video and make something. It all still works, which would not be possible if any part of the process depended on a remote server. There is no watermark on any of the three outputs, no sign-up, no account, and no limit on how many you make.
Pick an animated GIF when the point is motion that has to play on its own. A GIF plays inside chat apps, forums, emails and documents with no video player and no click. That is its one real advantage, and it is enough to keep a decades-old format alive. Good jobs for it:
— A reaction clip for a group chat.
— A short product demo that plays inside an email where video will not.
— A looping banner for a forum post or signature.
— A quick screen recording to show a bug to a developer.
— A funny moment from a home video that friends can share without needing a video player.
A GIF is not a video replacement. It has no sound, it holds at most 256 colours per frame, and it barely compresses. A video codec stores only what changed between two frames: a car crossing a still background needs the car's new position, not the whole sky again. GIF cannot do that, so every frame is stored almost whole. Three seconds that take 200 kilobytes as an MP4 can take two megabytes as a GIF. Five seconds that take 400 kilobytes as an MP4 can easily take ten megabytes. The penalty grows fast, so keep GIFs to two to five seconds. Ten seconds at ten frames a second is a hundred separate pictures in one file. Past about 400 frames the page warns you, and some platforms will reject the file or crush it at their end.
For anything longer than about ten seconds, a short video file beats a GIF in every way. It is smaller, sharper, holds more colours and can carry sound. Most social platforms and chat apps now play short videos inline, the same way they play GIFs. If you already have a GIF and need it as a video, the GIF to Video tool on this site does the reverse. It plays the GIF onto a canvas and records it as an MP4 or WebM, typically a tenth of the size.
Pick still pictures when you want image files you can use anywhere a photo would go. The video itself is not changed. You get PNG, JPG or WebP files. Common reasons:
— A teacher needs a clean shot of a diagram from a lecture recording.
— A coach wants ten frames from a slow-motion clip to study a player's form.
— A seller needs a listing photo from a product demo.
— A blogger wants a thumbnail pulled straight from a travel video, with no play button and no controls in the way.
— You need a set of frames for a step-by-step tutorial where the steps are shown on screen.
— You want to save a single sharp moment from a fast-moving scene.
You can take just the frame showing now, a set number spread evenly, or one every few seconds, from 0.05 seconds up to 600 seconds apart. A cap of 500 pictures keeps the browser from running out of memory; ask for more and the page tells you to narrow the range first. One frame downloads on its own. More than one arrives as a ZIP, and both the ZIP and the pictures inside it are named after your video. Open cooking.mp4 and ask for ten PNGs, and you get cooking-frames.zip holding cooking-01.png through cooking-10.png: the video's name, a dash, then a number padded with zeros to the width of the largest one.
Pick a contact sheet when you want the whole clip in one picture. It is a grid of frames with the time printed on each, so you can see the shape of a recording and then jump straight to the moment you need. It suits cataloguing: a thumbnail grid beside each file tells you what is inside without opening it. Security footage, dashcam recordings, lecture captures and event videos all benefit. Editors use one to spot where the outdoor shots are and where the interview starts. Print it, pin it up, mark it with a pen.
Even spacing suits uncut footage. Twenty frames through a one-take interview all show the same person, and the times let you find any section. Twenty frames through a music video cut every three seconds show twenty unrelated shots and tell you nothing. Heavily edited work needs a denser grid: six columns by ten rows is sixty frames, about one every four seconds on a four-minute clip. For anything longer and heavily edited, a professional tool that detects scene changes will do a better job than any fixed grid.
Sometimes none of the three is what you need. This page saves pictures, not video. If you want a shorter clip rather than stills, use a video trimmer such as the Video Studio on this site. If you want to stitch frames into a time-lapse video rather than keep them as separate photos, you need a video editor, not a frame grabber. For screen recording, your operating system's built-in tool is usually better. It captures the whole screen at full quality without going through a video file first.
Choosing the part to use
A panel called Choose the part to use appears once the video loads. The GIF and the still pictures both work inside the range you set here, so it is worth learning properly. There are four ways to set it, and they all move the same two points.
— Drag the two handles on the range bar.
— Play the video and press Start here and End here at the right moments.
— Type exact times into the Start and End boxes and press Enter. Both accept plain seconds or a clock format like 1:02.5.
— Press Play the selection to watch just the chosen part and check the region is right.
The labels below the bar show the start time, the end time, and how long the selected part is. A checkbox called Keep looping the selection plays the chosen section over and over, so you can watch it several times before you make anything. Both readouts and the loop help most before a long job, because a wrong range costs you the whole run.
The range matters most when you ask for a set number of frames spread evenly. Ten frames across a thirty second selection are far more useful than ten across an hour, because each one sits closer to the next. It is also the first thing to check when a ZIP holds fifty pictures and you asked for a hundred. The handles may have cut the range shorter than you thought, so fewer frames fit inside it.
The contact sheet is the exception. It always spans the whole clip, because its job is to summarise the file, so the panel is hidden when you choose the sheet rather than shown and quietly ignored. The sheet has its own control instead: Skip the very start and end, on by default, which starts sampling two per cent in from each end and stops two per cent early. That dodges the black frames that sit at the start and end of most video files. It cannot catch fades in the middle, and a denser grid is the practical fix for those.
Making an animated GIF
Pick "An animated GIF" in the menu marked What do you want out of it. The page then writes the section you choose as a single animated GIF file. A GIF plays on its own inside chat apps, forums, emails and documents, with no video player and no click. That is its one advantage over video, and it is enough to keep a format from the 1980s alive.
A GIF is not a video replacement. It has no sound, it holds at most 256 colours per frame, and it barely compresses. A five second clip that takes 400 kilobytes as an MP4 can easily take ten megabytes as a GIF. But when you need a short loop that plays everywhere without a click, nothing else does the job as reliably. Good jobs for a GIF:
— A reaction clip for a group chat.
— A short product demo that plays inside an email, where a video will not.
— A looping banner for a forum post or a signature.
— A quick screen recording that shows a developer the bug.
— A funny moment from a home video that friends can share without needing a video player.
Set the section first. Once the video loads, a panel called Choose the part to use appears. It holds a track with two handles. Drag them to mark the start and the end of the piece you want. You can also play the video and press Start here and End here at the right moments. Or type exact times into the Start and End boxes and press Enter. Those boxes take plain seconds, such as 12.5, or a clock format such as 1:02.5 or 1:02:03. A bad entry is put back and the page tells you the formats it reads.
The labels under the track show the start time, the end time, and how long the selected part is. Press Play the selection to watch just that stretch before you commit. A checkbox called Keep looping the selection is ticked by default, so the chosen section plays over and over and you can watch it a few times. This same panel serves the still pictures as well. It is hidden only when you pick the contact sheet, which sets its own span across the whole clip.
Keep the section short. Two to five seconds is the sweet spot. The longer the clip, the more frames the GIF needs, and the bigger the file gets. Ten seconds at ten frames a second is a hundred separate pictures stored inside one file.
Three settings sit below the trim panel. Each one moves the file size a long way:
— Width (pixels) sets how wide the GIF will be. The box starts at 480, or at the video's own width if that is smaller, and it accepts 32 to 1600. Going from 480 to 320 removes over half the pixels in every frame and roughly halves the file. Going to 640 roughly doubles it. For most chat apps, 320 to 480 is plenty. The height follows the video's shape, so you set one number only. A number larger than the video's own width has no effect, because the tool never enlarges a frame.
— Frames per second controls how smooth the motion looks. The choices are 5, 10, 15 and 20. At 5, one second holds five pictures. At 20 it holds twenty, and the file is four times larger. Ten is the default, because GIFs have always looked slightly choppy and people expect that. Above 15 rarely feels smoother, and the size jump is steep. One small quirk: a GIF stores the gap between frames in hundredths of a second, so 15 frames a second is written as seven hundredths each and plays a shade slower than 15. The other three choices divide exactly.
— Colours sets the colour depth of each frame. GIF holds at most 256 colours. The choices are 64, 128 and 256. Screen recordings, cartoons and text look fine at 64. Photographs and real faces need the full 256, or you will see banding: visible steps between shades where the change should be smooth.
Below those sits a checkbox marked Loop forever, ticked by default, because that is what most people expect from a GIF. Untick it and the GIF plays once, then freezes on the last frame. That suits an animation with a clear ending, such as a progress bar filling or a text reveal that should stop once the message is complete.
Beside the button a line keeps a running count: the number of frames, the pixel size, and a very rough guess at the file size. Treat that last figure as a guess only; the page labels it as one, because how well a GIF squeezes depends on how flat the picture is. If the count passes about 400 frames, a warning appears under the settings. At that point the file becomes large and slow to build, and some platforms will reject it or crush it at their end. Past about 1,500 frames the page refuses outright and asks you to shorten the clip or lower the frame rate.
Press Make the GIF. A progress bar reads the frames first, then builds the GIF. This does not run in real time. The page reads each frame straight from the video data, so it finishes in seconds rather than minutes. The result appears in a panel headed "Your GIF" with a preview, the file name and the file size, and a Download button. The name comes from your source video. If the file is too big, you do not start over: change the width, the frame rate or the colours and press the button again. Each attempt is quick.
A worked example. You have a thirty second video of a friend reacting to a surprise, and the best three seconds start at about twelve seconds in. Drag the start handle to 0:12 and the end handle to 0:15, or type those times into the Start and End boxes. Leave the width at 480, the frame rate at 10, and the colours at 256, because the clip has real faces in it. Leave Loop forever ticked. The tool reads thirty frames, one for each tenth of a second. The file comes out at about 1.8 megabytes, which is fine for a group chat. Dropping the width to 320 cuts it to roughly 900 kilobytes. Dropping the frame rate to 5 as well halves it again, at the cost of choppier motion.
People are often surprised by the size. Three seconds might be 200 kilobytes as an MP4 and two megabytes as a GIF. The reason sits in the format, not in the tool. A video codec compares two frames and stores only what changed between them. A car crossing a still background needs the car's new position, not the whole sky again. GIF cannot do that. Every frame is a separate picture, stored almost whole. On top of that, GIF picks a small set of colours and rounds everything else to the nearest match. So you have three levers: width, frame rate and clip length. Halving any one of them roughly halves the file.
Mistakes people make:
— Leaving the width at 480 for a clip that will only ever be shown at 200 pixels wide. Match the width to where the GIF will actually appear. Smaller means a smaller file.
— Setting 20 frames a second for a talking head. The difference between 10 and 20 is barely visible in slow motion, but the file is twice as big.
— Expecting sound. GIF has no way to carry audio. That is true everywhere, not just here. If you need a short clip with sound, save it as a video.
— Trying to make a GIF of an entire five minute video. The file will be enormous and most platforms will reject it. Keep clips under about ten seconds.
— Using 64 colours on a clip with skin tones. Faces need 256 to avoid ugly banding across cheeks and foreheads.
Sometimes a GIF is the wrong answer. For anything longer than about ten seconds, a short video file is better in every way: smaller, sharper, more colours, and it can carry sound. Most social platforms and chat apps now play short videos inline, the same way they play GIFs. If the file is still too large after turning all three levers down, the honest answer is that the clip is too long for the format. Shorten it, or save a video instead. If you already have a GIF and need it as a video, the GIF to Video tool on this site does the reverse. It plays the GIF onto a canvas and records it as an MP4 or WebM, which is typically a tenth of the size.
If the video will not open at all, the page tells you that this browser cannot play that file and suggests an MP4 or WebM. That is a decoding limit in the browser, not a fault in your file. Older or unusual codecs are not supported everywhere. Convert the file to MP4 with another tool first, then come back.
Your video is never sent anywhere. The browser opens it from your disk, reads each frame, builds the GIF in memory, and hands it back as a download. You can disconnect from the internet after the page has loaded and the GIF still builds. There is no watermark on the result, no sign-up, and no limit on how many GIFs you make.
Pulling out still pictures
Choose "Still pictures, one file or a ZIP" from the What do you want out of it menu. The page then saves moments from the video as image files. The video itself is never changed. You get PNG, JPG or WebP files that you can use anywhere a photo would go. There are plenty of reasons to want that:
— A teacher needs a clean shot of a diagram shown in a lecture recording.
— A sports coach wants ten frames from a slow-motion clip to study a player's form.
— A seller needs a good shot from a demo video to use as a listing photo.
— A blogger wants a thumbnail pulled straight from a travel video.
— You want a thumbnail from a clip without the play button and the controls in the way.
— You want a set of frames for a step-by-step tutorial where the steps are shown on screen.
— You want to save a single sharp moment from a fast-moving scene.
— You want to see what happens across a long recording, frame by frame.
Drag your file onto the drop area, or press choose a file. MP4, WebM, MOV, M4V and MKV all work, along with anything else your browser can play. There is no size limit from the tool itself, though a very long recording takes more time if you ask for many frames. Once the file opens, the video appears in a player. A line under it shows the file name, the file weight, the length and the picture size in pixels. It is the same player you get in any browser tab, so you can play, pause and scrub to any point.
The dropdown labelled Which frames gives you three ways to say which moments you want.
— Just the one showing now captures whatever the player is paused on. Play the video, pause at the right moment, press the button. That is the simplest way to get a single screenshot. This one ignores the trim range and uses the position on screen.
— A set number, evenly spread is the setting the page starts on. It takes a count from the How many box and spaces that many frames across the selected part. The first frame sits at the start of the range and the last sits at the end, so ten frames across a sixty-second video land about every six or seven seconds. The range runs from 1 up to 500. Ask for exactly 1 and you get the middle of the selection.
— One every few seconds flips the question round. Instead of how many, you say how often. Type a number into Every (seconds). The smallest step is 0.05 seconds, or every fiftieth of a second. The largest is 600 seconds, or every ten minutes. It counts from the start of the range and steps forward from there.
Beside the button, a small note tells you how many pictures the current settings will produce. It updates as you type, so you can see the count before you commit to it.
The trim panel, headed Choose the part to use, narrows the job to one section. It applies to the still pictures and to the GIF. It is hidden for the contact sheet, which picks its own span across the whole clip. Drag the two handles on the track, or play the video and press Start here and End here at the right moments. Press Play the selection to watch just the chosen part and check that the region is right. A checkbox called Keep looping the selection is ticked, so the section repeats and you can watch it several times before you grab anything. The labels below the track show the start time, how long the selection is, and the end time. You can also type exact times into the Start and End boxes and press Enter. They take plain seconds, such as 12.5, or a clock format like 1:02.5, or hours as well: 1:02:03.5. A time the page cannot read is rejected and the old value comes back.
The range matters most with the even spread. Ten frames across a thirty-second selection are far more useful than ten across an hour, because each one sits closer to the next. The 500 picture cap exists to keep the browser from running out of memory. So if you want a dense sample, narrow the range first, then ask for it inside that range.
Width (pixels) sets how wide each saved picture is. The height follows the video's shape, so you set one number only. The box shows 1280 before a video is open. Once you open one, the page fills the box with that video's own width, so you start at full size. Asking for more than the video has does nothing. The tool turns your number into a scale and never lets that scale rise above 1, so the width is capped at the source. If the video is 1920 wide and you type 4000, you still get a 1920-wide picture: no padding, no stretching, and no increase in file size. The box only changes anything when the number is smaller than the video's own width, so treat it as a way to make pictures smaller.
Save as offers three formats:
— PNG is the sharpest and does not blur, so it suits text and hard edges.
— JPG is much smaller and looks the same on ordinary footage like faces or scenery.
— WebP is the smallest of the three and works in all modern browsers, though some older image viewers cannot open it.
The Quality slider runs from 50 to 100 and starts at 92. It only affects JPG and WebP. At 100 the file is as close to perfect as the format allows. Lower numbers shrink the file, but you may see soft spots or small blocks in areas of flat colour. Somewhere between 85 and 92 is a good middle ground.
Press Get the pictures. A progress bar fills as the tool works through the video. This part is fast, because the tool never plays the video in real time. It jumps straight to each moment, reads the picture, and moves on. The seek is quick because the browser jumps to the nearest keyframe and then decodes forward a few frames, rather than playing everything in between. A hundred frames from an hour-long recording can finish in seconds.
The results appear on the page with the count and the total size. One frame downloads as a single image file. More than one arrives as a ZIP, numbered in order. The names come from your video: open cooking.mp4, grab ten PNGs, and the ZIP is cooking-frames.zip holding cooking-01.png through cooking-10.png. Ask for a hundred and the numbers gain a digit, so they still sort correctly. A single grab is saved as cooking-frame.png. The page previews the first sixty results and then stops, so it does not slow down. It says so on screen, and every frame is still inside the ZIP.
A worked example. You have a three-minute cooking video and need ten frames for a recipe post. Open the file. Leave Which frames on the even spread and type 10 into How many. Leave the width at the video's own 1280. Leave Save as on PNG, because the blog needs sharp pictures of the text overlays. Press Get the pictures. The bar runs for about two seconds. A ZIP downloads with ten pictures in it, each 1280 wide and about twenty seconds apart. If one catches a blurry mid-stir shot, go back, pause on a better moment, switch to "Just the one showing now", and grab a replacement.
Some problems come up often enough to list:
— The frame is blurry. Video stores most frames as changes from the last full picture, so the player sometimes has to guess. Pause, step forward one frame with the arrow key, and try again.
— The file is huge. You saved a PNG from a high-resolution video. Switch to JPG and drop the quality to 85. The pictures will be a fraction of the size.
— Setting the width to 4000 changed nothing. The video was only 1920 wide, and the tool never scales a frame up. Your 4000 is capped at 1920, so you get exactly the picture you would have got by typing 1920. Only a number below the video's own width does anything.
— The ZIP only has fifty pictures, but you asked for a hundred. Check the trim handles. They may have cut the range shorter than you expected, so fewer frames fit inside it.
— The page says it is limited to 500. That cap keeps the browser from running out of memory. Narrow the range first, then ask for a dense sample inside that range.
— Nothing comes back, or the page says the frames could not be read. Your browser could not decode the video. Try converting the file to MP4 with another tool first. Some codecs, especially older ones, are not supported in every browser.
Sometimes another tool is the right one. This saves pictures, not video. If you need a shorter clip rather than still images, use a video trimmer — the Video Studio tool on this site does that. If you want an animated preview, switch this page to the GIF output instead. If you want to stitch frames into a time-lapse video rather than keep them as separate photos, you need a video editor, not a frame grabber. For screen recording, your operating system's built-in tool is usually better. It captures the whole screen at full quality without going through a video file first.
Your video is never sent to a server. No bytes leave your machine. Your browser opens the file from your disk, seeks to each moment, draws the frame onto a hidden canvas, and hands the result back as a download. You can disconnect from the internet after the page has loaded and the tool works exactly the same way, which would not be possible if any part of it depended on a remote server. There is no sign-up, no account, and no watermark on the pictures. The frames are yours, at whatever width you set and whatever quality the video allows.
Building a contact sheet
Pick "A contact sheet — every scene on one page" from the output menu. The page then builds one image holding a grid of frames taken at regular points through the video, each stamped with the time it came from. The idea comes from film and photography, where a contact sheet was a single print of every negative on a roll. It is the fastest way to see what is inside a clip without scrubbing a timeline.
The most common reason to make one is cataloguing. If you store hundreds of clips, a thumbnail grid beside each file tells you what is inside without opening it. Security footage, dashcam recordings, lecture captures and event videos all benefit. Editors use a sheet to spot the shape of a piece before they cut: one glance shows where the outdoor shots are, where the interview starts, and where the screen goes black. Print one out, pin it to the wall, and mark it up with a pen.
Once the video loads, a line under the player shows four things: the file name, the file weight, the length, and the picture size in pixels. Check that line before you set the grid. The length tells you how far apart the frames will land, and the picture size tells you the shape each thumbnail will take.
Every sheet setting and what it does
— Width of each frame sets the pixel width of every thumbnail. It runs from 120 to 800 and defaults to 400. A wider frame makes small details readable but produces a larger output image. A narrower frame keeps the file small and is fine for a rough overview. The height follows the video's own shape, so you set one number only.
— Columns sets how many frames sit across, from 1 to 10, default 4.
— Rows sets how many sit down, from 1 to 12, default 5. Those defaults give twenty frames, which covers most clips well. The grid is the frame count: columns times rows, so the most you can ask for is ten by twelve, or 120 frames.
— Gap between frames adds space between the thumbnails, in pixels. The slider runs from 0 to 24 and defaults to 6. Zero gives a tight grid with no breathing room. A wider gap makes each frame easier to pick out.
— Background sets the colour behind the grid. The default is a very dark grey, close to black. Light backgrounds suit printing. Dark backgrounds suit screens and look cleaner when the video itself has dark edges. One warning: the header line is always drawn in white, so on a pale background it will be hard to read. The timestamps are fine either way, because each one sits on its own dark plate.
— Filename and details along the top adds a header band 64 pixels tall. It carries the source filename, then the picture size, the length, the frame count and the file weight. On by default.
— Skip the very start and end trims a margin from both ends before spacing the frames out. On by default. It moves the first sample in by two per cent of the length and pulls the last one back by the same amount. That avoids the black frames that sit at the start and end of most video files.
— Timestamp on each frame prints the time in the bottom left corner of every thumbnail, on a dark plate so it stays readable over a bright shot. On by default. Turn it off for a cleaner look, but the sheet loses much of its usefulness without times. The stamp reads hours, minutes, seconds and milliseconds, like 00:38:20.451.
How the sheet chooses its frames
The sheet spans the whole clip. It works out its own list of times, one per cell, and samples the middle of each slice rather than its edge. Ask for twenty frames from a ten minute video and it takes one from the middle of each thirty second slice, not one on every boundary. That is why the trim panel is hidden when you pick the sheet: the range controls would be sitting there doing nothing.
Be aware that the separate contact sheet page worked the same way. If you want a sheet of one section, cut that section out first with the Video Splitter or the Video Studio, then drop the shorter file here. Skip the very start and end is the only span control on the sheet itself.
Building the sheet and saving it
Before you press anything, read the estimate beside the button. It tells you the frame count, the exact pixel size of the image you are about to make, and how far apart the frames will fall. It looks like "32 frames · sheet 1470 × 1742 px · one every 2:50.15". Change a setting and it updates at once, so you can size the output before you spend any time on it. One detail worth knowing: that spacing figure divides the full length by the frame count, so with the skip option on the real gaps come out slightly tighter.
Press Build the sheet. A progress bar fills as the tool seeks to each position, grabs the frame and draws it onto the grid. This is fast because it seeks rather than plays. A twenty frame sheet from a two hour file finishes in a few seconds on most machines.
When it is done the full grid appears on the page. Scroll through it and check the frames. If any are black or unhelpful, change the grid size or turn on the skip option and build again. Press Download the PNG to save it. The file is named after the source video with "-sheet" added, so holiday.mp4 gives holiday-sheet.png.
The output size follows simple arithmetic. The image is as wide as the columns times the frame width, plus one gap between each column and one at each edge. The height is the rows times the thumbnail height, plus the gaps, plus the header band. So the default four by five grid at 400 pixels wide, from a widescreen video, gives an image about 1630 by 1225. That is big enough to print on A4 at around 200 dots per inch, or to zoom into on a screen.
A worked example with a lecture recording
You have a ninety minute lecture recording and want to see what was on screen at each stage. Drop the file on the page. The details line shows it is 1:30:45 long at 1920 by 1080 pixels. Leave Columns at 4 and set Rows to 8. That gives 32 frames, one roughly every two minutes and fifty seconds. Set Width of each frame to 360 so the output is not enormous. Leave Timestamp on each frame ticked. Leave Skip the very start and end ticked too, because the recording opens and closes on a black screen.
Press Build the sheet. The bar fills in about five seconds. The grid shows the title slide at the top left, diagrams through the middle rows, and the closing slide near the bottom right. Each frame carries a time like 00:05:40.312. Press Download the PNG. The image is 1470 by 1742 pixels. Drop it into the same folder as the video. Now you can see at a glance where the diagram about database joins appeared, and the timestamp tells you to skip to 00:38:20.
Why even spacing does not suit every video
Twenty frames spread evenly through a one take interview look fine. Every frame shows the same person talking, and the times let you find any section. Twenty frames spread evenly through a music video cut every three seconds show twenty unrelated shots. None of them tell you the story.
The difference is how the video was edited. Uncut footage suits even spacing, because every frame belongs to the same scene. Heavily edited footage needs a much denser grid to have any chance of catching the important moments. Set a higher row count for edited work. Six columns and ten rows gives sixty frames, which covers a four minute video at about one frame every four seconds. That is dense enough to catch most cuts. For anything longer and heavily edited, a professional tool that detects scene changes will do a better job than any fixed grid.
Common problems and how to fix them
— Black frames in the grid are the most frequent complaint. They come from fades, dissolves and title cards. Skip the very start and end handles the two black frames most files carry, but it cannot catch a fade in the middle. A denser grid is the practical fix.
— A blurry frame usually means the seek landed on a moment of fast motion. The tool cannot pick a sharp frame from a nearby position for you; it takes whatever sits at the time it was given. Build a second sheet with one extra row. That shifts every seek point slightly, and it is often enough to dodge the blur.
— The image is too large to email. Lower Width of each frame to 200 or 240. That roughly halves the pixel count and the file size drops sharply. Cutting a row or two works as well.
— The sheet is blank after you press build. This means the browser could not decode the video, and you will see a message saying the frames could not be read. Convert the file to MP4 with another tool first, then try again. Some codecs, especially older ones, are not supported in every browser.
Privacy and how the sheet works under the hood
Your browser opens the video from your local drive. No bytes leave your machine. The page uses a hidden video element to seek to each position, draws that frame onto a canvas, stamps the time on it, and repeats for the next position. When every frame is drawn, the canvas is exported as a PNG.
The seek is fast because the browser jumps to the nearest keyframe and then decodes forward a few frames, rather than playing the whole video. That is why a two hour file can give you a sheet in seconds.
Because everything runs locally, no server imposes a file size limit. The only limit is your browser's memory. A two hour 4K file is fine. You can check the privacy claim yourself: disconnect from the internet after the page has loaded, then build a sheet. It still works exactly the same way, which would not be possible if any part of the process depended on a remote server. Nothing is added to the picture either. There is no watermark, no sign-up and no limit on how many sheets you build.
Getting a good picture out
All three outputs are still frames underneath. The GIF is a stack of them. The still pictures are saved one by one. The contact sheet tiles them into a grid. So the same craft applies whichever one you pick, and most of it comes down to three things: reading the video's own numbers, choosing a sensible width, and picking moments worth capturing.
Start with the details line under the player. Once a file opens, the page prints four things there: file (the name), size (how heavy the file is on disk), length, and picture (the frame size in pixels, such as 1920 × 1080). That last number is the one you plan every width against. Beside the "Make it" button sits a second line that updates as you change settings. For a GIF it shows the frame count, the output size in pixels, and a very rough size guess. For still pictures it shows how many you will get. For a contact sheet it shows the frame count, the finished image size in pixels, and how far apart the frames will fall. Read it before you press anything.
Width moves file size more than any other setting. Each output has its own box and its own default, because each one is used differently:
— The GIF's "Width (pixels)" box defaults to 480. When a video opens, the page sets it to 480 or the video's own width, whichever is smaller. Going from 480 to 320 removes over half the pixels in every frame, which roughly halves the file. Going to 640 roughly doubles it. For most chat apps, 320 to 480 is plenty.
— The stills "Width (pixels)" box defaults to 1280. You set the width only. The height follows the video's shape.
— The sheet's "Width of each frame" is the width of one thumbnail, from 120 to 800, default 400. A four by five grid at 400 wide gives an image about 1600 pixels across, big enough to print at A4. If the sheet is too large to email, drop each frame to 200 or 240, or cut a row or two.
Set the width to match where the picture will be seen. Leaving a GIF at 480 for something that will only ever show at 200 pixels wide just makes a bigger file for no gain.
Going the other way does nothing at all. A width larger than the video is ignored. The tool works out a scale from your number and caps that scale at 1, so it never enlarges a frame. Ask for 4000 from a 1920-wide video and you get a 1920-wide picture: the same sharpness, the same file size, no padding and no stretching. The frame holds only what the camera and the codec recorded, and no width setting adds to that. So the box is really a way of making pictures smaller. Type the video's own width for full size, or something below it for a lighter file.
A still shows you things you never noticed while the video played. Motion blur is the common one. A frame caught mid-swing, mid-stir or mid-turn was exposed while the subject moved, so the blur is baked into the video itself. No setting recovers it. It helps to know how the reading works. The page never plays the video through. It asks the browser to jump to each moment, and the browser lands on the nearest keyframe and then decodes forward a few frames to reach it. That is why a hundred frames from an hour-long recording finish in seconds. It is also why some frames are reconstructed rather than stored whole, and reconstructed frames can look soft. The fix is to move. Pause, step forward one frame with the arrow key, and grab again.
Compression blocks are the other surprise. Flat areas — a sky, a wall, a plain background — can break into small square patches. The eye skims over them in motion but cannot ignore them in a still. Some of that comes from the source video. Some you add at save time. JPG and WebP get their small size by throwing detail away, so the Quality slider matters. It runs from 50 to 100, sits at 92 to begin with, and changes nothing for PNG. At 100 the file is as close to perfect as the format allows. Lower numbers bring soft spots and blocks. Between 85 and 92 is a sensible middle. PNG does not blur at all, which is why it suits text and hard edges. The GIF has its own version of the problem: 256 colours holds skin tones without banding, while 64 colours puts visible steps across cheeks and foreheads. Screen recordings, cartoons and flat graphics survive 64 fine.
Choosing the moment is where the three outputs differ. For the GIF and the still pictures, the panel called "Choose the part to use" is your control, and it appears once the video loads. You have several ways to set the range:
— Drag the two handles on the track.
— Play the video and press "Start here" and "End here" at the right moments.
— Type exact times into the Start and End boxes and press Enter. Both boxes take plain seconds or a clock format like 1:02.5.
— Press "Play the selection" to watch just the part you marked.
— Leave "Keep looping the selection" ticked, and that section plays over and over, so you can watch it a few times before you grab anything. It is on by default.
The labels under the track show where the selection starts, how long it runs, and where it ends. Check the middle one. A tight range keeps a GIF short and puts evenly spread stills close together: ten frames across thirty seconds tell you far more than ten across an hour. It also matters for the 500-picture cap. If you want a dense sample, narrow the range first and then ask for it.
The contact sheet does not use that panel, and the page hides it while the sheet is selected rather than showing a control that would do nothing. The sheet works out its own spread across the whole clip. Its one related control is "Skip the very start and end", ticked by default, which starts two per cent in from each end and stops two per cent short of the finish. That dodges the black frames most video files open and close on. If you want a sheet of one section only, cut that section out first with the Video Studio tool on this site, then drop the shorter file on this page.
When the sheet appears, scroll through the whole grid before you trust it. Black cells in the middle come from fades, dissolves and title cards, and the skip control cannot catch those. A denser grid is the practical fix: six columns by ten rows gives sixty frames, about one every four seconds on a four-minute clip. A blurry cell means the seek landed on fast motion. The tool cannot find a sharper frame from a nearby position for you. Build a second sheet with one extra row instead. That shifts every seek point slightly, which is often enough to dodge the blur. The still-picture previews work the same way, though the page stops after sixty of them to stay responsive. Every frame is still inside the ZIP.
If nothing usable comes out at all — a blank sheet, or a message saying the frames could not be read — the browser could not decode the video. Convert the file to MP4 with another tool first and try again. Some codecs, especially older ones, are not supported in every browser.
There is no size limit from the tool itself. Nothing is uploaded, so no server sets one, and the only real limit is your browser's memory. A two-hour 4K file is fine. Long recordings still take longer when you ask for many frames, because every frame is a separate seek. If a job feels slow, ask for fewer frames or narrow the range.
Some jobs belong to another tool, and it is worth saying so plainly:
— If you want a shorter clip rather than pictures, trim the video with Video Studio.
— If you want to stitch the saved frames back into a moving picture, the Photo Slideshow Maker takes a set of images. For fine control over timing, a video editor is the right tool.
— If you want a picture of your own screen, your operating system's screenshot or recording tool is usually better. It captures at full quality without going through a video file first.
— If the footage is long and heavily edited, a professional tool that detects scene changes will beat any fixed grid.
— If you already have a GIF and need it as a video, the GIF to Video tool does the reverse, and the result is typically a tenth of the size.