
Everything you can do to a video here, and the order it happens in
This page replaced twelve separate tools, each of which did one thing to a clip and wrote a new file. Doing three of them meant three downloads and three re-encodes, and a video loses a little every time it is re-encoded. Here you build a list of steps and they are all applied in a single pass. What follows is what each step does, which control actually matters in it, and the order the steps run in.
Trimming to the part you actually want
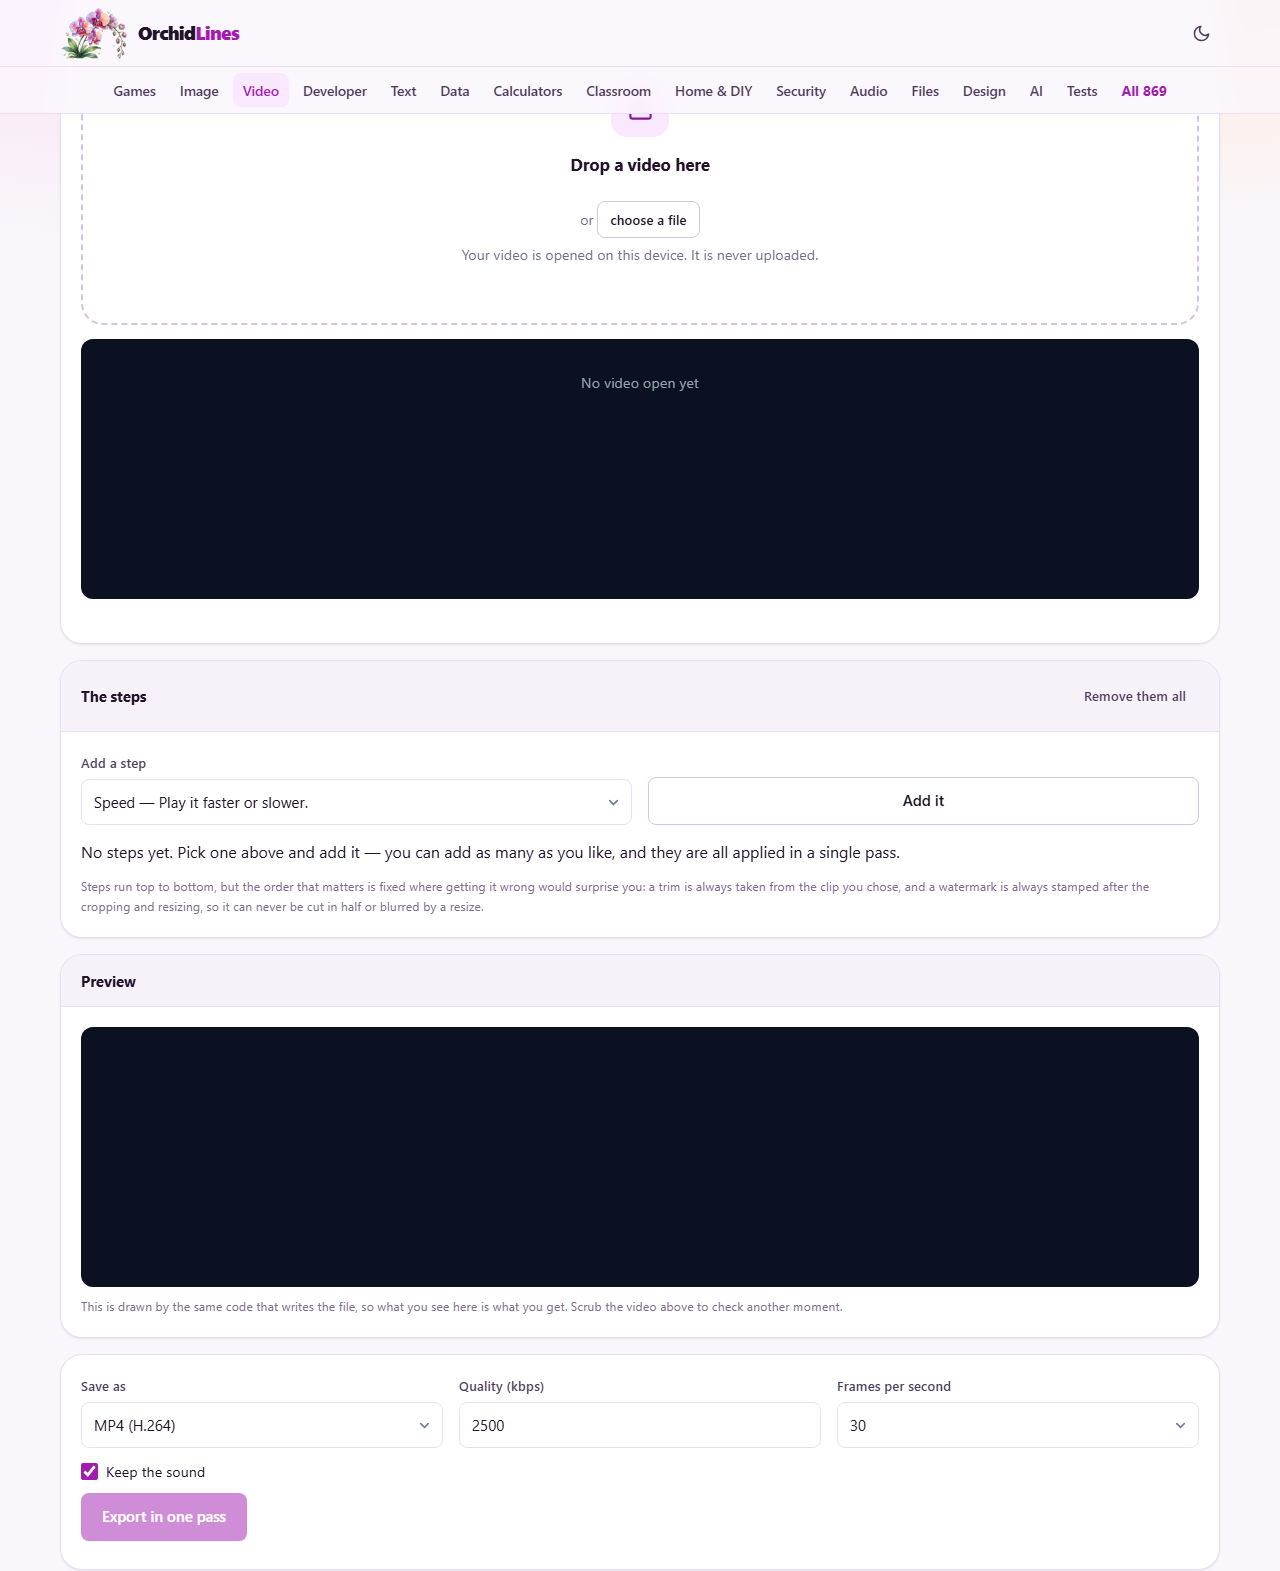
Start by opening a video. Drag a file onto the drop zone, or press choose a file and pick one from your folders. The page reads MP4, WebM, MOV and MKV. A preview player appears, and under it a line of metadata with exactly four things on it: the file name, the file size, the length, and the picture size in pixels, such as 1920 × 1080. The frame rate of your source is not shown there, and it is not shown anywhere else on the page, so if you need to know it, check the file in whatever recorded it. Read that metadata line before you touch any setting, because it tells you what you actually have. No file size limit is built into the page. The real limit is memory: the browser holds the entire export in memory until it finishes, so a few hundred megabytes is comfortable on most machines, and a several gigabyte file is better handled by a desktop tool.
Trimming picks a start point and an end point and throws the rest away. It is the first thing worth doing to a long recording. A five minute demo may hold only thirty useful seconds. Every step you switch on runs in one pass, so the trim decides how much video the rest of the stack has to chew through.
There are three ways to mark the range. Drag the two handles on the range bar: the left one sets the start, the right one sets the end. The labels update as you drag, and the chosen range is shaded on the bar. For a tighter cut, play the video, pause on the exact frame you want, and press Start here. Play forward, pause, then press End here. Pausing first is what buys you frame-level accuracy, which dragging alone rarely reaches. If you already know the times, type them into the Start and End fields. Plain seconds work, and so does the 1:02.5 minutes and seconds form. Press Enter to apply it.
Tick Keep looping the selection and press Play the selection before you export. The chosen section repeats, so you can check both edges. Listen as well as watch. A cut that lands in the middle of a spoken sentence sounds worse than silence, so nudge the edge to a natural pause.
Trimming early pays twice:
— File size. Cutting a 10 minute clip down to 2 minutes drops the export to a fifth of its weight before you touch any quality setting.
— Time. Only the selected range is decoded and re-encoded. On the slower real-time export path the video plays through once while the browser records it, so a one minute selection takes about a minute. Keep the tab in front on that path, because browsers slow down background tabs and a throttled recording stretches out.
Four settings sit beside the export button, and they are the only ones the page always shows. Save as lists the formats your browser can write. MP4 comes first and is the default; WebM is offered after it. Quality (kbps) starts at 2500. Frames per second offers 24, 30 or 60, and starts at 30. Keep the sound is ticked. There is no Height control here. The picture keeps the size it came in at unless you set Output size inside the Crop & fit step, which is where the height lives.
A worked example. You recorded a five minute software demo and want the part from 1:12 to 1:42. Drop the file on the page and let the player load. Play to about 1:12, pause, and press Start here. The left edge snaps to that moment. Play forward to 1:42, pause, and press End here. Tick Keep looping the selection, press Play the selection, and watch the thirty seconds loop. Move either edge if it needs a few frames more or less. Leave Save as on MP4, Quality at the default 2500 kbps, Frames per second at 30 and Keep the sound ticked. Add no steps at all, so the clip keeps its own picture size. Press Export in one pass. The progress bar fills over about thirty seconds and the file downloads. Open it and confirm it starts and ends where you meant.
Three traps catch people out:
— Getting the start right and forgetting the end. The right handle sits at the last frame of the full video until you move it, so a careless export runs from your start point to the end and takes minutes instead of seconds. Check both handles every time.
— Exporting at a higher bitrate than the original. That can make the clip larger than the same section would have been if you had simply copied it out. If the finished file looks too heavy, lower the quality. For quick sharing, 1200 to 2000 kbps is a good balance. A talking head is usually fine at 1500, while fast action wants 3000 or above.
— Setting Output size and expecting it to make the picture bigger. It will not: the height is capped at whatever the crop gives, so asking 1080 of a 720p clip simply gives you 720. The step says so under the box. Nothing is created that was never filmed, and no larger file is produced. If you do not need a smaller picture, leave Output size alone.
Some jobs need a different tool. To join several trimmed clips into one longer video, you need an editor that can join files, because this page writes one clip at a time. For exact frame-accurate cuts on a compressed file with no re-encoding, you need a desktop editor that can stream copy. And to shrink a video without cutting anything out of it, use Output size in Crop & fit instead: trimming removes time, not weight per second.
Your file is read by your browser and stays on your device from start to finish. Nothing is uploaded to any server, no watermark is added, no account is needed, and there is no limit on how many clips you export. You could disconnect from the internet after the page loads and every part of this step would keep working.
Speed: making a clip faster or slower
Speed changes the real timing of the clip, not just the rate a player shows it at. The file you get out is genuinely shorter or longer. It applies only to the range you marked with the trim handles, so you can slow one moment of a long recording and leave the rest at normal pace.
A forty minute software demo becomes a five minute overview at eight times. A cooking tutorial gets a half speed section so the viewer can see a tricky folding technique. Coaches slow sport down to study form, craft makers speed up ninety minutes of gluing, and wedding videographers speed up the reception setup and slow down the first dance.
The controls do not exist until you ask for them. Open the Add a step menu and pick Speed. The step appears in the stack with three fields: Speed, Custom speed and The sound. Nothing on the page is dragged or drawn on the video. Every setting here is a menu or a typed number.
The Speed menu holds nine fixed choices and one custom option. It starts on Twice as fast:
— Quarter speed, very slow is the slowest fixed choice. The clip runs at one fourth of its pace, so the output is four times as long.
— Half speed, slow motion is the classic slow motion setting.
— Three quarter speed gives a subtle drag that can make dialogue feel more deliberate.
— Normal leaves the timing alone. Pick it when you added the step to reach the sound menu and then decided the pace was fine.
— A quarter faster is a gentle speed-up. It trims dead air without feeling rushed.
— Half again is noticeably quicker.
— Twice as fast is the setting the menu starts on, and it suits condensing a meeting recording.
— Four times turns a long walkthrough into a brisk overview.
— Eight times, timelapse is a true timelapse, where individual actions blur together.
— A number I type below is the one that uses the Custom speed box underneath. That box starts at 3, and any value from 0.1 to 20 works. A value of 3 triples the pace. A value of 0.3 plays the clip at less than a third of its original pace. The box is ignored unless the menu is on this option.
The menu labelled The sound has two choices. Keep it, pitch and all, speeds the audio up or down with the picture. A voice at double speed sounds higher and faster, like a record played at the wrong speed. At half speed it sounds deeper and drawn out. Drop it entirely removes the audio track, so the output is video only. Pick it when you plan to add music or a voiceover later, and above twice speed, where the sound becomes a high-pitched whine and mouse clicks turn into static. Unticking the page's own Keep the sound box has exactly the same effect. The two controls exist so you can reach the result from either place without scrolling.
Frame rate matters more here than in any other step. Speeding a clip up means fewer original frames cover each second of output, so the effective frame rate falls. At 24 frames per second a four times clip can look like it strobes, worst of all on camera pans. Set Frames per second to 60 and fast motion stays smooth. That menu sits on the page itself, next to Save as and Quality, and offers 24, 30 and 60. It starts on 30. It is a setting you choose, not a reading taken from your file: the page never tells you what frame rate the source was shot at.
Slow motion has a hard limit. Footage shot at 30 frames per second holds 30 unique images every second. Halve it and those 30 images have to cover two seconds, which leaves 15 new images per second and visible choppiness during movement. Professional slow motion is filmed at 120, 240 or even 1000 frames per second, so enough images remain to fill every moment when it plays back at 30. This page stretches the frames you already have. It cannot invent frames that were never captured. For smooth slow motion from normal footage you need software that does motion interpolation to generate in-between frames, which is heavy computation and a different kind of tool.
The line beside the Export in one pass button does the arithmetic for you. It reads out four things: the pixel size of the output, the new length after your speed change, the steps in the stack listed in the order they run, and the shortest time the export can take, worded as "at least" so many seconds. It is a time floor, not a file size, and at large picture sizes it adds that the real wait will be longer. It updates as you change the Speed menu, so you always know what you will get before you start. On the slower real-time export path the wait tracks the output, not the input: halve a two minute clip and there are four minutes of video to write, so the export takes about four minutes. On that path keep the tab open and in the foreground. The browser makes the file by playing the video internally and capturing it, and a background tab is throttled to save power, which comes out as jerky timing and stuttering frames. Expect a little softening either way, because the picture is decoded and encoded again. Raising Quality above its default of 2500 recovers most of it, but a copy is never quite as sharp as the original.
Worked example: a screen recording into a timelapse. You recorded yourself designing a poster. The player reads 35:12. Nobody will watch that, but it looks impressive sped up. Trim off the first twenty seconds of desktop fumbling and the last ten seconds of closing the app, so the range reads 0:20 to 35:02. Open Add a step and pick Speed. Set Speed to Eight times, timelapse. The line beside the button shows the output length as about 4:20. Set The sound to Drop it entirely, because clicks at eight times speed are just static. Set Frames per second to 60 so the fast mouse movements stay smooth. Leave Save as on MP4, which is what it starts on, and leave Quality at 2500. Press Export in one pass. On the real-time path the progress bar takes about four and a half minutes to fill. The result is an MP4 of roughly 80 megabytes, showing the whole poster come together in under five minutes. Add a music track in a separate editor afterwards.
Nothing is uploaded. The file is read from your own drive, and no frame and no audio sample leaves your machine. That matters here, because the clips people speed up or slow down are often private: family events, medical procedure recordings, meetings. Disconnect the network once the page has loaded and this step works exactly the same way.
Rotate and flip
When you hold a phone upright and press record, the sensor still captures in one fixed orientation. The phone writes a rotation flag into the file, and that tag tells players which way up to show the picture. The pixels themselves are never turned. A player that reads the flag gets it right; one that ignores it shows the clip on its side. That mismatch is behind nearly every sideways video: fine on the phone, wrong on a website. This step turns the picture itself, so no flag is left to ignore. The exported file carries none, and every player and device shows it the same way.
Drop a video onto the page, or press choose a file. A line under the player reads out the file name, the size, the length and the picture size, such as 1920 × 1080. Pick Rotate & flip from the Add a step menu and judge the result on the Preview panel, which is drawn by the same code that writes the file. The estimate line under the steps reports what the export will be: after a quarter turn it reads 1080 × 1920, because a quarter turn swaps width and height.
Check the preview first. If the clip already looks right there, it does not need turning, and a quarter turn will make it sideways everywhere instead. That is the most common mistake with this step. If a clip only misbehaves on some players, leave Turn it on Not at all and export anyway: the new file is written without a rotation flag, and that alone removes the ambiguity.
Turn it has four options. Not at all leaves the angle alone. A quarter turn clockwise turns it 90 degrees right. Upside down turns it 180 degrees. A quarter turn anticlockwise turns it 90 degrees left. Flip it has four as well: Not at all, Left to right for a mirror image, Top to bottom, and Both, which looks the same as a 180 degree turn. The two combine, so a clip filmed through a mirror and also turned is fixed in one go.
Do not confuse the two. A mirrored clip needs Left to right under Flip it, not a quarter turn. An upside-down clip needs Upside down, one 180 degree turn, not two quarter turns. Using the wrong one wastes an export. Webcams are the usual reason for a flip: they show a mirrored preview while you film but save the unmirrored frame, so whiteboard writing behind you reads backwards. Flip it left to right and the text reads properly. If that recording was turned too, use both controls together.
Straighten is a slider. It runs from minus 15 to plus 15 degrees, starts at zero, and shows the angle next to the label. There is nothing to drag on the picture itself. Straightening is not free, either. Tilt a rectangle and its corners poke outside the frame, so The corners a straighten leaves offers three answers:
— Zoom in so there are none. This is the default. The picture is scaled up until the corners are covered, which crops a strip off every edge. On a 16:9 clip, three degrees zooms in about 9 per cent, five degrees about 15 per cent, and the full 15 degrees about 43 per cent, leaving only half the original picture area. Cleanest for small corrections of two or three degrees.
— Leave them black. Black wedges show in the corners. Nothing is cropped.
— Fill them with a blurred copy. A blown-up, blurred copy of the frame sits behind the tilted picture, so the wedges hold something from the shot rather than a black triangle. This often looks better at larger angles, where the crop bites.
Even a five degree straighten with the crop takes a visible strip off all four edges, so check the preview before deciding the straightened version beats the slightly tilted original.
Worked example: a birthday message filmed with the phone held the wrong way, which plays turned 90 degrees left, head at the left edge instead of the top. Drop the file in. It looks sideways in the player, confirming the problem. Set Turn it to A quarter turn clockwise, and the preview shows the person upright. Leave Flip it at Not at all and Straighten at zero. In the page settings leave Save as on MP4, which is the first entry and the default, set Quality to 2500 kbps, leave Frames per second at 30, and leave Keep the sound ticked: turning only touches the picture, so the audio passes through unchanged. Press Export in one pass. About a minute later the file is upright in every player, with no rotation tag left to cause trouble.
Turning runs in the same pass as your other steps, so it needs no export of its own. If you also add a Crop step, the crop is always read after the rotation, however you arrange the two in the stack: the framing steps run in a fixed order and the up and down arrows do not change it. That matters because cropping here is not a box you drag over the video. There is no draggable box anywhere in the Studio. The Crop step is a Shape menu plus four sliders: Width kept, Height kept, Position across and Position down. Those sliders measure against the turned picture, so Position across moves along the width you see after the quarter turn, not the width the camera recorded.
Some jobs need a different tool. To turn a hundred clips at once, command-line software that batch-processes files is faster; this page takes one clip at a time, by hand. Footage shot at an odd angle, needing a non-uniform crop or perspective correction, wants an editor with transform controls, because Straighten is for a few degrees, not a steep angle. Making the picture turn slowly during the clip is a motion graphics job.
Every frame is drawn onto a turned canvas by your own browser. The video never leaves your device: no upload, no server, no account. The file you drop in and the file you download both stay on your machine.
Cropping, fitting and sizing
Cropping cuts away the edges so only the part you want remains. It is not the same as scaling. Scaling shrinks the whole picture into a smaller box, so nothing is lost but everything gets tiny. Cropping throws away the outer strips and keeps what is left at its original resolution. The usual reason is shape: a camera shoots wide at 16:9, an Instagram feed post wants a square 1:1, and Reels, TikTok and Shorts want a tall 9:16. The other reason is tidying the frame, such as a doorway poking into the left of the shot or a cable dangling at the bottom.
Drag a file onto the drop zone, or press choose a file. Any format your browser can play will open, including MP4, WebM, MOV and MKV. Once it loads, a line of metadata below the player gives you four facts: the file name, the file size, the length, and the picture size in pixels. There is no frame rate on that line, so judge the output settings from the picture size and the length. Then pick Crop from the Add a step menu. A panel of settings appears, and the Preview panel redraws with the crop applied. That preview is drawn by the same code that writes the file, so what you see is what you save.
There is no box to drag. Nothing on the video responds to the mouse. The step is set with form controls, and which ones you see depends on what you are doing: a Shape menu, a How it fits menu, and then only the sliders those two leave something to decide. This is worth knowing up front, because most crop tools work the other way round and people hunt for a rectangle that is not there.
The Shape menu holds six options and decides the proportions of the kept area:
— Any shape: the default. The shape is not locked, so Width kept and Height kept work on their own and the area can be any proportions you like.
— Square: Instagram feed posts, 1:1.
— Portrait 4:5: Instagram portrait posts, which take up more height in the feed.
— Tall 9:16: Reels, TikTok and YouTube Shorts, the full height of a phone screen.
— Classic 4:3: the old television ratio, still used by some webcams and screen recordings.
— Widescreen 16:9: the standard landscape shape for YouTube and most televisions.
A locked shape stops you getting the proportions slightly wrong and finding black bars after you upload. It also simplifies the sliders, because a locked shape has only one size left to choose: fix the proportions and the height follows from the width, so there is nothing for a second slider to say. The page therefore hides Height kept and relabels the other one Size. At 100 you get the largest box of that shape the frame will hold, at 50 half of it, and every value in between does something. On a 1920 by 1080 clip at Tall 9:16 the largest box that fits is 608 by 1080: the full height of the frame, but under a third of its width.
The sliders do this:
— Width kept, 5 to 100 per cent, starting at 100. With Shape on Any shape it is simply the share of the original width that survives, and at 100 nothing is cut off the sides. With a shape locked this slider is relabelled Size and sets how much of the largest box of that shape you keep.
— Height kept, 5 to 100 per cent, starting at 100. The same for the top and bottom. It is hidden while a shape is locked, because the shape already decides the height and a slider that cannot change the answer is worse than no slider.
— Position across, 0 to 100, starting at 50. This is not a position in the frame. It is a share of the space left over after the size is decided. At 0 the kept area sits against the left edge, at 100 against the right, and at 50 it is centred whatever size you chose. It does nothing only when there is no space left over at all, which means Shape on Any shape with Width kept at 100. Lock a shape and there is usually a lot of space across even at Width kept 100, so this slider is exactly the one that decides which part of the picture survives.
— Position down, 0 to 100, starting at 50. The same top to bottom: 0 is the top edge, 100 the bottom, 50 centred.
How it fits decides what happens between your source and that shape, and it is the menu that used to be a separate Reframe step. Cut into the frame is the plain crop: the output is the rectangle you selected and nothing else. Fill the shape scales the whole frame up until it covers the shape and lets the edges fall outside, which is what you want for a wide clip going to a tall platform. Fit it all in keeps every pixel and puts something behind the gaps, either a blurred copy of the frame or a colour you pick. Stretch to fit distorts, and is there for the rare case where that is genuinely what you want.
Output size sets the height of the finished picture, and it is the menu that used to be a separate Resize step. As big as the crop allows leaves it alone. Small, Medium and Large set a height and a bitrate together, at 480p and 800 kbps, 720p and 1800, and 1080p and 4000; the bitrate they carry overrules the Quality box. Set the height myself shows a Height in pixels field. Nothing here ever enlarges: asking 1080 of a 720p source gives you 720, because no tool can add detail that was never filmed.
Because position is a share of the leftover space rather than a pixel coordinate, the default of 50 always keeps the middle of the picture. Set the size first, then move it. To go back to the whole picture, set Shape to Any shape, put Width kept and Height kept at 100 and both position sliders at 50.
Watch the line beside the export button as you move a slider. It reads the output size in pixels, the length of the selection, the steps in your stack in the order they run, and the shortest time the export can take, phrased as "at least" so many seconds. It never quotes a file size. If it says 608 × 1080 px, that is your output resolution.
A worked example. You have a two minute interview shot at 1920 by 1080 in landscape, and you want 30 seconds of it as a vertical clip for Reels.
— Drop the file on the page, add a Crop & fit step and set Shape to Tall 9:16.
— Leave Size at 100. At 9:16 the height that full width asks for is more than three times the frame, so the page clamps the height to 1080 and shrinks the width to match. The estimate line reads 608 × 1080 px: the full height of the original frame, but under a third of its width.
— Move Position across until the speaker's face sits in the middle of the preview. There is plenty of leftover width here, so this slider moves the strip a long way. If they sit left of centre, try 35 or 40. Leave Position down at 50.
— In the trim panel, play to the start of the best 30 seconds and press Start here. Play forward 30 seconds and press End here.
— Tick Keep looping the selection and let it play once. It repeats the section, so you can check the speaker stays inside the kept area the whole way.
— Save as is already on MP4, so leave it. Set Quality to 2000 kbps, because the picture is narrower now and needs less data, and leave Frames per second at 30.
— Press Export in one pass. An MP4 source in a current browser takes the fast path and finishes well inside the clip's own length. A format that path cannot read is recorded in real time, so the bar fills over about 30 seconds. Either way a vertical MP4 downloads, ready to upload.
The crop and the trim run in the same pass, with every other step you switched on. You never crop, save, reopen and trim, which saves a second re-encode, and every re-encode costs a little quality. On bitrate, 2500 kbps suits most cropped footage, but a crop keeps fewer pixels than the source, so you often need less than the original used: cut a 1080p frame to a 400 pixel tall strip and 1500 or even 1000 kbps shows no visible softness. Match the frame rate to the source. The sound is copied through unchanged, because a crop only touches the picture.
Sizes always come out even. MP4 encoding needs an even pixel count on width and height, so an odd size rounds down by one and 641 wide becomes 640. You will not see the difference, and the export will not fail.
Two things a crop cannot do. It cannot add detail: a 1080p video cropped to a small centre square may be only 400 pixels wide, and stretching those 400 pixels back to full screen looks soft. Crop as little as you can get away with. It also cannot follow a moving subject, because the sliders hold one fixed area for the whole clip. For an area that tracks movement you need a tool that can keyframe the crop position over time.
Three mistakes come up again and again:
— Not checking the crop across the whole clip. The speaker is centred on the first frame, then leans aside halfway through and half leaves the kept area. Scrub through the preview, or loop the selection once, before you export.
— Picking the wrong shape. Reels, TikTok and Shorts all want 9:16, which is tall. Standard YouTube videos want 16:9, which is wide. Get them the wrong way round and the platform adds black bars.
— Exporting above the original bitrate. The frame is smaller, yet the file lands heavier than the input. Lower the quality number and it drops.
All of this runs on your own device. Nothing is sent to a server: disconnect from the internet once the page has loaded and the crop, the trim and the export still work. There is no account, no watermark and no limit on how many clips you do. No file size limit is built in either, but the browser holds the whole export in memory until it finishes, so that memory is the real ceiling. A few hundred megabytes is fine on most computers; far beyond that, a desktop tool is more practical.
Fitting a wide clip into a tall one
Most cameras and webcams record 16:9 landscape. Most feeds now want 9:16 portrait. Post a wide clip to a vertical feed and you get one of two poor results: thick black bars, or an automatic crop that takes the middle of the frame and hopes for the best. Reframing lets you decide what stays, what goes, and what fills the space the new shape creates.
Open your video, then pick Crop & fit from the Add a step menu. The step appears in the stack with its own panel of controls, and the Preview redraws with your settings applied. That preview is drawn by the same code that writes the file, so what you see is what you save. Scrub the video to check another moment before you export.
Nothing here is dragged on the picture. There is no box to grab and no handle to pull. Crop & fit is a shape menu, a fit menu, a few sliders and a colour picker, and the preview is the only place you judge the result. Set a control, look at the preview, adjust.
Shape lists five presets: Tall 9:16 for Reels, TikTok and Shorts; Square 1:1; Portrait 4:5 for the Instagram feed; Widescreen 16:9 for YouTube; and Classic 4:3 for older TV and slides. There are no custom numbers to type. The Output size menu then decides how many pixels that shape gets, measured on the short side. The default, 1080 on the short side, gives a 1080 by 1920 file for a tall shape. 720 on the short side makes a smaller file when bandwidth or storage matters. 1440 on the short side is larger and slower to export. As close to the source as possible uses the shorter side of your own clip, so a 1920 by 1080 source also lands at 1080 by 1920, and a 4K source lands at 2160 by 3840. Every platform re-encodes what you upload, so a file bigger than 1080 on the short side usually just takes longer to upload and gets squeezed back down. Uploading something smaller can look soft on a large phone.
Output size is the only height control there is. There is no page-level Height setting to match it to, and no separate resizing step to argue with it: shape, fit and final height are decided together in one place, which is why they are one step. Choose Set the height myself and a Height in pixels box appears beside it.
How it fits controls what happens to the parts of the original that do not belong in the new shape.
— Fill the shape keeps the picture full-bleed. The frame is scaled up until it covers the new shape, so you see a portion of the original and the rest is gone.
— Fit inside, blurred backdrop shrinks the whole frame until it fits, then fills the empty strips with a blurred, zoomed copy of that same frame. The blur is 4 per cent of the output width, so the backdrop looks the same at every output size. Nothing is lost, but the main picture is smaller.
— Fit inside, solid colour does the same with a flat colour behind, which you pick with Backdrop colour. Black is the default.
— Stretch to fit distorts the picture to fill the frame. It makes every face look wrong. Avoid it.
When you fill the shape, the slider labelled Which part survives decides which strip is kept. At 0 you keep the left edge, at 100 the right, and the default 50 keeps the centre. If your subject stands on the left, slide down toward 20 or 30. If they stand on the right, slide up toward 70 or 80. The slider follows whichever side overflows, so putting a tall clip into a wide frame moves the view up and down instead. In the two fit-inside modes the picture is always centred, and the slider does nothing. Zoom runs from 100 to 200 per cent and pushes into the frame before the shape is taken. Past about 150 per cent the picture goes visibly soft, because you are enlarging pixels that were never recorded.
The loss is worth knowing before you commit. Take a 1920 by 1080 frame to 9:16 and the strip that survives is about 608 pixels wide, under a third of the original width, stretched back up to fill 1080. Two people at opposite sides of a shot cannot both stay in frame. That is why the blurred backdrop mode exists. Sensible starting points:
— Reels, TikTok, Shorts: Tall 9:16, 1080 on the short side.
— Instagram feed: Portrait 4:5, 1080 on the short side.
— YouTube: Widescreen 16:9, 1080 or 720 on the short side depending on the content.
A worked example. You filmed a two minute sit-down interview in 16:9. The subject sits slightly left of centre and you want the best thirty seconds for Reels. Open the file. Add a Crop & fit step, set Shape to Tall 9:16 and How it fits to Fill the shape. Move Which part survives to about 40, so the subject sits centred in the tall frame. Leave Zoom at 100. Leave Output size on 1080 on the short side. Now set the range: play to the start of your thirty seconds, pause, and press Start here. Play forward, pause, and press End here. Tick Keep looping the selection and watch the section repeat while you check the preview. The face stays inside the frame throughout. Leave Save as on MP4, which is the default and the first entry in the list. Leave Quality at 2500 kbps, Frames per second at 30 and Keep the sound ticked. Press Export in one pass. The result is a clean 1080 by 1920 vertical clip.
WebM is offered under MP4 in the same menu, and it gives a smaller file at the same quality. Choose it only when the clip stays in a browser or on Android, because MP4 is the safer file to hand to someone else.
Two habits save re-exports. Check the preview across the whole selection, not just the first frame, because the position is fixed for the entire clip and nothing tracks a moving subject. And keep faces and captions clear of the top and bottom eighth of a vertical frame, where the app's own buttons and titles sit over your video.
Reframing reshapes one clip. If you need the crop to follow someone walking across the shot, you need a tool with motion tracking. If you need text overlays, transitions between clips, or background music, you need a video editor. What happens here happens on your own device: the file is decoded, redrawn frame by frame and re-encoded in the page, with no upload, no account and no watermark.
Making the file smaller
Email is the usual reason. Most providers cap an attachment at 25 megabytes, and a one minute phone clip can be ten times that. Messaging apps set their own limits: some accept 16 megabytes, some allow more, but almost none take a raw camera file without complaint. Upload forms hit the same wall. A course platform may allow 500 megabytes per video. A job application portal may cap at 50. Forums are tighter still. There is also storage: compressing old screen recordings and meeting captures you want to keep but rarely watch frees disk space without deleting anything.
Two things decide how heavy a file is. The first is how many pixels are in each frame. A 1080p frame holds over two million pixels; a 720p frame holds under one million, so halving the pixel count roughly halves the data each frame needs. The second is the bitrate: how many bits per second the encoder spends on the picture. A high bitrate keeps fine detail and smooth gradients. A low one throws that away and saves space.
Making the picture smaller lives inside Crop & fit, not on the page itself. Open Add a step, choose Crop & fit, and use its Output size menu. There is no Height control anywhere else, so until you change Output size the export keeps the picture size of your source.
The menu labelled How small has four choices:
— Small sets 480p at 800 kbps. It is for messaging apps with tight limits. The picture is noticeably softer, but the file is tiny.
— Medium sets 720p at 1800 kbps. It suits most sharing: clear enough for full-screen playback on a phone, and still manageable.
— Large sets 1080p at 4000 kbps. Pick it when the viewer will watch on a computer or a television.
— Set the height myself is the default. It leaves the bitrate to you and lets you type an exact height. Use it when you know the limit you have to hit, or when you want to experiment.
The three presets are worth having because each one is a height and a bitrate together, and the two only make sense as a pair. There is a catch worth knowing. A preset overrides the Quality (kbps) box in the export panel, and that box does not change to show it. Pick Small and the box still reads 2500 while the export is written at 800. Only Set the height myself hands the bitrate back to the Quality box.
Height in pixels is the step's other field. It sets the vertical resolution, and it accepts 120 to 4320 in steps of two. The width follows on its own to keep the shape, so you never type a width and never squash the picture. Dropping 1080 to 720 removes more than half the pixels. That usually saves more file size than cutting the quality number by the same share, and it looks better. Below 480 the picture feels small on a modern screen. Above the source height, nothing happens: the step clamps your number to the height of the clip you opened, because it cannot add detail that was never filmed. Ask a 720p clip for 1080 and you get 720.
The rest of the controls that decide weight live in the export panel at the bottom of the page. They are always visible and they apply to every step in the stack:
— Save as lists the formats your browser can actually write. MP4 is first and is the default. WebM is offered after it, and gives a slightly smaller file at the same quality when the video will be watched in a browser or on Android.
— Quality (kbps) is the video bitrate, and runs from 200 to 20000 with a default of 2500. A 720p clip looks good at 1200 to 1800. At 1080p, 2500 to 4000 is reasonable. Below 800 at any size you will see blocky patches wherever there is movement. Remember that an Output size preset overrules this number.
— Frames per second offers 24, 30 and 60, and starts at 30. Going from 60 to 30 halves the frame count and cuts size, but fast motion looks less smooth. Talking heads and slide recordings are fine at 24. Keep 60 for sport or gaming. Do not set it above the source rate: the extra frames are just repeats, and they add size for no gain. The page does not read the source rate for you, so use what you know about the recording.
— Keep the sound is ticked by default and copies the audio track into the export. Audio is a small part of the total weight, but a long silent screen recording sheds a few per cent without it. Untick it when there is nothing worth hearing.
Beside the export button a line updates whenever you change a setting. It is not a file size. It reports the output size in pixels, the length of the selection, the chain of steps you have switched on, and the shortest time the export can take. Work the size out yourself: multiply the bitrate by the length and divide by eight. At 800 kbps, one minute is about six megabytes. Treat that as a ceiling, not a promise, because how well footage compresses depends on what is in it. A slide presentation compresses extremely well, because the encoder sees that nothing changed between frames and spends almost no bits on them, so the real file can land far under the sum. A shaky handheld shot of a crowd changes every pixel every frame, and may land close to it. If your limit is a hard 25 megabytes, aim for 20 and leave room.
Worked example: a screen recording for email. You have a four minute software walkthrough. The file is 180 megabytes and it has to go under 25. Drag it onto the drop zone. The metadata line names the file, gives its size as 180 MB, its length as 4:00 and its picture size as 1920 × 1080. It does not tell you the frame rate, because nothing on this page does; you know from the recorder that it was 30. Open Add a step and choose Crop & fit. Try Medium from Output size and do the sum: 1800 kbps across 240 seconds is about 54 megabytes, well over the limit. Choose Small instead. That is 800 kbps across 240 seconds, so about 24 megabytes at worst, just inside. Leave Save as on MP4, leave Frames per second at 30 and leave Keep the sound ticked. Ignore the Quality box, because the preset is setting the bitrate. Press export. The progress bar fills over roughly four minutes on the real-time path, because the video has to play through once while it is encoded. The finished file downloads at 14 megabytes, comfortably under the ceiling, because large areas of a screen recording stay the same from frame to frame. Attach it and send. If you would rather have the sharper picture of Medium, trim first: at 1800 kbps, 25 megabytes buys you about 110 seconds of video.
Sometimes the file comes out bigger. You open a 50 megabyte clip, pick Large, and get 60 back. The quality you asked for was higher than the original was encoded at, so the encoder spent more bits per frame than the maker did. Drop to a smaller preset, or switch to Set the height myself and lower the height, the Quality number, or both. If you only want the same picture in a different container, change Save as and leave the quality alone.
Always compress from the original. Every pass throws away detail that cannot come back, so a second pass starts from a picture that has already lost some and takes more off on top. After two or three rounds it looks clearly worse at the same bitrate. If a clip you already shrank is still too big, go back to the master file and compress once with lower settings.
Trimming is the strongest lever of all. Cutting a 10 minute clip to 2 minutes drops it to a fifth of its weight before any quality is touched. Output size sits in the same step as the framing, so set the trim range and the size together, then export once.
Some jobs want another tool. To compress hundreds of files at once, command-line software is faster. To hit an exact file size to the byte, you need two-pass encoding, which browser encoders do not support. For a video several hours long, a desktop tool is more practical, because the browser holds the whole export in memory until it finishes.
Nothing is uploaded. The file is opened by your browser and processed on your own machine, so you can disconnect from the internet once the page has loaded and this step still works. No watermark is added, no account is needed, and there is no cap on how often you use it.
Colour: brightness, contrast and a look
A clip that looked fine on the camera can play back flat, dark or washed out. Indoor footage under ceiling lights comes out dim and yellow. Concert and restaurant video is dark because the camera exposed for the bright stage or the candle. Screen recordings look grey because the recording app captured less contrast than the display showed. A quick colour pass fixes all three. For a social post, a look on top gives a set of clips a consistent feel. For a work presentation, getting the brightness right is often the whole job. Once a file is loaded, a line of metadata under the preview gives the file name, the file size, the length and the picture size in pixels, so you can see what you are working with before you touch anything.
Pick Colour from the Add a step menu. The step appears in the stack with one menu and five sliders. There is nothing to drag on the picture itself; every setting here is a slider or a menu.
Five sliders do the manual work:
— Brightness, 20 to 200 per cent, with 100 as the unchanged middle. Below 100 the picture darkens, above 100 it lightens. This is the first slider to reach for on a dark clip.
— Contrast, also 20 to 200 per cent, starting at 100. Raising it pulls the bright parts brighter and the dark parts darker. Lowering it flattens everything toward a middle grey. The order matters: lift brightness first, then add contrast. The other way round crushes the shadows before you get a chance to bring them back.
— Saturation, 0 to 300 per cent, starting at 100. Zero is greyscale, 100 is unchanged. Above about 140 per cent, skin tones go orange and green foliage turns neon. If it looks lively on your monitor, it is probably already too strong on a phone.
— Hue, minus 180 to plus 180 degrees, starting at 0. It rotates every colour around the wheel. Moves of 10 to 20 degrees warm or cool a shot. Bigger moves are a deliberate creative choice, such as turning a daylight scene into a sunset.
— Blur, 0 to 50, starting at 0. This only blurs. It is not a sharpening control. The number is tenths of a pixel, so 30 gives a three pixel blur. Values around 3 to 10 take the edge off grain or give a slight dreamy glow. Above about 30 the video looks plainly out of focus.
The Look menu offers five presets besides None — just the sliders, which is the default. Warm lays a sepia tint over the picture and lifts saturation and contrast a little, so the shot shifts toward amber. Cool rotates the hue about 12 degrees toward blue and adds a touch of saturation and brightness. Black and white strips the colour out and adds a little contrast so the result does not look muddy. Faded lowers contrast and saturation and lifts brightness, for the washed-out look of old stock. Punchy raises contrast and saturation together for a bold result. A look is applied on top of whatever the sliders are set to, so lift the brightness first and Faded lands on a properly exposed frame rather than a dark one. There is no reset button. To start again, put Brightness, Contrast and Saturation back to 100, Hue and Blur back to 0, and Look back to None.
Under the surface the page turns all six settings into a single CSS filter string and hands it to the canvas, so your browser's own graphics code does the work. That is why the preview keeps up while you drag a slider, even on a high resolution clip, and why the exported frames match what you saw: the same string is applied to every frame. If nothing seems to be changing, check that at least one slider has moved off its default, because a filter that asks for no change is skipped entirely.
The up and down arrows on a step are worth understanding here, because they matter for this step and three others. Four steps paint on the finished picture: Colour, Green screen, Hide a face or plate and Watermark. Those four run in the order you arrange them, so the arrows genuinely change the result. The step higher in the stack is painted first, so the one below it goes on top. Put Colour above Watermark and the mark is stamped after the grade, so it keeps its own colour. Put Watermark above Colour and the grade washes over the mark too. It is easy to see: the same watermark and the same colour step in opposite orders give a red mark one way and a grey mark the other. Every other step — trim, speed, rotate, crop, reframe, resize — runs in a fixed order whatever you do with the arrows, because there is only one sensible answer for those and a wrong guess would be a nasty surprise.
Order can save a little work too, but only in one exact case. Colour is folded into the draw that puts the frame on the canvas when there is no framing step in the stack at all — no Rotate & flip and no Crop & fit — and Colour is the first of the painting steps. In that one arrangement the grade costs nothing extra. Add any framing step and the saving disappears, because the frame no longer arrives in one piece, and the grade goes through a scratch canvas like any other painter. So do not shuffle the stack for speed unless your stack is colour and nothing else. Shuffle it for the look you want.
A worked example. You have a three minute clip of a speaker at a podium. The room lights were low and the camera was on auto, so the footage is dark and a little yellow. Add the Colour step. Raise Brightness from 100 to 140. The face is now visible, but the picture looks flat, so set Contrast to 125 to bring back some depth. The yellow cast comes from tungsten lights, so set Hue to minus 10 degrees to pull some of the warmth out. That flattens the colour slightly, so raise Saturation to 115 to put it back. Leave Blur at 0 and Look on None. Trim to the 45 second section where the point is made, set Quality to 3000 kbps, leave Save as on MP4, which is the default, and leave Frames per second at 30. On the slower real-time path the progress bar fills over roughly 45 seconds, and the result is balanced and ready to share.
Three traps are worth knowing:
— No slider recovers detail that was never recorded. A blown-out sky is pure white in the file. Brightness lifts the grey around it, but the clouds are gone. Crushed black shadows behave the same way.
— A brighter picture compresses less efficiently, so the same bitrate can look softer than it did before the lift. Raising Quality by a few hundred kbps fixes it.
— Re-encoding always costs a little quality. The video is decoded, adjusted and encoded again, and each step loses some detail. That is true in every editor, not just a browser one. Keep the original file, and if the export looks soft, raise the quality number and go again.
This is one grade across the whole selection. Colour curves, selective colour and per-region corrections are beyond what the page offers, so warming just the skin tones while cooling the background needs a full grading panel. The settings also hold steady for the whole clip; nothing fades a grade in or out over time. If the clip contains several scenes that each need different treatment, a timeline editor is the better choice, because it can set a different grade for each cut. Everything here happens on your own device: the video is decoded, filtered and re-encoded in the browser, nothing is sent to a server, and you could disconnect from the internet after the page loads and still export. There is no account, no sign-up and no watermark on the output. The audio track, if you keep it, is copied through untouched.
Green screen
A green screen is never one green. The top of the cloth catches the light and looks bright. The bottom sits in shadow and looks dark. In plain RGB those two greens are far apart, so a tool that removes pixels close to a single green leaves holes in the dark patches, or eats into the subject once you widen the range. This step keys in a colour space that splits colour from brightness. With brightness set aside, bright green and dark green land almost on top of each other, so one threshold covers the whole screen without creeping into the subject.
Add the Green screen step and start with Colour to remove. It is a colour box that starts on pure green, #00ff00. Click it and your browser opens its own colour picker, where you can type a hex value or pick a shade by hand. There is nothing to click on the video itself: this step, like every other one here, is form controls only. The preview redraws as soon as you change the value, so you can judge the key by eye.
Pure green is rarely the right answer. Lighting, white balance and camera settings all shift the real colour, and a wrinkled cloth in a garage looks nothing like a painted studio wall. Two ways to find the true colour. Some browsers put an eyedropper button in that colour picker, which samples any pixel on your screen, including the preview behind it. Where that button exists, use it and click a mid-tone part of the screen rather than the brightest or the darkest patch. Where it does not, take a screenshot, read the hex out of any image tool, and type it in. Failing both, nudge the picker toward a duller, darker green and watch the preview: when the background falls away in one go rather than in patches, you are close.
Three sliders then do the work:
— How close a match is the threshold, and it runs from 5 to 120. Start low and raise it until the green disappears. The default of 45 is a sensible starting point and most footage settles between 55 and 65. Push it too far and parts of the subject start vanishing, especially hair, pale skin, and anything with a slight green tint. Back off a notch once the background is clean.
— Edge softness controls the boundary between subject and background, from 1 to 80. A value of 1 gives a hard, sticker-like edge. The default is 20, and around 15 to 25 suits most footage: it lets hair and motion blur blend into the new background. Much higher and the subject picks up a visible halo.
— Spill removal pulls back the green light that bounced off the screen onto the subject. Hair and shoulders catch it worst, and without this the cut-out has a green rim that looks wrong against any background. The default of 60 per cent handles most clips. Raise it if the rim persists, but above about 85 you may see the subject's own colours shift.
The What goes behind menu has two options. A solid colour fills the space with whatever shade you set in the Backdrop colour box below it, which starts on a very dark blue-grey, #101018. Black — video has no transparency fills it with plain black, and the label is the explanation: MP4 and WebM carry no alpha channel, so there is no way to export a see-through clip from this page. Anything you knock out has to be replaced by something. If you genuinely need a transparent clip to layer in a timeline, you need an editor that writes ProRes 4444 or a similar alpha-capable format. There is no option to load a photo as the backdrop either, so a real background image is a job for a compositor.
A worked example. You have a 90 second interview shot against a green cloth. Drop the file in and add the Green screen step. Open Colour to remove and set it to something like #2D8B3E rather than the bright green you expected, because the cloth is old and the room light is warm. Most of the screen disappears, but patches remain near the floor. Raise How close a match from 45 to about 62 and the patches go. Check the hair: if strands are disappearing, drop back to 58. Set Edge softness to 22 for a natural boundary. Raise Spill removal to 70, because the subject's white shirt has a faint green cast on the shoulder. Leave What goes behind on A solid colour and set Backdrop colour to a dark grey. Trim to the 15 second section you actually need. Leave the format on MP4, which is the first entry in Save as and the default, with Quality at 2500 kbps and Frames per second at 30. On the slower real-time path the progress bar fills at roughly one second per second of video, so that 15 second selection takes about 15 seconds.
Two faults account for most bad keys. A green edge after export means Spill removal is too low; raise it in steps of 10 until the rim is gone. Parts of the subject vanishing means How close a match is too high; lower it. If the subject wears something close to the screen colour, such as a green tie or teal earrings, no threshold saves both the clothing and the key. The only fix is to reshoot against blue.
Blue screens key exactly the same way. Set Colour to remove to your blue instead of a green and every other control behaves as before. Green is more common because camera sensors capture more green detail, which gives cleaner separation. Blue is the better choice when the subject wears green, or when the scene contains plants. Green and blue are the standards because they sit furthest from human skin tones. A red screen would fight with lips, blush and sunburn.
The biggest improvement happens before you open anything. Light the screen and the subject separately. Two cheap work lights on the cloth, aimed so the green is even from top to bottom, cut out more cleanly than any amount of slider work afterwards. Even lighting also means the one colour you type is right for the whole screen, which is the whole game here. Keep the subject at least a metre from the screen. The closer they stand, the more green bounces onto them, and the harder spill is to remove. If the rim will not go no matter what you set, the footage was shot too close.
This step is not the right tool for everything. Live keying during a stream needs OBS or a hardware switcher. Per-frame control with rotoscoping and garbage mattes needs a full compositor, and so does dropping a photograph or another video in behind the subject. This handles the straightforward case: one clip, one flat colour behind it, one export. Because the key is one step in the stack, it is applied together with any trim, crop or colour change in a single pass, so the footage is only re-encoded once. Green screen is one of the four painting steps, so the up and down arrows decide whether it runs before or after your colour grade, your redaction and your watermark.
Your file stays on your own device throughout. Nothing is sent to a server, and you could disconnect from the internet after the page loads and every control would still work. That matters most here, because green screen footage is usually unreleased material: takes that were never meant to be seen raw. There is no account, no sign-up, and no watermark on the output.
Hiding a face or plate
Redacting covers one region of the frame so the rest can still be shared. A doorbell clip going to the police may show a bystander's face. A property listing may show a neighbour's readable number plate. A classroom recording may show a child whose parents did not consent. The footage, the sound and the context are all still useful. Only that one patch is unsafe.
Drag a file onto the drop zone, or press choose a file. Then pick Hide a face or plate from Add a step, so the stage joins your stack. There is no box to drag on the video. Nothing on this page is placed with the mouse. You position the cover with four sliders, each measured as a percentage of the frame. Left sets the distance in from the left edge. It runs from 0 to 95 and starts at 30. Top does the same from the top edge, also 0 to 95, starting at 30. Width runs from 2 to 100 and starts at 30. Height runs from 2 to 100 and starts at 25. So the cover begins as a rectangle above and left of centre, and you walk it onto your subject one slider at a time. The Preview shows the real effect rather than an outline, so you can see whether the subject is genuinely hidden before you commit. Nudge Left and Top until the patch sits on the face, then raise Width and Height until it covers the head with room to spare. If the blur is too light or the patch is too small, you find out now and not after the export.
How to hide it offers three methods. Blur it applies a gaussian blur inside the area. Pixelate it turns the area into large coloured squares. Cover it solidly fills the area with a flat colour. Shape gives you a Rectangle or an Oval. An oval is kinder on a face, because it follows the shape of a head instead of drawing sharp corners round it. Strength runs from 5 to 100 per cent and starts at 40. At 5 the subject is still plainly visible. At 100 very little detail survives. It sets the blur radius or the block size, and it is measured against the whole frame rather than the patch, so growing the patch does not change how coarse the effect looks. Strength does nothing when you choose Cover it solidly, because a flat fill has no strength to set. That method reads Cover colour instead, which is a full colour picker and starts on black. Both controls stay on screen whichever method you pick.
People walk, cars drive and heads turn, so the cover has to move too. Set the four sliders on the subject at the start, then scrub or play forward to a moment where the subject has drifted out from under the patch. Move the sliders back onto them and press Add a point here. That button stores the current slider values at the player's current time. The motion between two points is filled in for you, so the cover travels smoothly from one to the next. Two or three points across a short walk is usually enough. A fast pan or a scene cut needs more. The line under the button counts your points and lists their times. Until you add the first one it reads that there are no points yet and the box stays where you put it. Clear them all removes every point so you can start over.
Then check your work by playing the selection through and watching the patch, not the subject. If a quick movement carries a face ahead of the cover for even a few frames, those frames are all somebody needs.
A worked example. You have a thirty-second doorbell clip. A delivery driver walks up to the door and back, and you need to share it with the face hidden. Drop the file in and add the Hide a face or plate step. Set How to hide it to Blur it, Shape to Oval and Strength to 80. At the first frame, slide Left to about 44 and Top to about 18, until the oval sits on the driver's face, then set Width to 14 and Height to 18 so it covers the head with a margin. Press Add a point here. Scrub to about ten seconds, where the driver is closer and the face is larger. Slide Left and Top back onto the face and raise Width and Height a few points, then add another point. Do the same at twenty seconds and again at the end. Four points, placed in under a minute. Play the selection and watch the cover track the face. If a frame slips, add another point near that spot. Leave Save as on MP4, set Quality to 2500 kbps and export.
Two warnings are worth taking seriously.
— A light blur can sometimes be reversed with software, and pixelated text in a known typeface has been read back more than once by researchers. A number plate has a fixed format, so pixelation may leave enough for someone to guess the rest. Where the consequence is serious, choose Cover it solidly. A flat fill holds nothing to recover. It is less elegant than a tasteful blur, but it is the only method that offers a real guarantee. When in doubt, the solid cover is always the right answer.
— The sound is passed through untouched, and nothing here silences a single word. Hiding a face while somebody says the name two seconds earlier undoes the whole exercise. Trim that part out, or untick Keep the sound and drop the audio entirely. This is a common oversight.
The cover is burned into the pixels. There is no layer to peel off and no metadata to strip, and the original picture behind the patch is gone from the exported file. Redacting is one step in the stack, applied in the same pass as your trim, crop or colour changes, so you export once rather than once per operation. It is one of the four painting steps, so keep it ABOVE any Watermark step if you want the mark to sit over the covered patch, because the higher step is painted first and the lower one lands on top of it. Trim first if the clip is long: an hour-long recording that needs three seconds hidden should be cut down before you export.
It still covers one region per pass, placed by hand. A crowd of faces needs software with face detection and tracking built in. Removing one spoken word without dropping the whole track needs a dedicated audio editor. Nothing leaves your device while you work: no frame, no thumbnail and no metadata. That matters more here than anywhere else on this page, because a video you are redacting is one you have already decided contains something sensitive. Keep your original master copy somewhere safe and hand out only the redacted version.
Watermarking
A watermark says who made the video. Creators post previews of paid work so the full version still sells. Photographers send draft edits before payment clears. Trainers put their name on every frame of a sample lesson. The mark is drawn into each frame as the stack renders, so it becomes part of the picture, not a layer a player puts on top. It is not stored separately from the frames, so it cannot be peeled off later, and cropping it away would mean cropping the video itself. That is obvious and loses content. The mark is painted in the same pass as your trim, crop or colour work.
Add the Watermark step to the stack and its fields appear. There is no box to drag on the video. Nothing here is placed with the mouse. You pick the mark, then two controls put it where you want it. Watermark is a painting step, so its place in the stack is a real choice: the up and down arrows move it above or below Colour, Green screen and Hide a face or plate, and the result changes. A mark stamped before a colour grade is graded along with the picture, so a red mark can come out grey. Put the Watermark step last and the mark keeps the colour you chose.
The menu labelled What to stamp offers three kinds of mark:
— Text stamps one line over the video. The Text field starts at orchidlines.com, so replace it with your own handle or name.
— A logo image places a logo file you choose with the Logo image button. A PNG with a transparent background works best, because the mark blends into the picture. A JPG, or any image with a solid background, shows a visible rectangle around it.
— Both stamps the logo and the words together. The logo sits on top and the Text field appears below it, drawn at about two fifths of the logo's height. That suits a logo with a company name beneath.
Text colour defaults to white, which reads on most footage. Choose something darker if your video is full of bright sky or white walls. Drop shadow is ticked by default and is worth keeping on. Without it, white text vanishes over light scenes and dark text over dark ones. The soft shadow keeps the letters readable whatever moves behind them.
Keep the logo small and simple. A detailed photograph looks messy at 6 per cent of the frame height and pulls attention off the video. A clean icon, a set of initials or a plain wordmark reads at a glance. A huge logo is scaled down by the Size slider anyway, so a smaller file only loads faster.
Four controls place and weight the mark:
— Where offers six positions. Bottom right is the default and the usual spot for a credit. Bottom left, Top right and Top left cover the other corners. The Middle is harder for a viewer to ignore. Tiled across repeats the mark over the whole frame on a slight diagonal, which is the hardest version to crop or paint out.
— Size is how tall the mark is as a share of the video height. It runs from 2 to 30 per cent and starts at 6. Five to eight per cent suits a quiet corner credit. Ten per cent or more suits a proof copy that nobody should use without paying. Smaller marks distract less but read less easily.
— Opacity sets how see-through the mark is. It runs from 5 to 100 per cent and starts at 70. Lower it for a ghostly mark, or raise it to 100 for a solid one. At 30 to 40 per cent a tiled mark still lets the viewer watch the content, while removal stays hard.
— Margin pushes the mark inward from the edge. It runs from 0 to 20 per cent and starts at 4. The gap is measured as a share of the video height on both axes, so the mark keeps the same visual inset on a tall clip and a wide one. Social video apps draw their own buttons and progress bars in the corners, so 6 or 8 per cent keeps your mark clear of those overlays.
The Preview panel is drawn by the same code that writes the file, so it shows exactly where the mark will land. Scrub through several scenes before you export. Checking costs nothing; getting it wrong costs a second export. Pair the mark with a trim, since a shorter selection finishes sooner.
Worked example: putting a handle on a tutorial. You recorded a four minute tutorial and want your handle in the bottom right before posting it. Open the file and add the Watermark step. Leave What to stamp on Text. Clear the default orchidlines.com from the Text field and type @janedesigns. Leave Drop shadow ticked and Opacity at its default 70 per cent. Leave Where on Bottom right. Set Margin to 6 per cent, so the mark clears the play button on most video apps. Leave Size at 6 per cent. The Preview shows the handle as you type, so scrub through and check it reads over every scene. Leave the export settings alone: Save as on MP4, which is first in the list and the default, Quality at 2500 kbps, Frames per second at 30 and Keep the sound ticked. Press Export in one pass. On the real-time path the progress bar fills over roughly four minutes; the fast path finishes sooner. Open the downloaded file and scrub through to confirm the mark is on every frame.
Some things this step will not do. The mark sits in one fixed spot for the whole clip. It does not move, rotate or fade, so an animated mark needs an editor with keyframe animation. The sound passes through untouched. And this step only adds marks. Taking a watermark off someone else's video is a different task entirely, and it raises real ownership questions; nothing here removes a mark. For still pictures, the image watermark tool is the better fit. The same ideas about placement and opacity apply, but a picture stamps instantly, with none of the export wait a video needs.
Your video and your logo both stay on your device. The browser reads them and does the work on your machine; neither is sent to a server at any point. The finished video is built locally and saved to your downloads folder. There is no account, no sign-up, and no limit on how many videos you mark. Disconnect from the internet once the page has loaded and every control still works.
Sound: keeping it or dropping it
The sound controls decide one thing: whether the audio from your clip is carried into the export, or left out of it. The picture is untouched either way. People reach for this for two reasons. The first is a problem in the recording: wind noise, keyboard clicks, a private conversation caught by accident, or music you do not have the rights to. The second is that the sound is simply not wanted, as with a silent loop for a website header or a screen recording that will get a fresh voiceover somewhere else. Once a file is loaded, the metadata line under the player tells you the file name, the file size, the length and the picture size in pixels. It does not report the frame rate, and nor does anything else on the page.
The main control sits in the page-level settings, next to the format and quality boxes. Keep the sound is a tick box, and it is ticked when the page opens. Leave it ticked and the audio from the range you trimmed is written into the new file alongside the picture. Untick it and the export is built with no audio track at all. That is a real removal, not a mute: there is no silent track sitting in the file, so nothing can be turned back up later. The file also comes out a little smaller, because the audio data is gone rather than quiet.
There is no Sound step in the Add a step menu, so do not go looking for one. Sound is set once for the whole export, not per step. The one exception is the Speed step, which carries its own menu labelled The sound. It has two choices. Keep it, pitch and all speeds the audio up or down with the picture, so a voice at double speed sounds higher and faster and at half speed sounds deeper and drawn out. Drop it entirely removes the audio, exactly as unticking the page-level box does. The menu is repeated there because above about twice speed a voice turns into a whine and mouse clicks turn into static, and that is the moment you want to drop the sound. Dropping in either place wins: if one of them says drop, the export is silent.
Every other step touches the picture only. Crop & fit, Rotate & flip, Colour, Green screen, Hide a face or plate and Watermark all pass the audio through unchanged. Moving a step up or down the stack never changes the sound either. The trim decides which part of the audio you keep, because it decides which part of the clip you keep, and the audio is cut at the same two points as the picture. So set the trim first and judge the sound against it. Everything runs in one pass, so the audio is written once, in step with the frames.
The pairing worth remembering is redaction. Hiding a face is pointless if somebody says the name two seconds earlier. Either trim that part out, or untick Keep the sound and hand over a silent clip. This is a common oversight, and the export gives you no warning about it.
A worked example: a product demo with the noise taken out. You have a forty five second screen recording. The audio is keyboard clicks and a noisy fan, and none of it helps. Trim to the forty five seconds you want. Untick Keep the sound. Leave Save as on MP4, Quality at 2500 kbps and Frames per second at 30. Press export. The result is the same recording with a clean, silent track, ready for a music bed or a voiceover added in a separate editor afterwards. This page will not lay that track under the picture for you.
A second example: silencing a restaurant clip. You filmed in a restaurant and the background music is copyrighted. Untick Keep the sound, leave Save as on MP4, and export. Around thirty seconds later you have the same picture with no audio track, ready to post without a copyright claim.
Match the frame rate to the source. A lower frame rate than the original drops frames. A higher one repeats them, which adds file size without adding anything you can see. You have to know the source rate yourself, because the page never displays it.
If the export looks stuck, it usually is not. On the slower real-time path it runs at the speed of the video: a five minute clip takes about five minutes, and the progress bar moves the whole way. Keep that tab in front, because browsers throttle background tabs and a throttled recording stretches out.
This step keeps sound or removes it. It does not add or mix. To put music or a voiceover behind the picture, take the silent export into a video editor and add the track there. To pull the audio out of a video and save it as a sound file, use the audio extractor. To change the pitch, tempo or tone of a track, use a dedicated audio editor.
One warning about copyright. Keeping the sound keeps whatever was recorded, including a song playing in the room. Platforms match audio automatically, and a match can get a video flagged, muted or taken down. That is how copyright works online, not a limit of this page. If the original audio is risky, drop it and add a royalty-free track elsewhere. Many libraries are free for personal use and charge a small fee for commercial projects, so read the licence before you share the result.
Your video stays on your device. The browser opens it, decodes it, applies your steps and writes the new file on your own machine. Nothing is sent to a server at any point, which matters here because audio is often the most private part of a recording: names, addresses and conversations that were never meant to travel. There is no watermark, no account and no limit on how often you use it. Disconnect from the internet once the page has loaded and every control still works.
Format and quality
This is the last step in the stack. Everything you set in the other panels is written into the picture here, in a single encoding pass. That matters, because every pass through an encoder throws away detail that cannot come back, the way a photocopy of a photo is never as sharp as the photo. Doing the whole stack at once costs one pass, not one per operation. For the same reason, work from your original file, not from a copy you already compressed. After two or three rounds the loss is easy to see.
A video file is a container holding a video track and usually an audio track. Inside it the picture is compressed with a codec such as H.264 or VP9, and a player has to understand both the container and the codec. That is why a MOV from an iPhone may not open on a Chromebook, and why an older Android phone plays MP4 but not MKV. Converting changes the container and re-encodes the picture so it works where you need it.
The Save as menu is built when the page loads, from the formats your browser can actually write. Nothing in it will fail. MP4 comes first and is the default, so it is what you get if you change nothing. WebM is offered after it. AVI, MKV and MOV are not offered, because writing them needs a full video toolkit, and that means downloading tens of megabytes before the page could do anything. Opening is far more generous than saving: your browser can decode more formats than it can encode, so you can drop in an MKV, a MOV or an M4V and still save an MP4. Leave Save as on MP4 when someone else will watch the file, since MP4 plays on nearly every device made in the last decade. Switch to WebM for a smaller file at the same quality when the video stays in a browser or on Android. MP4 also needs even pixel counts, so an odd size is rounded down by one: 641 becomes 640.
When the file loads, a line of metadata appears under the player. It carries four things and no more: the file name, the file size, the length, and the picture size in pixels. There is no frame rate on it, so do not go hunting for one. Read the line before you touch the settings below. Three more controls sit beside Save as, and they apply to the whole stack:
— Quality (kbps) is the video bitrate, from 200 to 20000, and it starts at 2500. At 2500 kbps, 720p footage looks crisp. At 1000 it starts looking soft. At 5000 it looks very clean but the file is large. A 720p clip sits well at 1200 to 1800, and 1080p at 2500 to 4000. A talking head is usually fine at 1500; fast action wants 3000 or above. Below 800 you get blocky patches wherever things move.
— Frames per second: 24, 30 or 60, and it starts at 30. Match the source, and pick 30 if you do not know it — and you will not learn it from this page, which never displays the source rate. Dropping 60 to 30 halves the frame count and the size, but fast motion looks choppier. Setting a rate lower than the original drops frames; setting a higher one repeats frames, which adds file size for no real benefit. 24 suits talking heads and slides.
— Keep the sound is ticked to start with, and passes the audio through unchanged into the new container. Untick it for a silent clip.
There is no Height box on the page itself. Picture size belongs to the Crop & fit step, so add that step and use its Output size menu. It holds five choices. Small is 480p at 800 kbps, Medium is 720p at 1800 kbps, and Large is 1080p at 4000 kbps. Those three set a height and a bitrate together, and the bitrate they carry overrules the Quality box. A fifth, Set the height myself, shows a Height in pixels box that starts at 720; the first, As big as the crop allows, leaves the size alone and is the default. The width follows on its own, so the shape is kept. Going from 1080 to 720 removes more than half the pixels, which saves more than cutting the bitrate by the same share, and it looks better. Below 480 the picture feels small on a modern screen. Asking for more than the source has achieves nothing, because the step never enlarges: the tool cannot add detail that was never filmed. Leave Output size alone and the picture keeps the size it came in at.
The line beside the export button is your check on all of this before you commit. It gives the output size in pixels, the length of the selection, the steps in the stack in the order they run, and the shortest the export can take, written as "at least" so many seconds — with a warning added at large picture sizes that it will run past that. It never estimates a file size, so do that sum yourself: bitrate times length, divided by eight.
How long the export takes depends on which path it uses. For MP4 and MOV files on a modern browser, the export goes through the browser's own video engine directly: the file is decoded, processed and re-encoded with nothing playing on screen, and it usually finishes faster than the clip length, often several times faster on a capable machine. The progress line tells you when this fast path is in use, and it runs happily in a background tab. Files the fast path cannot read, and older browsers, fall back to the original method: the video plays through once while the browser records it, so a one minute export takes about a minute. On that path, keep the tab in the foreground. Browsers throttle background tabs to save power, and a throttled recording stretches out.
A worked example. A colleague sends you a 45 second product demo shot on an iPhone: a MOV, 90 megabytes. Your slide software only accepts MP4. Drop the file on the page. The metadata line gives the file name, 90 MB, a length of 0:45 and a picture size of 1920 × 1080. Save as is already on MP4, so leave it alone. The demo is sharp and you want to keep its full size, so leave Output size on As big as the crop allows: the export stays 1920 by 1080. Set Quality to 3000 kbps, leave Frames per second at 30, and leave Keep the sound ticked. Press Export in one pass. The finished MP4 downloads at about 17 megabytes, smaller than the original because the original was encoded at a higher bitrate. If your export ever comes out larger than the file you opened, your bitrate was above the one the source was made at, so lower the Quality number, or bring the height down with Output size.
Some caveats. If a file refuses to open, your browser cannot decode that format; Chrome and Edge handle the widest range, so try one of those before giving up. Corrupted files fail too. If a video plays in a desktop player but not here, the codec is one the browser does not support, and a desktop converter is the fallback. Phones work for a clip of a minute or two, but longer files are slow and drain the battery, and a mobile browser may offer fewer entries in Save as. There is no file size limit built in; the real ceiling is memory, because the browser holds the entire export in memory until it finishes. A few hundred megabytes is fine on most machines. For a several-gigabyte file, a desktop tool is more practical. Nothing is uploaded at any point, so you can disconnect from the internet once the page has loaded and every setting here still works. There is no watermark, no account and no cap on how many files you export.