
How to Turn a Song or Voice Recording Into Printable Waveform Art
This article shows you how to use the Waveform Art tool to create a wall-worthy picture from any audio file. You will learn what each style looks like, how to pick colours, how to size the image for printing, and why shorter clips produce better shapes than full-length songs.
What a waveform picture actually shows
A waveform is a graph of loudness over time. Tall spikes are the loud moments. Short dips are the quiet ones. Every recording has its own shape, and that shape can be drawn as an image. A first-dance song, a wedding vow, a child saying their first word, or a favourite guitar solo each produce a pattern that belongs to that recording alone.
The idea became popular as a gift print. You take a meaningful piece of audio, render its waveform at print resolution, add a caption underneath, and frame it. Commercial services sell these prints for a fair price, but they ask you to upload the recording to their server. This tool creates the same kind of image entirely on your own machine, and the PNG downloads straight to your computer.
Getting audio onto the page
Drop any audio file into the landing area, or click to browse. MP3, WAV, M4A, FLAC, OGG, AAC and other common formats all work. You can also drop in a video file. The tool ignores the picture and reads only the soundtrack, so a home movie is just as valid as a song file.
Once the file loads, the waveform draws itself on the canvas and the settings rail appears on the right. From here you shape every part of the final image. There is no limit on file length, but clips shorter than about 30 seconds tend to produce the most interesting shapes, as explained further down.
The five styles and when to pick each one
Mirrored bars is the default. The waveform appears as a row of vertical bars, each one reflected above and below a centre line. This is the classic look you see in most framed prints and social media posts.
Solid block fills the space between the top and bottom of the wave, giving a dense, dramatic shape. Smooth outline draws just the outer edge as a curved line, which feels lighter and more elegant. Single line traces a single curve along the top half only.
Circle wraps the waveform around a ring. The bars point outward from the centre, and the shape of the audio radiates in every direction. This is the style most people choose for a framed print, because it fills a square or a circle mount naturally.
Every control in the settings rail
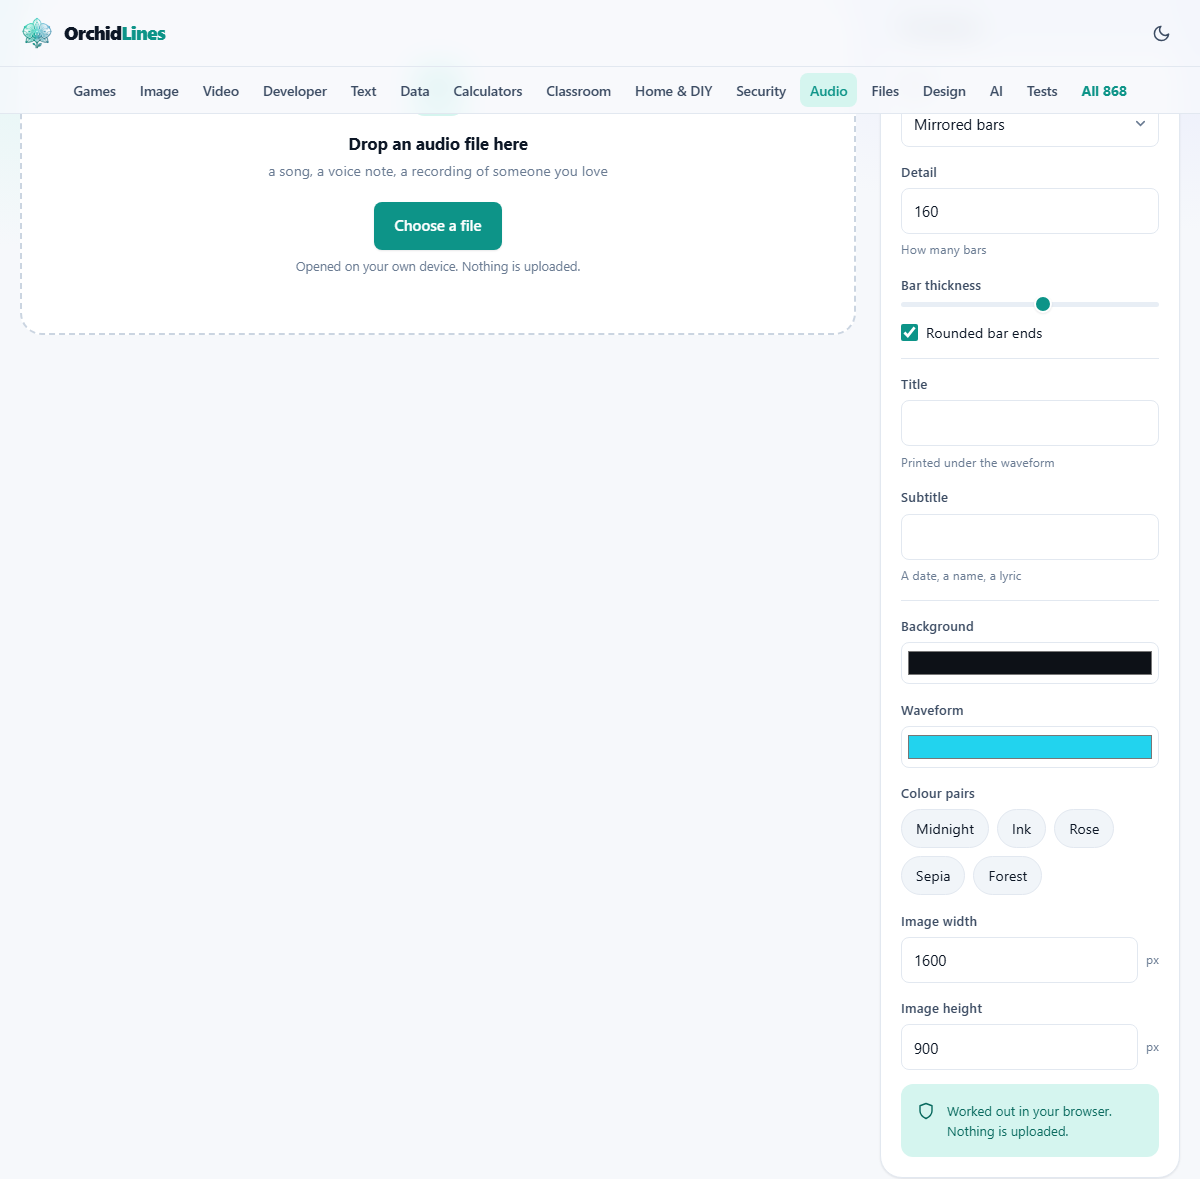
Style picks one of the five shapes listed above. Detail sets how many bars the image contains, from 20 to 600, with 160 as the starting value. More bars give a finer grain. Fewer bars give a bolder, simpler look. For a large print, 200 to 300 bars tend to look best. For a small card or a social post, 80 to 120 keeps things readable.
Bar thickness is a slider from 10 to 100 percent. At low values the bars are thin lines with gaps between them. At high values they nearly touch. Rounded bar ends softens the tip of each bar into a capsule shape instead of a hard rectangle. It is on by default and suits most prints.
Title and Subtitle are text fields printed below the waveform. A common pairing is the song name as the title and a date or a person's name as the subtitle. Both are optional. Leave them blank if you want the waveform on its own.
Background and Waveform are colour pickers. You can set any combination you like, or click one of the five Colour pairs to jump to a tested pairing. Midnight is cyan bars on dark blue. Ink is black on white. Rose is pink on deep purple. Sepia is brown on cream. Forest is green on dark teal.
Image width and Image height set the pixel size of the downloaded PNG. The defaults of 1600 by 900 are good for screen use. For printing, aim for about 300 pixels per inch. A 10 by 8 inch print needs roughly 3000 by 2400 pixels. A 12 by 8 inch print needs about 3600 by 2400.
Worked example: a framed print of a wedding song
You have an MP3 of the song that played during the first dance. Drop it onto the page. The waveform appears as mirrored bars. Change Style to Circle. Raise Detail to 240 so the ring has a fine texture.
Click the Rose colour pair. The background turns deep purple and the waveform turns pink. Type the song title into the Title field and the wedding date into the Subtitle field.
The print will go into a 10 by 10 inch square frame. Set Image width to 3000 and Image height to 3000. Press Download PNG. A large, high-resolution image lands in your downloads folder. Open it to check the colours and the text, then send it to a printing service or print it at home.
If the waveform looks like a solid block with little variation, the full song is too evenly mastered. Go back, select only the chorus or the first verse, and try again. A shorter clip with quiet and loud passages produces a much more interesting shape.
Why shorter clips look better than full songs
Modern music is mastered to be loud from start to finish. The dynamic range, the difference between the quietest and loudest moments, is very small. When the tool draws this as a waveform, the result is a nearly flat block with little visible shape. It is accurate, but not very striking on a wall.
A ten-to-thirty second clip has more visible peaks and valleys. A chorus with a drum break, a passage where the singer drops to a whisper, a laugh in a voice note - these create the hills and dips that make the picture interesting. The tool normalises the waveform so the loudest moment always fills the full height, which means even a quietly recorded voice note will look bold and full.
Tips for getting a good print
Test at screen size first. Leave the dimensions at the default 1600 by 900, try different styles and colours, and only change to print size once you are happy with the look. Rendering a large image takes longer, and you do not want to wait for a 3600-pixel canvas every time you change a colour.
High contrast prints survive printing better than subtle ones. Ink on paper always loses a little range compared to a backlit screen. Midnight, Ink and Forest all hold up well. Light-on-light combinations may look flat once printed.
Match the image proportions to the frame before you download. An image at 3000 by 2400 will not fit a 10 by 10 inch mount without cropping. Decide on the frame first, do the maths, then type the numbers in.
Common mistakes and how to avoid them
Downloading at screen size and then printing it large. An image that is 1600 pixels wide looks sharp on a monitor but soft and blurry when printed at 12 inches. Always set the width and height for print before pressing Download PNG.
Using too many bars on a small image. If the width is only 800 pixels and the detail is set to 400, each bar is less than two pixels wide and the gaps disappear. Lower the bar count or raise the image width.
Forgetting the subtitle. The bottom of the print can feel empty without a second line of text. Even a simple dash and a year looks better than a blank space under the title.
- A 10 by 8 inch print at 300 dpi needs about 3000 by 2400 pixels.
- A 12 by 8 inch print needs about 3600 by 2400 pixels.
- A social media post at 1080 by 1080 fits most feed sizes.
When a different tool is a better fit
If you want an animated waveform that moves with the music in a video, the Audiogram Maker does that job. It creates a video file with the audio playing and the waveform bouncing in time.
If you want to see the waveform to edit the audio rather than to make a picture, a tool like the Volume and Normalise page shows a live waveform with selection and playback controls designed for editing, not for printing.
The file stays on your computer
The recording you load is decoded and drawn entirely inside your browser. The PNG is built locally too. Nothing is uploaded, no account is needed, and no outside service ever hears the audio. That matters most when the recording is something personal, like a loved one's voice, a private vow, or a child's first words. The picture is yours from start to finish.