
Changing an audio file into the format you actually need
Which files this page can open, what the channel and sample rate menus do to the size and the sound, how to read the little estimate beside the Convert button, and a long recording taken from eight hundred megabytes down to seventy.
Why anyone converts audio at all
Converting means unpacking a file back into plain sound measurements, then writing those measurements out again in a different wrapper. The sound in the middle is the same sound; only its packaging changes.
People come to that for two reasons. Either something refuses to open a file, or something is too big to move.
- A voice memo from a phone that an editing program will not import.
- A recording of a meeting that is far too large to attach to an email.
- An interview that a transcription service wants as mono at a low rate.
- A lossless album that eats the free space on a phone.
- A sound effect handed over in a format the rest of a team cannot play.
- A file you want as WAV before dropping it into a video timeline.
What it will open, and what it will not
The opening side is wide, because your browser already knows how to unpack the common formats. MP3, M4A, AAC, OGG, Opus, FLAC, WAV and WebM audio all go in without complaint.
The saving side is narrower, and the page is honest about it. You get WAV plus whichever compressed formats your particular browser is willing to write, which in practice means M4A, WebM or OGG.
MP3 is the one that is missing, and it is missing everywhere rather than only here. No browser carries the code to create one, so this site supplies it: a small open-source encoder is loaded the first time you save an MP3. M4A is the sensible swap: same sort of size, same sort of quality, and it opens on the same phones, cars and players.
If a file cannot be unpacked, a short message says so and suggests MP3, WAV, M4A or OGG instead. The usual cause is an older format such as .wma. Video files are not what this page is for either; take the sound out of them first.
The facts line and the waveform
As soon as the file is open, a row of facts appears: the name, the length, mono or stereo, the sample rate and the peak level.
Sample rate is how many times a second the sound was measured, given in kHz, which is thousands per second. Peak is the loudest single instant, in decibels counting down from zero, where zero is the highest a digital file can go.
Below the facts sits the drawing of the sound, with a small bar of controls under it. Play starts and stops, and so does the space bar. Select all marks the whole file. The minus and plus buttons zoom out and in, with the current zoom shown as a percentage between them. Zoom to selection fills the view with the part you marked, and Fit puts the whole file back on screen.
You can drag across the drawing to mark a stretch, drag the edges of that mark to adjust it, and roll the wheel to zoom around the pointer. Once you are zoomed in, a scroll bar with an arrow at each end appears so you can travel along the recording.
All of that is for listening and checking. The Convert button always writes the whole file, so use the marker to inspect a passage, not to cut one out.
The settings, and what each one costs you
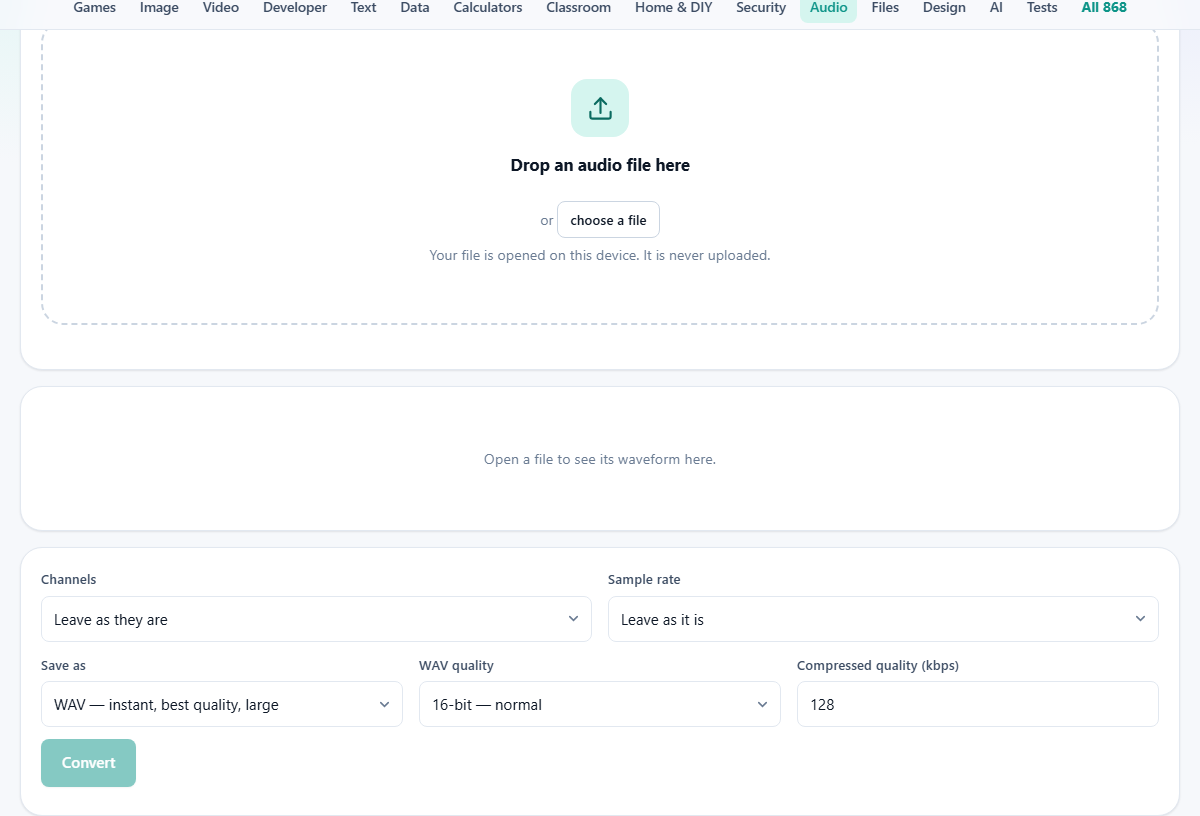
Channels offers Leave as they are or Mix down to mono. Folding two channels into one halves the amount of sound to store. On a voice recording that is free money, because a single speaker gains nothing from stereo. On music it flattens the sense of space, so think first.
Sample rate offers Leave as it is, then 48 kHz for video work, 44.1 kHz for the compact disc figure, 32 kHz, 22.05 kHz and 16 kHz for speech. The rule behind those numbers is simple: a file can only hold pitches up to a little under half its rate. At 16 kHz that ceiling is around 8 kHz, which is above everything the human voice does, and well below what a cymbal needs.
Save as lists the formats, each labelled with what it will cost in time. WAV quality applies only to WAV, and picks how finely each measurement is stored: 16-bit for normal use, 24-bit for studio work, 32-bit float for material going into more editing.
Compressed quality is a number in kilobits per second, from 32 to 320, starting at 128. It is the budget the encoder is given for each second of sound. Speech is comfortable near 64, music is usually happy around 128 to 192, and pushing past 256 mostly buys size rather than quality.
Reading the estimate before you commit
Beside the Convert button sits a short line in the shape of MP3 to WAV, instant. Change the Save as menu and it changes with you, because the two paths behave completely differently.
WAV writes the measurements straight to disk. Nothing has to be worked out, so it finishes as fast as your machine can save a file, whatever the length.
A compressed format has no such shortcut in a browser. The sound has to run through the encoder at its natural speed, so the line switches to takes about so many seconds, and that number is the length of your recording. Ten minutes of audio means ten minutes of waiting, with a progress bar to watch.
Mixing to mono and changing the sample rate are not the slow part. Both are done on the raw measurements and are over in moments, even on a long file.
When a compressed conversion is running, leave the tab open and stop the machine from going to sleep. It is a recording being made in real time, and interrupting it interrupts the file.
What lands at the end
A Result panel appears when the work is done, and the page scrolls you to it. Inside is a small player, the name of the new file, its size, and a Download button.
Play it there before you save it. That five second check catches the wrong sample rate, the wrong channel choice and the occasional file that was already damaged before you started.
The name is your original with the new ending, so podcast.mp3 comes back as podcast.wav or podcast.m4a. Nothing is written to disk until you press Download.
Open a different file and the Result panel clears itself, which stops you downloading a finished job that belonged to the file before it.
A lecture recording, cut down to size
A file called seminar.wav is dropped in. The facts read 38:12 long, stereo, 44.1 kHz, peak minus 2.1 dB, and the file itself is just over 400 MB. It has to go on a course page, and nobody is downloading that.
It is one voice in a quiet room, so set Channels to Mix down to mono and Sample rate to 16 kHz for speech. Leave Save as on WAV and press Convert.
The Result panel appears almost at once with seminar.wav at about 70 MB. Two settings and no waiting took nearly six sevenths of the size away, and the speech sounds the same, because none of what was thrown out was carrying any of it.
If it needs to be smaller still, change Save as to the M4A entry and set Compressed quality to 64. The estimate line now warns that it takes about 2,292 seconds, which is the thirty eight minutes of the recording. That run brings the file under 20 MB, and it is a fair trade when the alternative is a page nobody can load.
Do it in that order, though, and only once. Every pass through a compressed format throws detail away for good, and no later conversion brings it back.
Mistakes worth not making
- Hoping that a bigger format repairs a poor recording. Saving a thin, low quality file as 24-bit WAV gives you a large file that sounds exactly as thin as before.
- Using 16 kHz on music. Cymbals, strings and air all live above that ceiling, and they will simply be gone.
- Marking a section and expecting the conversion to keep only that. The marker does not trim; the whole file is written every time.
- Converting from a copy that has already been squeezed twice. Go back to the best version you have and convert once from that.
- Choosing 32-bit float for something that has to play on a phone. It is an editing format, and it doubles the size for no benefit outside a studio.
- Leaving stereo switched on for a solo voice, then wondering why the file is twice as big as it needs to be.
When another page fits the job better
- To keep only part of a recording, the Audio Cutter trims first and saves you converting what you are about to throw away.
- For the sound inside a video file, Extract Audio from Video pulls it out and hands you a file to bring here.
- If the problem is that a recording is too quiet rather than too big, Volume and Normalise is the right page.
- To fix the title and artist that a player shows, the MP3 Tag Editor writes those without touching the sound.
- To swap sides, pull out one channel or repair a phase problem, Channel Tools goes far beyond the mono option here.
- To cut long gaps out of a talk before shrinking it, the Silence Remover does that work first.
The file never leaves your machine
There is no upload step hiding behind the Convert button. Your browser reads the file from your own disk, unpacks it in memory, does the work there, and offers the result back as a download.
You can test that yourself by disconnecting after the page has loaded. Everything still works, because there was never another computer involved.
The only real limit is memory, since the whole recording is held while you work on it. Files up to an hour are comfortable on most computers. Beyond that, split the recording into parts and convert them one at a time.
Nothing is kept when you are done. Close the tab and both the original and the result are gone from memory, which is the behaviour you want for anything private.