
Splitting a long recording into named tracks with one download
A concert recording, a vinyl rip, or a mixtape lands on your computer as one big file. You want separate tracks with proper titles, not a single blob you have to scrub through every time you want the third song. This article covers every control on the track splitter, explains the three ways it finds where to cut, walks through a real example, and explains the format and tagging details that matter when the files reach your music player.
How the tool finds the boundaries
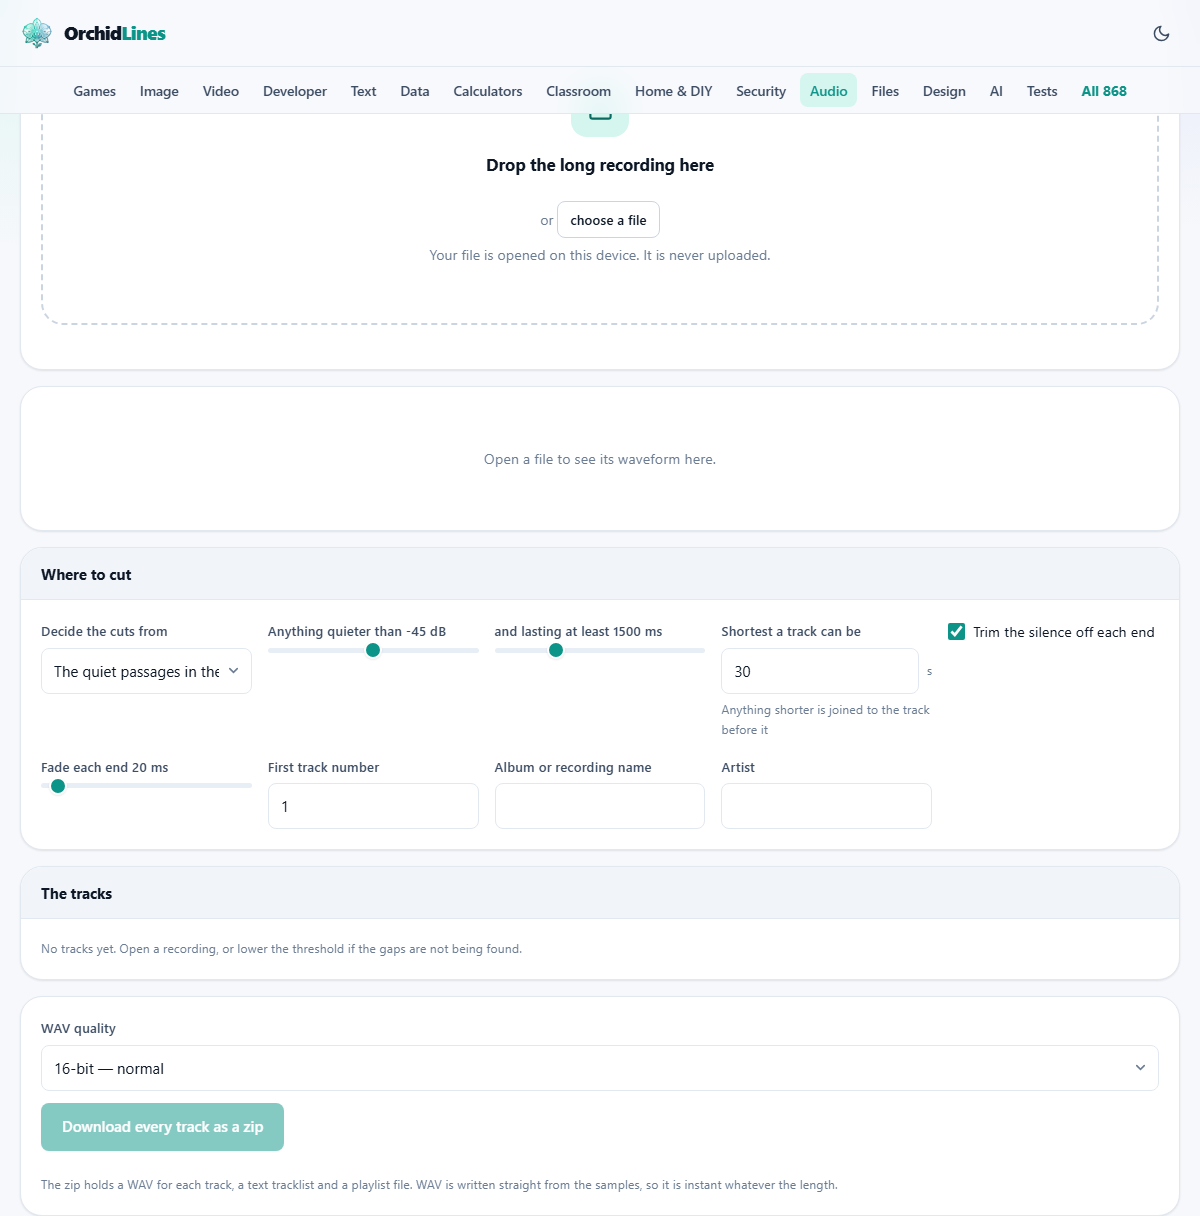
The Decide the cuts from dropdown gives three options. The quiet passages in the recording is the default. The tool scans the audio, finds every spot where the level drops below a threshold for long enough to count as a gap, and marks each one as a track boundary. A tracklist or CUE sheet I already have lets you paste times and titles directly, and the tool cuts at those exact positions. Equal lengths divides the recording into a set number of pieces of the same size.
Silence detection is the right choice when your recording has clear pauses between tracks. A tracklist is better when the music is continuous, like a beat-matched DJ mix with no gaps at all. Equal lengths is a quick way to chop a long lecture or podcast into manageable chunks without caring about content.
Adjusting the silence detection
Two sliders control how the quiet passages are found. Anything quieter than sets the threshold, measured in decibels. The default is minus 45 dB. If the tool finds too many tracks, the threshold is too high and it is treating soft passages as gaps. Lower the slider. If it finds too few, raise the slider until the real gaps show up.
And lasting at least sets the minimum gap length in milliseconds, from 200 to 5000. The default is 1500 ms, which is about a second and a half. This stops brief pauses within a song from being treated as track boundaries.
Shortest a track can be is a safety net. Anything shorter than this value in seconds is joined to the track before it. The default is 30 seconds. That stops a dramatic silence in the middle of a song from splitting it in two. For most albums, 30 seconds works well. For recordings with very short pieces, lower it.
Using a tracklist or CUE sheet instead
Switch the dropdown to A tracklist or CUE sheet I already have. A text box appears. Type or paste one track per line, with the start time first and then the title. For example, 0:00 Opening Theme on the first line, 3:42 Second Track on the next, and so on. The tool reads each time and cuts at that position.
A CUE sheet pasted straight in works too. CUE times look like 03:42:37, where the last number is not hundredths of a second. It is CD frames, and there are seventy-five of them in a second. The tool reads these correctly, which matters because treating them as hundredths puts every cut about half a second too early. Press Use this list after pasting, and the track list updates to match.
Naming, numbering and tagging the output
Each track in the list can be renamed by typing over its title. The Album or recording name field writes an album tag into every finished file. The Artist field does the same for the artist. First track number sets where the numbering starts, which is useful if you are splitting just the second side of a record and want to begin at track six.
Every finished WAV file carries its title, artist, album and track number stored inside the file header, in the same block that music players and taggers have always read. The file name also includes the track number and title, so the files sort correctly in any folder. This means the tracks are ready to drop into a music library with no extra tagging step.
Previewing before you commit
Each track in the list has a listen button. It plays exactly the audio that will end up in that file, starting and ending at the detected boundaries. This lets you check whether the cut fell in the right place before building all twelve files.
If a cut is wrong, adjust the threshold or the minimum gap and the list rebuilds. For tracklist mode, edit the time in the text box and press Use this list again. The waveform at the top also helps. You can drag across it to select a region, zoom in with the scroll wheel, and press space to play or stop. The timeline ruler shows exactly where each track begins.
Downloading the result as a zip
Press Download every track as a zip. The tool writes one WAV file per track, all packed into a single zip archive. The WAV quality dropdown lets you pick 16-bit for normal use or 24-bit for studio work. Saving happens instantly because WAV is written straight from the raw samples with no encoding step.
Inside the zip you also get a text tracklist and a playlist file, so the album plays in order on any player that reads playlists. The zip downloads to your computer as a single file, and your original recording on disk is never changed.
A worked example - splitting a vinyl rip
You recorded one side of a record as a single WAV file. Drop it onto the page. The waveform loads, and the track list fills in with entries based on the gaps between songs. Suppose it finds seven tracks where the record has six. One of the songs has a long quiet passage in the middle, and the tool treated it as a gap.
Raise Shortest a track can be from 30 to 60 seconds. The short fragment gets merged into the track before it, and now you have six entries. Type the song titles over the default names. Fill in the album name and the artist. Press the listen button on the first and last track to check the boundaries sound clean.
The Trim the silence off each end checkbox is on by default, which removes the dead air at the very start and end of each track. The Fade each end slider is set to 20 milliseconds, which puts a tiny fade on each cut to prevent clicks. These defaults are usually fine. Press Download every track as a zip, and you get six properly titled, properly tagged WAV files in one archive.
Why the output is WAV and not MP3
Compressed formats like M4A or OGG require the browser to play the audio through in real time to encode it. For twelve tracks, that would take as long as the entire recording. WAV is written directly from the samples and finishes in a fraction of a second per track, no matter how long the music is. If you need smaller files, convert the WAV files afterwards using a dedicated converter.
Troubleshooting common problems
If the list shows only one track, the recording never gets quiet enough to register as a gap. This is common with vinyl or cassette recordings where surface noise fills the gaps. Raise the threshold slider until the gaps appear. For a noisy source, you may need to go as high as minus 25 dB.
If titles do not appear in your music player, check that the player reads WAV tags. Most modern players do, but a few older ones only look for tags in MP3 files. In that case, convert the WAV files to MP3 using a converter that copies the tags across.
If the first or last track has a long stretch of silence at its edges, make sure the Trim the silence off each end checkbox is ticked. It removes the dead air before the first note and after the last. The fade slider adds a short crossfade at each cut point, which prevents the faint click you sometimes hear when a waveform is sliced at a non-zero crossing.
Privacy and local processing
The entire recording stays on your device. It is read, split and packaged into a zip without ever leaving your browser. No audio is sent to any server at any point. You could disconnect from the internet after the page loads and the splitter would work exactly the same way. That is true even for very large files - hour-long concert recordings are processed locally just like short ones.