
Getting a fan, a hum or a hiss out of a recording
A steady background sound can be measured and then subtracted. That is what this page does, and doing it well is mostly about which half second you point it at. Here is what each field changes, how long a job really takes, what the saved file looks like, and the handful of habits that separate a clean result from a bubbly one.
The kind of noise that can be taken out
Some noise never stops. A laptop fan, an air conditioner, the buzz of mains power in a cheap microphone, the hiss on an old tape. It sits under the whole recording at more or less the same level from start to finish. That steadiness is what makes it possible to measure and remove.
Typical jobs: a video call recorded near a cooling unit, a lecture caught on a phone by a projector, a family cassette copied to a computer, a voice memo made in an idling car. In each of these the useful sound is much louder than the background, and the background barely changes.
Two terms are worth pinning down first. The noise floor is the quiet layer of sound that is always there under everything else. A frequency band is one slice of the sound, sorted by pitch, the way a piano sorts notes from low to high. This tool measures the noise floor in hundreds of bands, then turns down every band sitting at that level.
Opening a recording
Drag a file onto the panel or click it to pick one. The picker will offer MP3, WAV, M4A, AAC, OGG, Opus, FLAC and WebM audio. Whether a particular file actually opens depends on the decoders built into your browser, and browsers differ; the widest coverage is in Chrome and Edge.
If your browser cannot read it, a red line appears saying so and suggesting MP3, WAV, M4A or OGG instead. Drop something that is not audio, such as a document, and a short warning says the file was skipped as the wrong type.
Once it opens, a small list gives the file name, the length, mono or stereo, and the sample rate, which is how many times a second the sound was measured when it was recorded. Under that sit two picture strips: the original in grey, and, after you run the job, the cleaned version in teal.
Pointing it at the right half second
The whole job rests on this step. The tool must hear the noise on its own before it can recognise it elsewhere. Two fields tell it where to listen.
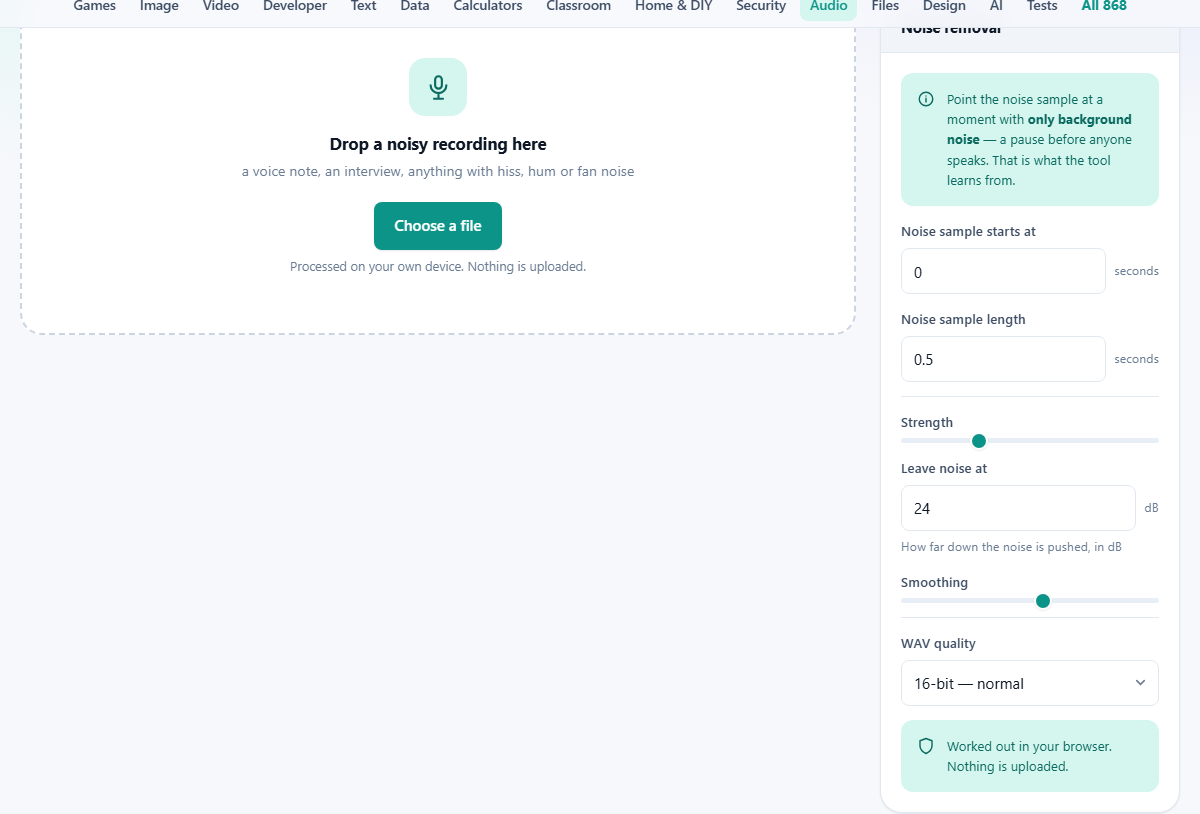
Noise sample starts at is a time in seconds, moving in tenths, starting at 0. Its upper limit is set from the file itself, ending just short of the last moment. Noise sample length is also in seconds, from 0.1 up to 5, and starts at 0.5.
A red band on the grey picture shows the stretch you have chosen, and it moves as you change either number. Get in the habit of looking at it. If part of that band sits over a bump in the wave, something was making a sound there, and it will be treated as noise and removed from the whole recording.
Ask for a stretch that is too short and a message says the sample needs at least a tenth of a second of pure background. Half a second of real silence is plenty; a whole second is better.
The three settings that shape the result
Below the sample fields sit the controls that decide how hard the tool works.
- Strength is a slider from 50 to 400 per cent in steps of 10, starting at 150. It scales the measured noise level before the tool decides what counts as noise. At 100 it removes roughly what it measured. At 150 it removes half as much again, which catches noise that varies a little. Past about 250 the edges of words start to go too.
- Leave noise at takes a number of decibels from 6 to 60 and starts at 24, and the page describes it as how far down the noise is pushed. A decibel compares two loudnesses; every 6 dB is roughly a halving. So at 24 the quietest bands end up near a sixteenth of their old level rather than at true silence. That leftover is deliberate. Perfect silence between words sounds unnatural; a faint trace of room sounds like a room.
- Smoothing is a slider from 0 to 90 per cent in steps of 5, starting at 50. The tool works through the file in short overlapping blocks, deciding afresh for each. Smoothing carries each decision partly into the next block, so the level cannot jump about. More is steadier, but slower to react to a sudden loud word.
Running it, and how long that takes
The button at the top of the recording panel says Remove the noise. Press it and the status line says it is analysing the noise, then that it is removing noise and this takes a moment. When it finishes, a green line reports how far the overall level fell, such as down 2.8 dB, and reminds you to listen to both versions before saving.
The work is real arithmetic on every block of the file, done by your own processor. As a rough guide, a half minute voice note in mono is done in a few seconds. A ten minute stereo interview can take a minute or two on an ordinary laptop, and longer on a phone.
While it runs, the page will not respond and there is no moving bar. That is expected, not a fault. Stereo costs twice as much as mono, so for speech in a hurry, mixing to one channel first on the Channel Tools page roughly halves the wait.
Comparing before and after
Three buttons sit above the pictures: Play original, Play cleaned and Stop. Playing starts at the beginning and runs to the end, so Stop is the button you will use most. Play cleaned only wakes up once a result exists.
Your ears are the judge, not the pictures, but the pictures are worth a glance. The quiet gaps in the teal strip should be flatter than the grey one while the loud parts stay the same height. If the loud parts have shrunk too, speech is being eaten along with the noise. Use headphones if you can; small laptop speakers hide both the noise and the damage.
Saving the cleaned file
One button, Save as WAV, and one menu above it. The menu offers 16-bit for normal use, 24-bit for studio work and 32-bit float for anything going into further editing. Sixteen is right unless you have a reason.
The download takes your file name and adds -denoised.wav, so panel-talk.m4a comes back as panel-talk-denoised.wav. WAV is written straight from the samples and appears at once, but it is big: roughly 10 MB a minute for 16-bit stereo at CD rate, half that for mono.
There is no compressed option here, since a lossless file is the right thing to hand to an editor or a transcriber. If you need something small for a phone or an email, put the WAV through the Audio Converter afterwards.
A full pass on a noisy panel talk
Here is a real session. The file is panel-talk.m4a, twelve minutes, stereo, recorded in a hall with a ceiling vent running throughout. Playing the start shows nobody speaks for the first second and a half.
Set noise sample starts at to 0.2 and noise sample length to 0.8. The red band lands in the quiet at the front, clear of the first speaker. Leave strength at 150, leave noise at 24, and smoothing at 50. Press Remove the noise and wait about a minute and a half.
The green line reports the level down 2.8 dB. Play cleaned and the vent has gone, but the ends of some words have a faint ringing tail, like a small bell. That is the classic sign of working too hard. Drag strength down to 110, raise smoothing to 70, and run it again.
Now the vent is quieter rather than absent, and the ringing has gone. That is the better result. Save at 16-bit and you get panel-talk-denoised.wav, around 120 MB, ready for editing.
What goes wrong, and the fix
- It sounds bubbly or watery. The tool was set too hard. Pull strength down in steps of 20 and raise smoothing towards 70 or 80, then compare again.
- Part of the speech vanished, or voices sound hollow. A word crept into the red band. Move the sample to a stretch that is genuinely empty and run it again.
- Almost nothing changed. Either the sample landed on silence with no noise in it, or the noise you are hearing is not steady at all.
- It started well then got worse halfway through. The noise changed, perhaps a fan cut in. Cut the recording into pieces with the Audio Cutter and give each piece its own sample.
- It sounds thin on music. Strong removal takes the air off cymbals and strings. Music tolerates far less of this than speech does.
Noise this method cannot touch
A door slam, a dog, a passing car, a scraping chair, a cough: none of these are in the sample, so none can be found. Nothing you do to the sliders changes that. They need cutting out by hand, and the Audio Cutter or the Silence Remover is the page for it.
Other jobs get confused with this one. If the recording is simply too quiet, that is a level problem and the Volume and Normalise page fixes it in seconds. If a low rumble is the only trouble, cutting the bottom band on the Equaliser is quicker and harms nothing else. To see what your noise looks like first, the Spectrogram Viewer draws it.
Your recording stays where it is
Nothing here sends audio anywhere. Your browser opens the file from your own disk, turns it into numbers in the memory of that tab, and the maths runs on your own processor. Close the tab and the numbers are gone.
That matters more here than on most pages, because the recordings people clean up are so often private: a medical appointment, a legal meeting, a family tape. None of it travels. Load the page once, switch the network off, and the tool works just the same.