
One long picture from a stack of screenshots
Phones and laptops capture one screen at a time, but conversations, receipts and web pages rarely fit on one screen. Here is how the stitcher joins a series of captures into a single continuous image, what every control in the panel changes, and how to rescue a join that came out wrong.
The job in plain terms
You scrolled through something long, capturing as you went, and now you hold four or five overlapping pictures of the same page. Joining them by hand in an editor means nudging each one into place and hoping the seams do not show. This tool does the nudging for you: it lines the captures up end to end, works out where one ends and the next begins, cuts away the repeated strip, and hands back one tall seamless image.
People reach for it to keep a whole chat conversation as evidence, to save a full order confirmation, to share an entire article in one picture, or to file a complete bank statement view without ten separate files. It joins sideways too, for anything that grows left to right.
Capturing pieces that will join well
The quality of the join is decided before you ever open this page. While scrolling, move by roughly two thirds of a screen each time, so that every capture repeats a decent band of what the previous one showed. The matching needs that shared band to find its footing.
Keep the zoom level and window size identical for the whole run, and watch out for anything pinned to the screen. A bar that stays put while the content scrolls, such as a menu locked to the top or a floating chat bubble, is genuinely present in every capture at the same spot, so it will dutifully appear at every seam. Crop such bars off each capture first and the result comes out clean.
Getting them in, and in order
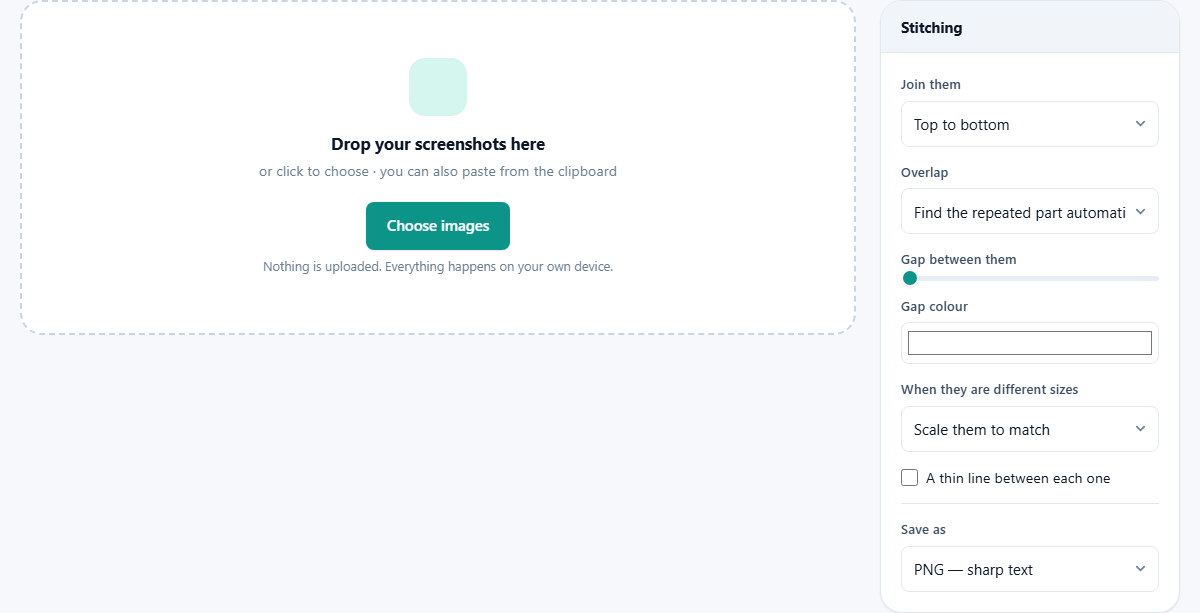
Drop the whole set onto the page at once, click Choose images, or paste a capture straight from the clipboard. Photo formats from phones, including HEIC, are accepted alongside the usual PNG and JPG.
The files appear in a list, and their order in that list is the order they will be joined, top first for a vertical join. If two landed in the wrong sequence, the arrows on each row move them up or down. Add more slots extra captures into the set, and Clear all abandons the lot. Below the list, a live preview shows the current joined result, and it redraws whenever you touch a setting, so you can watch the effect of every change before downloading anything.
The overlap choice is the heart of it
The Overlap menu has three positions, and choosing well here is most of the skill. Find the repeated part automatically is the default and the right pick for scrolling captures. It compares strips of pixels near the join, hunts for the shift where the two pictures agree, and removes the duplicated band.
No overlap, join them end to end is for pictures that never shared any content in the first place: three separate receipts, say, stacked into one tall image for a single upload. Nothing is removed, because nothing repeats.
A fixed amount I set below hands control to you. The Overlap amount slider then trims a set percentage, up to sixty, off each join. Use this when the automatic match has been fooled, which happens when the shared band is nearly blank, since a plain white strip matches equally well at every possible shift. Nudge the slider while watching the preview until the seam disappears.
Direction and mismatched sizes
Join them offers Top to bottom or Left to right. Vertical suits scrolled pages; horizontal suits wide spreadsheets captured in slices, or a row of screens placed side by side for comparison.
When the captures are not all the same width, the setting called When they are different sizes decides what happens. Scale them to match resizes everything to a common width so the content lines up across the seam, which is what you want when the same page was captured on two devices. The other three choices keep each picture at its own size and simply line them up at the start, the centre, or the end of the row, leaving the shorter ones padded. Those suit deliberate side-by-side arrangements rather than continuous content.
Gaps and divider lines, when seams should show
Sometimes you want the opposite of seamless. A set of steps in a tutorial, or three design options shown to a client, reads better when each piece is visibly separate. Gap between them pushes the pictures apart by up to eighty pixels, and Gap colour fills the space with any colour you pick; white gutters between phone captures look tidy on a light page. Ticking A thin line between each one draws a hairline at every junction instead of, or as well as, a gap.
For a genuine continuous stitch, leave the gap at zero and the line off, since any visible boundary would defeat the point.
Worked example: a chat thread in four captures
Say you need to keep a conversation about a delivery dispute. You scroll the thread and take four captures, each repeating the last few messages of the one before. Drop all four onto the page. The list shows them in capture order, but the third and fourth arrived swapped, so one press of an up arrow fixes the sequence.
Leave the direction on Top to bottom and the overlap on automatic. The preview redraws into one tall conversation, and scrolling through it shows each seam has vanished; no message appears twice and none is missing. One join looks slightly off because the shared band was mostly empty background, so switch to the fixed overlap, slide to about eighteen percent, and watch that seam close up. Choose PNG, press Download, and one complete, readable thread lands in your downloads folder.
Saving: format, quality and length limits
Save as offers PNG for sharp text or JPG for a smaller file, with a Quality slider that applies to JPG. Captures of screens are nearly always full of text, and JPG compression smears faint coloured fringes around every letter, so PNG is the right default here even though the file is bigger. Reach for JPG only when the content is photographic or the file must squeeze under an upload limit.
There is also a practical ceiling on length. The joined result is built as one single image in memory, and a browser will only allocate so much for one canvas. Dozens of tall captures can pass that limit. If a monster stitch fails, split it into two halves and join each separately.
When the result looks wrong
A quick diagnosis list for the common failures.
- The same strip appears at every seam: something was pinned on screen during capture. Crop it from each piece and stitch again.
- A seam cuts a line of text in half: the automatic match found a false agreement. Switch to the fixed overlap and set it by eye against the preview.
- Everything joined but nothing was removed: the captures may not truly overlap, so the automatic search found no repeat. Recapture with more shared content, or accept an end-to-end join.
- Text turned fuzzy after saving: the file went out as JPG. Save again as PNG.
- Pieces sit at different widths: set the size handling to Scale them to match.
A sideways job: three slices of a wide table
The horizontal mode gets less use and deserves a walkthrough of its own. Imagine a budget sheet far too wide for the screen, captured in three slices as you scrolled sideways, each slice repeating two or three columns of the one before.
Load the three, set Join them to Left to right, and leave Overlap on automatic. The repeated columns disappear and the row of totals runs unbroken from one end to the other. If one join refuses to settle, the likely reason is a band of empty cells in the shared strip, which looks the same at every possible shift. Switch to the fixed amount and creep the slider up from ten percent until the column headings meet correctly. Keep Gap between them at zero so the grid lines stay continuous, and save as PNG so the small figures stay legible.
Tools that pair well with this one
A stitch is often the middle step rather than the last one, and a few neighbouring pages on this site handle the steps either side.
- Before joining: the cropping tool trims a pinned menu bar or a status row off each capture, which is the single best cure for a repeated strip at every seam.
- After joining: the face blur and the block censoring tools hide names, account numbers and photographs before the picture goes to anyone else.
- For a bug report or a how to guide: the annotation tool adds arrows, boxes and notes on top of the finished long image.
- If the PNG is too heavy to email: the compressor will shrink it, though check the text still reads cleanly afterwards.
What this is not built for
The matching slides one flat picture against another until they agree, which is exactly right for screen captures, scans and documents. Camera photos of a real scene are another matter: a panorama needs rotation, lens correction and blending, none of which happens here, so overlapping holiday photos will not merge into a landscape. Likewise, if you want a grid of many pictures arranged in rows and columns, that is a collage layout rather than a linear join.
One more point worth stating plainly: screen captures are among the most private pictures a device holds, full of names, balances and messages. Everything this page does to them happens in your browser's own memory, on your machine. The captures are never transmitted, and the joined image exists nowhere until you download it to your own disk.