
Turning a phone snap into an ID photo you can print at a kiosk
An ID photo is a physical object with a size in millimetres. That is the awkward part, because a phone gives you a picture measured in pixels. This page bridges the two, then lays copies out on a print sheet so one cheap print gives you a set. Here is what each control does, how many copies you get, and how to work through a whole job.
Why millimetres come first
Passport offices do not ask for pixels. They ask for a piece of paper of a certain width and height. So this tool starts from the millimetres your country wants and works out the pixels from them, using the print resolution you pick.
That order matters. Crop first and print later and you are guessing whether the file has enough detail for paper. Here it is built to the finished size from the start, so the output has the same dimensions whether you fed it a huge camera file or a modest phone photo. The crop comes from the middle of your picture and is never squashed: the tool takes the largest rectangle of the right shape, then lets you push it around.
The jobs people bring here
- A passport renewal, where the form wants a file uploaded and the counter wants prints.
- A visa application, which often asks for a different size from your own passport.
- Student cards, staff badges, library cards and gym memberships.
- Exam entry forms, driving licence paperwork and bank applications.
- A family doing several of these in one evening, which is where the print sheet saves real money.
Country / size
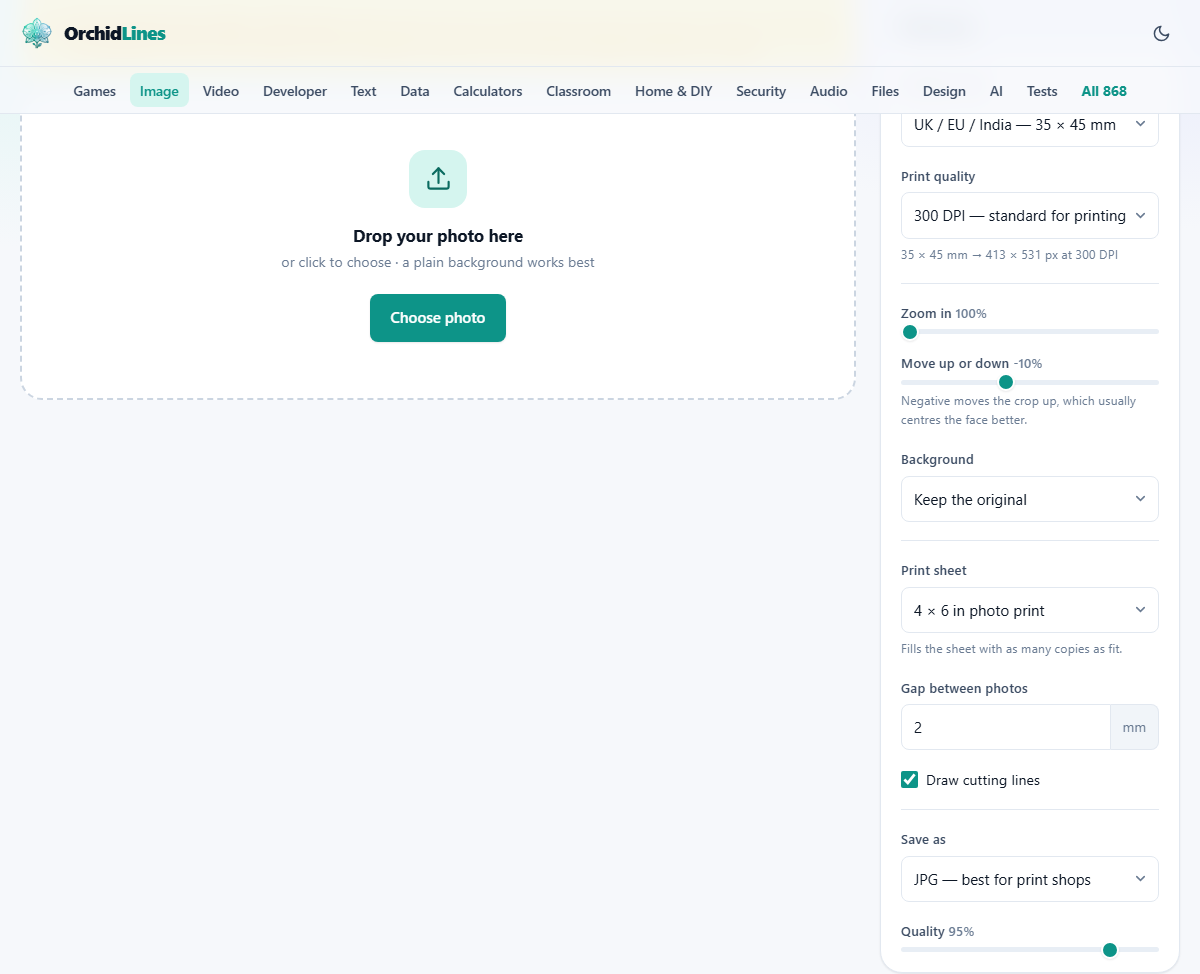
The first menu holds the sizes people actually need, with the millimetres written into each entry so you can check them against your own form rather than trusting a country name.
- UK / EU / India at 35 by 45 mm, the most widely used size of all.
- USA at 2 by 2 inches, shown as 51 by 51 mm, square and noticeably larger.
- Canada at 50 by 70 mm, larger again and a taller shape.
- Australia and Japan, both 35 by 45 mm, listed separately so you can pick by name.
- China visa at 33 by 48 mm, narrower and taller than the common size.
- Schengen visa at 35 by 45 mm, and an ID photo size of 25 by 35 mm for staff and student cards.
- Custom size, for anything not on the list.
Custom size in millimetres
Choose Custom size and two small boxes appear, marked W and H. Each takes a whole number of millimetres between 10 and 200, and they start at 35 and 45.
Use them when your form quotes a size you do not recognise, or when a local office wants something odd such as a wide badge photo. Type the two numbers and everything after them, including the sheet layout, follows the new shape.
Print quality, and the line that tells you the pixels
Print quality offers 300 dots per inch as the standard for printing, 600 for extra sharpness, and 150 for screen use only. Dots per inch is how many dots of ink are packed into each inch of paper, so a higher number means more pixels for the same physical size.
Underneath the menu a line of text does the sum for you and updates as you change anything. Pick 35 by 45 mm at 300 dots per inch and it reads 413 by 531 pixels. Pick the American square at the same setting and it reads 600 by 600.
Stay on 300 unless you have a reason not to. It is what print shops expect. 600 doubles every number for a difference you will not see. 150 looks fine on a screen and soft on paper, and a soft print is one of the reasons photos get handed back.
Framing the face with two sliders
Zoom in goes from 100 to 260 per cent and starts at 100. At 100 the tool uses as much of your photo as the shape allows, so there is usually too much room around the head. Raising it takes a smaller piece of the original and enlarges it, bringing the face forward.
Move up or down goes from -50 to 50 per cent and starts at -10. Negative numbers slide the crop upwards, which is nearly always what you want: a centred crop puts the chin in the middle and wastes the top half on wall.
Work the two together while watching the preview. Zoom until the head and shoulders fill the frame, then nudge the other slider until a small gap sits above the hair. Nothing here finds a face for you, so this is your judgement.
The Background menu, and what it does not do
Background has two settings. Keep the original leaves your photo as it is. Fill behind see-through areas paints a colour, chosen in the picker below and starting at white, behind any transparent part of the picture.
Read that second option carefully. It fills gaps that are already see-through, which is what you need for a PNG whose background was removed elsewhere. It does not remove a wall from an ordinary photo. If your wall is the wrong colour, deal with that before you come here.
The print sheet, the gap and the cutting lines
Print sheet decides what you download. Single photo only gives one image at the size you chose, which is the setting for an online upload. The other four lay copies across a page: a 4 by 6 inch photo print, a 5 by 7 inch print, A4 paper or A5 paper. Copies are centred on white and the sheet is filled with as many as fit.
Gap between photos takes millimetres from 0 to 10 in half-millimetre steps and starts at 2. Widen it and the number of copies drops, because there is less room. With 35 by 45 mm photos on a 4 by 6 print, 2 mm gives four across and two down, so eight copies. Push the gap to 5 mm and it becomes three across and two down, so six copies with more room for scissors.
Draw cutting lines stays ticked by default and outlines each copy in a thin dark rectangle. Cut just inside the line and no dark trace is left on the finished photo.
Getting the file out
Save as offers JPG, marked as best for print shops, or PNG. Quality runs from 70 to 100 and starts at 95, which is right for something being printed. Print counters handle JPG without complaint, so leave it there unless a form demands PNG.
A preview panel sits above the file list and reports the finished pixel size, with a Show original tick box for comparison. When a sheet is selected the preview shows the whole sheet, so the size given is the sheet, not one photo.
Press Make photo. Each file gains a Save button, and with two or more done a Download all as ZIP button appears. Saved files carry your name with -passport added.
A renewal, worked through
Stand about a metre from a plain light wall, facing a window, and have someone take a photo on a phone. It comes out 3024 by 4032 pixels. Drop it in and pick UK / EU / India at 35 by 45 mm. The line under Print quality reads 413 by 531 pixels at 300 dots per inch.
The first preview shows far too much wall. Push Zoom in to 150 and the head and shoulders fill the frame. Move up or down sits at -10, which is close, but the crown is tight against the top edge, so ease it to -18.
Leave Print sheet on the 4 by 6 print, the gap at 2 mm and the cutting lines ticked. The preview now shows eight copies on a white page and reports 1800 by 1200 pixels when saved. Keep JPG at 95, press Make photo, and save the file. Take it to any photo counter and ask for one standard 4 by 6 print, then cut the copies apart just inside the lines. If the form also wants a file uploaded, switch Print sheet to Single photo only and save again for a 413 by 531 image.
Where it goes wrong
- Only two copies on a 4 by 6 sheet. You chose the American square size, which is large. A 5 by 7 print holds six of them and A4 holds twenty.
- The face looks soft. Zoom is high, so you are enlarging a small part of the original. Take the photo again from closer.
- The head sits low with a band of wall above it. Move up or down is near zero. Pull it well into the negative numbers.
- The print looks fuzzy on paper. Print quality was left on 150.
- A dark line runs along one edge of a cut photo. You cut on the guide rather than inside it.
- You wanted one file and got a page of copies, or the reverse. That is the Print sheet menu.
- The background is still the wrong colour. Nothing here changes an existing background.
The rules this tool cannot check
A banner at the top of the page says it plainly: the size will be right and the rest is your responsibility. Size is only one of the reasons a photo gets rejected.
Offices also judge how much of the frame your head fills, the background colour, shadows on the wall behind you, your expression, glasses, head coverings and how recent the photo is. Those rules differ from country to country and often between document types.
So do the boring thing before printing eight copies. Find your own country's published guidance, open it beside the preview, and compare. Five minutes there saves a wasted trip.
When a different page is the better fit
If your problem is an upload form with a file size limit, such as a photo that must land between 20 and 50 kilobytes at a set pixel size, the Form Photo and Signature Fixer is built for that and will also tidy a scanned signature.
If the background genuinely needs replacing, Photo AI Studio can swap it on your own machine, and you can bring the result back here as a PNG with the fill setting. For a plain crop with no print size involved, the Image Cropper is quicker.
Your face stays on your own device
None of this involves a server. Your browser opens the photo, crops it, builds the sheet and hands you the file. Nothing is uploaded, no account is created, and no copy of your face is left anywhere for anyone to lose.
For an ID photo that is not a small point. A picture of your face at print resolution, beside the fact that you are applying for a document, is worth keeping to yourself. Copy the finished file onto a memory stick for the print counter and it never passes through anyone else's computer.