
Small Grid, Real Craft: Getting More from a Pixel Canvas
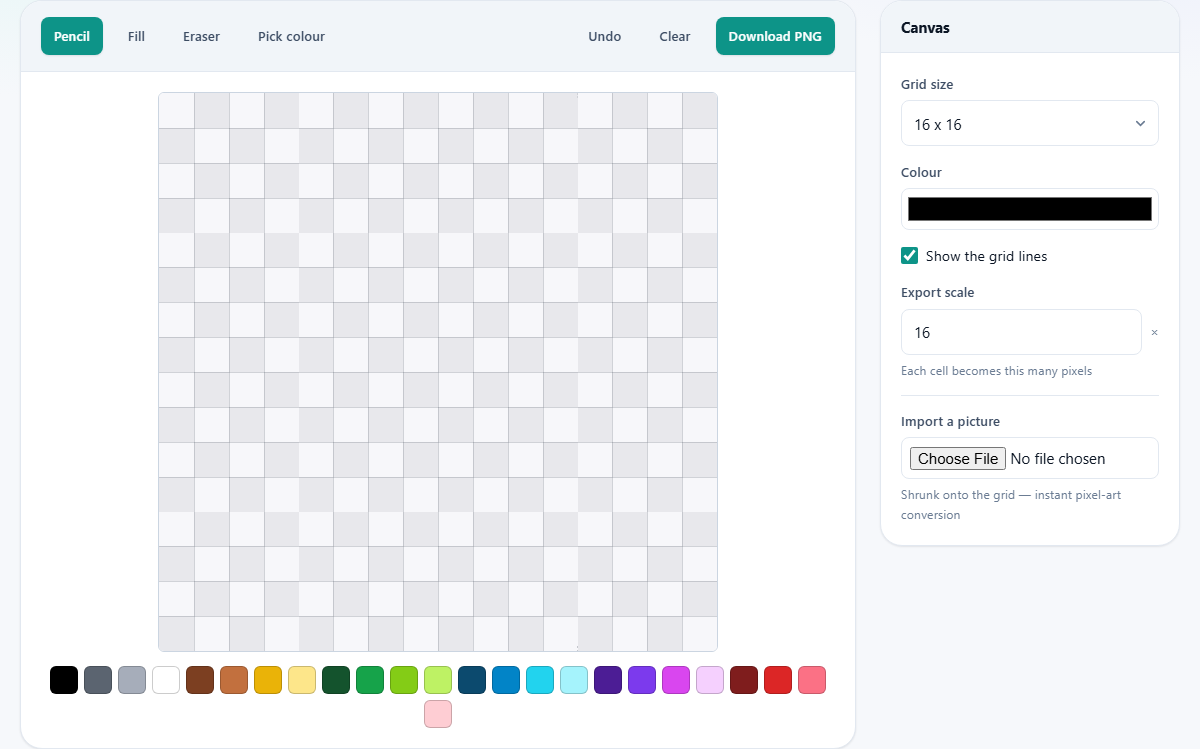
The quick help above tells you what the buttons do. This article is about the decisions behind them: which grid suits which kind of drawing, what each of the four tools is quietly best at, how the export number works with real figures, and the old habits that make a sixteen cell character read clearly from across the room.
Who reaches for a grid like this
People arrive here for surprisingly different reasons. A hobby game maker needs a hero, a coin and a door, and needs them today. Someone wants a forum avatar with personality that a photo cannot give. A cross stitch or bead artist wants a chart, and a pixel grid is exactly that chart. A developer wants a small icon for a side project and does not want to learn a huge art package to get it.
What unites them is the appeal of a bounded problem. A photo can be fiddled with forever. A sixteen by sixteen grid has two hundred and fifty six cells, and when each one holds the right colour, the drawing is finished. That feeling of done is rare in creative work, and it is the real reason this style never went away.
Matching the grid size to the job
The Grid size menu runs from eight up to sixty four cells per side, and the right choice matters more than any other setting. Every extra cell is another decision to make, so doubling the grid roughly quadruples the work.
A rough guide from practice:
- Eight: single symbols, hearts, arrows and letters. Brutal, but a finished set takes minutes.
- Sixteen: the classic character size. Enough room for a face, a body and a readable pose.
- Twenty four or thirty two: small portraits, animals, detailed items. An evening of pleasant work.
- Forty eight or sixty four: little scenes and large emblems. Plan these; they are real projects.
Four tools, four habits
The row of buttons at the top holds the whole toolkit, and each one earns its place.
- Pencil paints one cell per click, or a stroke of cells when you drag. It is where nearly all the work happens.
- Fill pours the current colour into a connected patch in one go. Use it after outlining a shape, so the pour stops at your lines.
- Eraser returns cells to empty. Empty is shown by the checkerboard and exports as true transparency, which is not the same as painting white.
- Pick colour lifts a colour already on the board and makes it current. It keeps your shades consistent without hunting through the palette again.
Colour discipline beats colour choice
The palette under the board offers a ready made set, and the Colour well in the side panel lets you mix anything beyond it. The temptation is to use many shades. Resist it. Tiny drawings read best when each surface gets exactly three values: one dark, one middle, one light. A mug needs three browns, not nine.
There is a practical reason as well as a stylistic one. At this scale, two similar shades sitting in neighbouring cells just look like a mistake. Strong steps between values are what create the illusion of light on such a small stage. When you truly need an extra shade, add it deliberately through the colour well, then reuse it everywhere with the picker.
A mug, cell by cell
Here is a complete run you can copy. Set the grid to sixteen. Choose a dark brown in the colour well and, with the pencil, draw the outline of a mug: a rounded rectangle about ten cells tall, with a two cell handle on the right. Keep the grid lines on while you do this; they make counting cells easy.
Switch to Fill, choose a warm red, and click inside the outline. The colour floods the body and stops at the brown border. Now pick a darker red and pencil a line of shadow cells down the left side and under the rim. Pick a paler red and add three highlight cells on the upper right. Finish with two single white cells above the rim as steam.
Untick Show the grid lines to judge the drawing without the scaffolding. If a stray cell bothers you, one press of Undo takes back the last stroke. Set the export scale to sixteen and press Download PNG: each cell becomes a sixteen pixel block, so the file lands at two hundred and fifty six pixels square, crisp at any zoom.
What the export number multiplies
The Export scale box accepts one to sixty four. At one, each cell is a single pixel, so a sixteen grid saves as a sixteen pixel file, which looks tiny in a folder but is exactly what a game engine wants, since engines prefer to do their own scaling.
At higher values, every cell becomes a solid block of that many pixels. The enlargement is done in whole blocks with no smoothing, so edges stay knife sharp instead of going fuzzy the way photo resizing would make them. A thirty two grid at scale eight gives two hundred and fifty six pixels; at scale thirty two it gives just over a thousand, plenty for a printed sticker or a profile banner.
The photo import shortcut
The Import a picture control takes any image file and squeezes it onto the current grid. Every cell receives the averaged colour of the photo pixels that landed inside it, which turns a portrait into an instant mosaic.
Treat the result as a first draft rather than a finished piece. The averaging produces dozens of muddy in between shades. The craft move is to repaint over it: use the picker to grab the best of those shades, reduce each area to your three values, and firm up the outlines by hand. Half an hour of this teaches more about the medium than a day of drawing on a blank board, because the photo has already solved the proportions for you.
A second run: a key at thirty two cells
The mug used sixteen cells and three reds. Here is a wider board with different numbers, so you can feel how the extra room changes the job. Set Grid size to thirty two. That is one thousand and twenty four cells, four times the mug, so plan before you paint.
Draw the key on a slant rather than flat. A slant fills the board better. With the pencil in near black, put the round bow in the top left, about eight cells across, then run the shaft down to the bottom right and add two teeth.
Now switch to Fill and click inside the outline with a mid gold. Pick a darker gold and pencil a one cell line along the lower edge of the shaft. Pick a pale gold and add four cells along the top edge. Two shades and an outline are enough for metal.
Set Export scale to eight this time, not sixteen. Thirty two cells times eight gives a two hundred and fifty six pixel file, the same finished size as the mug came out at. That is the trade in plain terms: a bigger grid at a smaller scale buys you detail without buying a bigger file.
What the saved file is good for
The download is an ordinary PNG with real transparency, so it drops into almost anything without an edit. At scale one it is a game asset, ready for an engine to load and blow up on its own terms. At a middling scale it makes a chat sticker, a forum avatar or a small badge on a web page.
Print works too. Because the blocks are exact, a pixel drawing printed large looks intentional rather than broken. Craft makers use the file a third way: each cell is one stitch or one bead, so the drawing doubles as the chart.
Habits that make tiny drawings read
Start with the silhouette. Fill the whole subject in a single dark colour first and look at it from a distance. If the shape is not recognisable as a mug, a cat or a sword while it is still a shadow, no amount of interior detail will save it.
Avoid single orphan cells of a colour that appears nowhere else nearby; at this scale they read as noise. Let colours arrive in runs of two or three cells. And check your work small as well as large: the drawing will mostly be seen at modest sizes, and problems that vanish when zoomed in shout when zoomed out.
Traps, and how to climb out
A few things regularly catch newcomers, and all of them have easy answers.
- Switching Grid size starts a fresh board. The page warns you first; export a PNG before you agree if the current drawing matters.
- Clear really does wipe everything. Undo is the polite alternative, stepping back one stroke at a time.
- The checkerboard is not grey paint. It means those cells are empty and will be see through in the saved file.
- A tiny exported file is not a bug. It means the export scale was set to one; raise the number and save again.
Where this editor politely stops
There are no layers here, no animation frames and no selection box, and that is a choice rather than a gap. The point is to keep the craft at its simple end, where a beginner can hold the whole tool in their head. When a project outgrows a single board, a dedicated sprite studio is the next step, and work made here moves across cleanly: export at scale one and you have a standard PNG any art program will open without complaint.
Autosave, and where your drawing lives
Every stroke is written into your browser's local storage, so closing the tab loses nothing; reopen the page and the board is as you left it. That storage sits on your own machine, not on a server. The drawing is never transmitted anywhere, and the saved PNG is produced by the browser itself and handed straight to your downloads folder. The one action that discards the stored drawing is choosing a new grid size, and the page asks before it does.