
Pulling a slanted rectangle back into shape
Four handles, one download button, and a photo that finally looks like it was taken from the front. This article walks through the stage and its handles, the two buttons that reposition them, the output settings in the side panel, and a full job done end to end with real numbers. It also covers the mistakes that produce a wonky result, and how to spot them before you save.
The shot you took from the wrong seat
You photograph a receipt on a table and it comes out as a fan shape. You snap the whiteboard from your chair at the side and the writing runs downhill. You lean back to fit a building in and it seems to topple away from you. None of that is bad photography. It is what a camera does when the subject is not parallel to the back of it.
The cure is a geometric one. If you can point out where the four corners of a rectangle ended up in the photo, the maths can work out how the picture was tilted and undo it. That is all this page does. A menu board, a museum label, a page of a book, a painting, a poster behind glass, a printout on someone's desk: if it should be a rectangle, it can be made one again.
What you see when a photo goes in
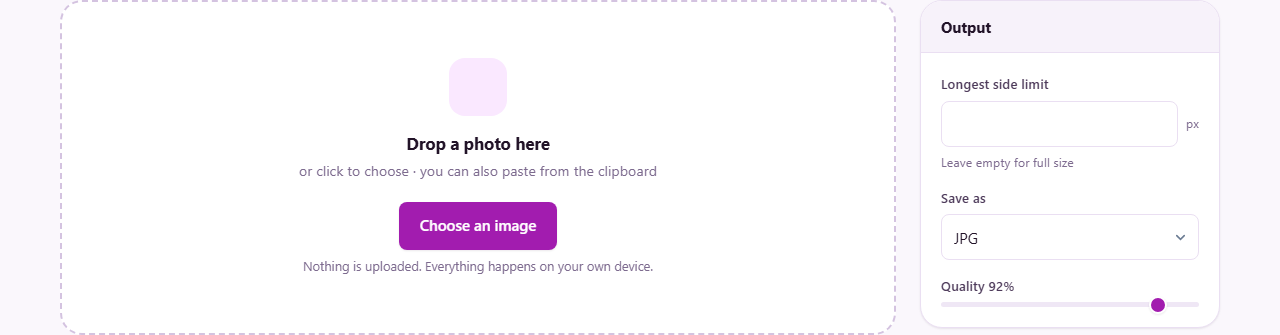
Drag a file onto the drop area, click to choose one, or simply paste from the clipboard if you have just taken a screenshot. The photo appears on the stage under the heading that asks you to drag the corners onto the shape. Everything outside the marked area is dimmed, so the part you are keeping stands out as you work.
Four round handles sit just inside the picture corners to start with. A bright outline joins them, and inside that outline sits a light three by three grid. That grid is more useful than it looks. Once your handles are near the right places, the grid lines should run along anything that is straight in the real object: the rows of a table, the mortar lines on a wall, the ruled lines on a page. If a grid line drifts away from a line that should be straight, a handle is out.
Placing the four handles
Drag each handle onto a corner of the thing you want made square. Only those four points are read. The outline drawn between them is a guide for your eyes, not a path the tool follows, so there is no way to bend an edge or add a fifth point. Handles cannot leave the picture either. Push one past the edge and it stops there, which is worth knowing when a document runs off the frame.
Keep the handles in their original arrangement. The one that started at the top left belongs on the corner you want to end up at the top left of the result, and the rest follow round in the same direction. If you drag two handles across each other, the corners swap and the download comes out mirrored or twisted. If that happens, do not fight it. Press one of the reset buttons and start the four placements again.
The two buttons that move all four at once
Corners to edges throws the handles back out to the picture corners, with only a whisker of margin. Use it as an undo when you have made a mess, or as a fresh start on a new attempt. Corners inward pulls all four in by a good margin instead, leaving them well inside the frame.
That second one solves a real annoyance. When a document fills the photo, the handles start almost on the picture edge, where they are fiddly to grab. Pull them inward first, then drag each one out to its corner. New image empties the stage and takes you back to the drop area, ready for the next photo.
The size readout, and where that number comes from
Under the stage sits a small line that reads Output, followed by a width and a height in pixels. It updates on every drag, and it is telling you the exact size of the file you are about to make. The tool works it out from your marked shape: the width is the average length of the top and bottom edges, and the height is the average of the two sides.
That is why the number moves around while you are still placing handles, and why it settles once you are done. It also explains the shape of the result. Mark a page that really is taller than it is wide, and the readout will show a taller than wide result. Mark a square window and you should see two numbers that are close to equal. If the readout looks nothing like the proportions of the real object, one of your handles is in the wrong place, and it is quicker to check now than after the download.
The Output panel on the right
Longest side limit is a box for a number of pixels. Leave it empty and you get the natural size shown in the readout. Type a number and the result is shrunk so that neither side is bigger than that, keeping its proportions. This is how you stop a huge camera photo turning into a huge file when all you need is something readable in a chat message.
Save as offers JPG, PNG and WebP, with JPG selected. JPG suits photographs of documents and buildings. PNG suits pictures made of flat colour, such as a slide or a diagram, since it stays crisp. WebP gives smaller files at the same look, if whatever you are sending it to accepts them. The Quality slider runs from 40 to 100 and sits at 92, which is a good place to leave it. Below about 70 you start seeing blocky patches around dark text.
A whiteboard, start to finish
Here is the whole job with numbers. The photo is a whiteboard shot from the side of the room, 4032 by 3024 pixels. Drop it in. The handles land at the picture corners, but the board only fills the middle, so press Corners inward to bring them somewhere easier to work with.
Now place them: top left handle on the top left screw of the board frame, then round the other three in order. The dimmed area shrinks to just the board, and the grid lines lie along the lines of writing. The readout says the output will be about 2180 by 1490 pixels, roughly the shape of a real whiteboard, so the corners must be about right. Type 1600 into the longest side limit, leave the format on JPG and the quality at 92, and press Download. A file appears with your original name and a straightened tag on the end, and the writing reads as if you had stood square in front of it.
When a corner is not in the picture
This comes up all the time. A finger covers the corner of a receipt, or a bookshelf hides the bottom of a poster, or the page runs off the edge of the frame. You are not stuck. Follow the two edges that would meet there with your eye, imagine where they cross, and put the handle on that spot. The maths only needs the point, and it does not care whether anything is visible at it.
If that meeting point falls outside the photo, the handle stops at the picture edge and the result will be a little off. Then pick a different rectangle. Any four points that form a real rectangle will do: the outer frame instead of the paper, four window corners on two floors, or the corners of a printed table. Choose one that sits fully inside the shot.
Mistakes that show up in the saved file
If the download surprises you, it is almost always one of these.
- Handles on the edges rather than the corners. Halfway along an edge is not a corner, and the result will lean.
- Corners crossed over. Two handles swapped gives a mirrored or folded picture. Reset and place them again in order.
- Expecting the rest of the photo to survive. It does not. Everything outside your outline is cut away.
- Marking a shape that is not really rectangular. An arch, a trapezoid sign or a curved label cannot be squared, because it was never square.
- A very steep angle. When the far edge of an object is tiny in the photo, there are few pixels there to stretch, and that half of the result comes out soft. Reshoot from closer to straight on if you can.
When another tool does the job better
If your aim is a clean, readable page rather than a corrected photo, use the Document Scanner instead. It does this same corner work and then lifts the contrast so the paper reads as white and the ink as black, which saves you a second trip. Come here when you want the photo itself put straight, with its own colours and shading intact, such as artwork, a painting, a sign or a building.
If the object was already square to the camera and simply sits at an angle in the frame, this is more machinery than you need. And if the photo has barrel bending from a wide lens, so straight lines bow outwards, corner placement cannot fix that. Straight lines will still be curved after the warp, because the curve was never about perspective.
Your own processor does the stretching
Nothing you drop here is uploaded. The photo is read by your browser, the shape you mark is turned into a transform, and the tool then walks over every pixel of the output and works out where it should come from in your photo. That is a lot of arithmetic, which is why a big picture takes a second or two after you press Download while the button reads Working.
The privacy side matters more here than for most image jobs. The things people straighten are contracts, invoices, medical letters, signed forms and notes still on a board. All of that stays with you. Very large photos are scaled down a touch first so the browser can hold them, and that is the only limit you are likely to meet.