
How to turn one photo into a background that goes on forever
A tile is a small square of picture that gets laid down again and again to cover a big area. This article walks through how this page builds one, what every control in the right-hand panel changes, and how to judge the result before you press download.
Where a repeating tile actually gets used
Think of any surface that has to be covered by something small. A web page is the obvious one. The browser can take a 512 pixel square and lay it across a screen of any width, so you ship a file of a few kilobytes instead of a full-screen photo of a few megabytes.
The same idea shows up well away from the web. A fabric printer wants one tile and works out the repeat itself. So does a print shop making wrapping paper, a maker of phone cases, and the artist setting the endpapers of a book. In games and 3D work, a wall or a floor is one tile stretched over a whole surface.
All of those jobs share one demand. Nobody should be able to see where one copy of the picture stops and the next begins. That join is the seam, and removing it is the entire point of this page.
The four methods, and what each one is honest about
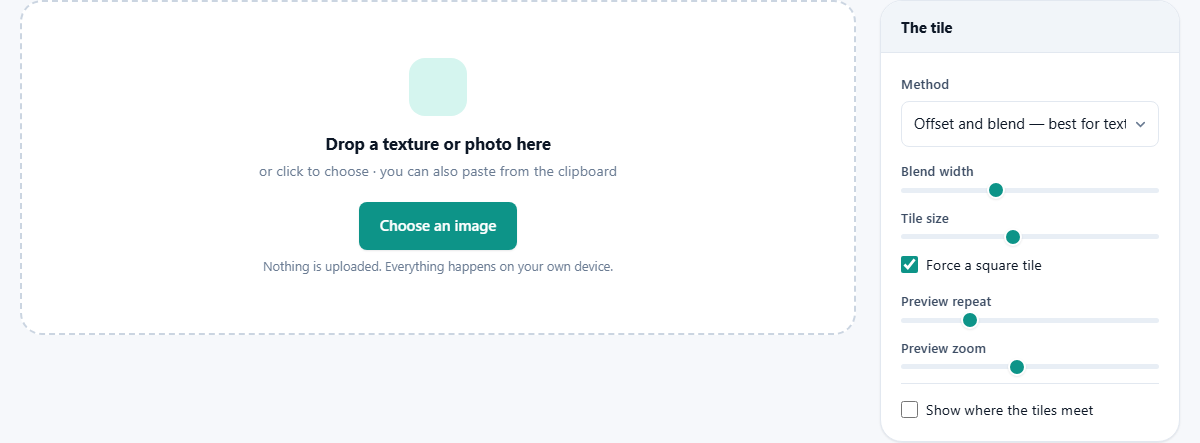
The Method box at the top of the panel picks the whole approach. The other settings only make sense once you have chosen here.
Offset and blend is the default and the one to reach for with a photograph. Mirror is a safety net that always works and always shows. Blend the edges only is the gentle option. Straight repeat is there so you can see the problem.
- Offset and blend - best for textures: the picture is shifted by half its width and half its height, so the four outer edges land in the middle of the frame. A strip of untouched picture is then faded over that cross until it goes away.
- Mirror - always seamless, always symmetrical: a quarter of the picture is flipped into all four corners. Every edge meets its own reflection, so a join is impossible. The butterfly shape that results is loud, but for decorative and ornamental work that is often the look you want.
- Blend the edges only: the middle of the picture is left exactly as it was. The far edge is wrapped round and faded in along the left side and the top. Choose this when there is something in the centre that must survive.
- Straight repeat - show me the seam: no treatment at all. Use it for ten seconds as a before picture, so you know how bad the join was and can tell whether the blending really helped.
The sliders, one by one
Blend width runs from 0 to 50 per cent and starts at 18. It sets how wide the healing strip is. Raise it until the cross in the middle of the tile stops being visible. There is a limit worth knowing: the strip is never allowed to reach the outside of the tile, because that outside edge is the part that has to meet the neighbouring copy cleanly. Past roughly a quarter of the tile, moving the slider stops changing anything.
Tile size runs from 128 to 1024 pixels and starts at 512. Your picture is cropped from the centre to fill that square. It is never squashed, because squashing would change the texture itself, and the texture is the one thing a tool like this must leave alone.
Force a square tile is ticked to begin with. Untick it and the tile keeps the shape of your original photo instead, with the size slider setting the width and the height following along.
Preview repeat goes from 2 to 6 and starts at 3. Preview zoom goes from 20 to 200 per cent. Neither one touches the tile you download. They only change how many copies you are shown and how big each one looks, which is how you spot a repeat that is too obvious.
Show where the tiles meet draws a bright pink outline around each copy in the preview. Tick it when you cannot work out whether a line you can see is a real seam or just a feature of the picture.
Reading what is on screen
The wide strip at the top is the wallpaper view. It is the tile repeated across a panel, exactly as a browser would do it. Below it, a small canvas labelled The tile itself shows one single copy so you can inspect the middle.
Next to that small canvas is a short block of text. It gives the finished pixel size, one line saying what the chosen method did, and the two lines of CSS you would paste into a stylesheet to use the file as a page background.
At the foot of the panel a grey line reports the preview state, for example: Showing 3 tiles across at 100%. That is a reminder, not a setting. If a pattern looks fine at three across, drag the repeat slider to six before you trust it.
What you get, and what to do with it
Download the tile saves one file called seamless-tile.png. It is always a PNG, and there is no quality setting to worry about. That is deliberate. PNG keeps every pixel exactly as it was calculated, and the compression used by JPG files leaves faint blocks that would show up along the join you just spent effort removing.
Download the repeat saves a second file called seamless-repeat.png. It is the tile laid out as a grid, using the same number you set with the preview repeat slider. At the default of 3 you get a three by three sheet. This is a proof sheet rather than a working file. Send it to a client, print it, or open it on a phone to check the repeat with fresh eyes.
New image drops what you have and puts the drop area back, ready for a different photo.
A worked example: a photo of a slate wall
Say you have a phone photo of grey slate, 4032 by 3024 pixels, taken flat on and in shade. Drop it on the page. The panel appears with the default settings already applied: offset and blend, blend width 18 per cent, tile size 512, square forced on.
Look at the single tile first. Down the middle there is a faint vertical line where two edges of the slate meet at slightly different tones. Drag blend width from 18 up to 26. The line disappears. Drag it further to 40 and nothing more changes, because the strip has hit its limit.
Now check the repeat. Set preview repeat to 6 and preview zoom to 60 per cent. Suddenly you can see a pale chip in the stone appearing in a neat grid, six across and six down. That is not a seam problem. It is one distinctive feature repeating. Push tile size up to 768 so the feature is further apart, or go back and crop a duller part of the wall.
Happy with it, press Download the tile. You get seamless-tile.png at 768 by 768 pixels. In a stylesheet, background-image with background-repeat set to repeat is all it takes. For a fabric order, hand the same PNG to whoever lays out the print run.
Mistakes that cost people the most time
Almost every disappointing result traces back to the source photo rather than to the settings.
Uneven light is the big one. If the left of your photo is brighter than the right, every copy carries that gradient, and tiling turns it into visible banding, like stripes across a wall. Even it out before you come here, or reshoot in flat shade.
The second is a distinctive mark. A bright leaf, a cigarette end, a water stain: any of these appear at exactly the same spot in every copy, and the eye finds that grid in about a second. More blending cannot help, because blending fixes joins, not repetition.
The third is starting too small. If your source is 400 pixels wide and you ask for a 1024 tile, the picture has to be stretched up to fill it, and stretched pixels look soft. Pick a tile size that your original can actually cover.
The last one happens after the download. Somebody opens the tile, saves it again as a JPG to make it smaller, and the seam quietly returns as a row of compression blocks. Keep the PNG.
When another page on this site fits better
This page makes one tile out of one picture. It does not draw stripes, dots or geometric repeats from scratch, and it will not cut a subject out of a background for you.
If the photo needs its lighting flattened first, do that with the Adjustments effect in Batch Image Editor, then come back. If you only want part of the picture, crop it there first so the tile is built from the region you chose rather than from the centre.
If the tile is destined for a 3D scene, the Normal Map Generator turns the same texture into the bumpiness map that sits alongside it. And if your goal is to print one big picture across several sheets of paper rather than to repeat a small one, that is the Poster Tiler, which is a different job entirely.
Your picture stays with you
Every step described above happens inside the browser tab you are reading this in. The shifting, the fading, the grid of copies in the preview: all of it is drawn by your own machine, using your own processor and memory.
There is no upload, no account, no queue and no server copy to delete later. A large photo may take a second or two to appear, and that pause is your own computer working rather than a network round trip.
It also means the page keeps working once it has loaded, even with the connection off. If you are shooting textures somewhere with poor signal, that turns out to be surprisingly handy.