
Round headshots that stay round wherever you put them
A round picture and a square picture behind a round window look the same until you move them somewhere new. This page makes the first kind. Below: how the square is chosen before the shape is cut, what each setting in the rail changes, a headshot taken from start to finish, and the one setting almost everybody misreads.
Cut out, not covered up
Plenty of apps show your photo inside a round window. The file itself is still a rectangle; the window belongs to the app. Move the file into a document, a slide or an email footer and the corners come back.
Here the corners really are removed. What falls outside the shape is stored as empty, so the picture drops onto a coloured panel, a photo, a printed page or a dark slide with no rectangle showing behind it.
That is why people come to this page: a staff page with tinted cards, a talk with round speaker portraits, a newsletter, a diagram of who reports to whom. If your picture only ever needs to sit in an app that already draws its own circle, you can skip the whole exercise.
The square comes first
Before any shape is cut, a square has to be taken from your photo, and the square is always as wide as the shorter side of the picture. A photo 3024 wide and 4032 tall gives a 3024 square. Left and right are always trimmed evenly, so the square sits in the middle from side to side.
Up and down is yours to decide. Crop from has three settings. Centre takes the square from the middle. Top pushes it hard against the top edge, which is usually where a face lives in a portrait. Bottom does the opposite and is handy for a picture where the subject sits low, such as a product on a table.
Zoom runs from 100 to 250 per cent and tightens the square. At 100 you get the biggest square the photo allows. At 130 the square is roughly three quarters as wide, so the subject fills more of the finished circle. Zoom only ever cuts closer in. It cannot reach past the edges of the photo, and it cannot invent detail that was never there.
Choosing the shape
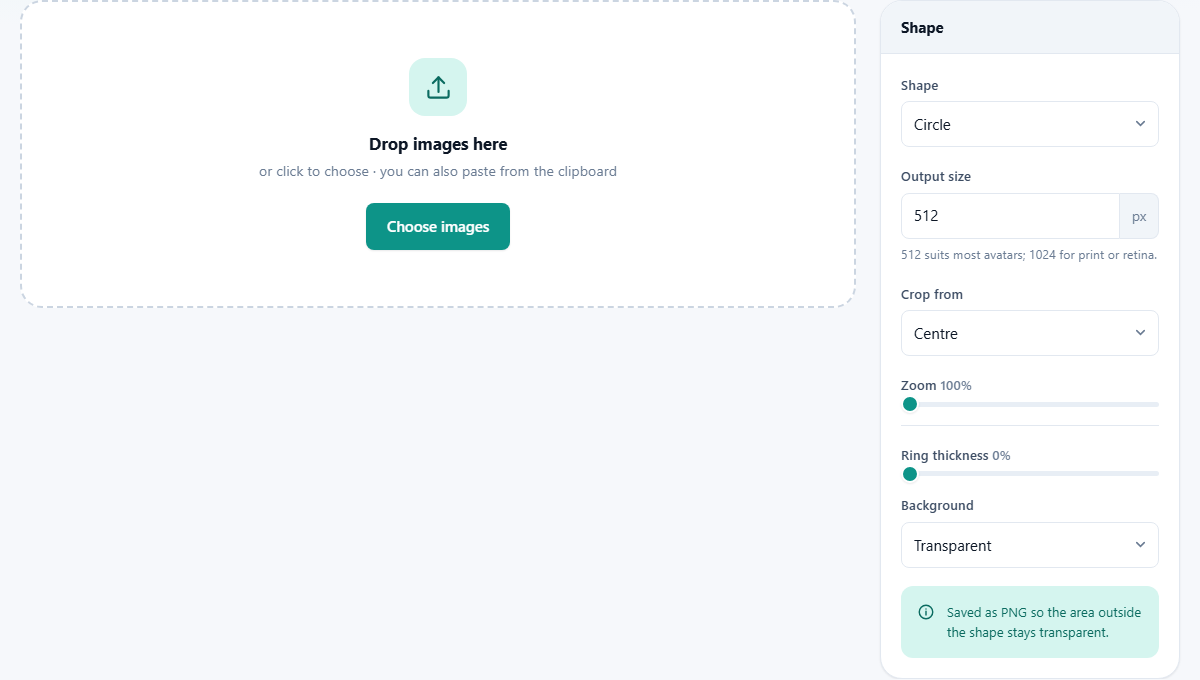
The Shape list holds three options and they are all cut the same way, only with a different outline. Circle is the plain round avatar. Rounded square keeps the full square but softens the corners. Hexagon gives a six-sided badge, flat at the left and right and pointed at the top and bottom.
Pick Rounded square and a second control appears: Corner radius, from 2 to 50 per cent. Because it is a percentage of the finished picture rather than a fixed number of pixels, the same setting looks identical at any output size. Small values around 8 give a modern app-icon look. Wind it up to 50 and the corners meet, which turns the square back into a circle.
Output size and why it is not a guess
Output size is a plain number box, from 32 to 4096, starting at 512. Whatever you type is exactly what you get: a square picture that many pixels wide and that many tall. It does not scale from your original, so a 6000 pixel photo and an 800 pixel photo both come out at the size you asked for.
512 covers nearly every use online. Go to 1024 if the same picture will also be printed, or shown large on a sharp screen. There is little point going higher for a face.
The order of work is what keeps the result crisp. The square is cut at the full resolution of your original first and only shrunk afterwards, in steps, so eyelashes and glasses frames stay clean instead of turning to mush.
The ring around the edge
Ring thickness starts at 0, which means no ring at all. Move it and a colour well appears beside it, starting on a teal. The slider goes up to 15, and the number is a percentage of the finished picture, so 4 on a 512 pixel avatar draws a band about 20 pixels wide.
Working in percentages means a set of avatars all carry the same ring whatever size you save them at. The band is drawn just inside the outline, so it never spills past the shape and never gets clipped. Past about 10 per cent the ring starts to crowd the face, so keep it modest unless the effect is the point.
What Background actually fills
This is the control people misread, so it is worth being precise. Background offers Transparent or Solid colour, and a colour well appears when you choose the second one. The colour is painted inside the shape, underneath your picture, not around the outside.
With an ordinary photo, every pixel of the shape is covered by the photo itself, so you will see no difference at all. The setting earns its keep when the file you loaded already has see-through parts, such as a logo saved as a PNG. Then the colour shows through those gaps instead of leaving them empty.
The area outside the shape stays clear either way. That is fixed, and it is why the file is always written as a PNG: it is the common format that can remember which parts of a picture are not there.
A headshot, start to finish
Say you have priya-desai.jpg from a phone, 3024 by 4032, standing head and shoulders against a bookcase. Drag it onto the drop area. The preview panel shows the result straight away and updates as you touch the controls, with Show original there to flip back for a comparison.
Leave Shape on Circle. Type 512 into Output size. Set Crop from to Top, because a centred square on a tall portrait tends to land somewhere around the chin. Nudge Zoom to about 130, which pulls the framing in from shoulders to face. Watch the preview rather than the numbers here; every photo is framed differently.
Set Ring thickness to 4 and pick a dark navy in the colour well to match the site the picture is for. Leave Background on Transparent. Press Crop. The row in the file list grows a Save button, the file is called priya-desai-circle.png, and the finished square is 512 by 512 with a clear surround.
Doing a whole team in one go
Drop in every headshot at once, or add them in batches with Add more. The settings in the rail apply to all of them, so the shape, the size, the ring and the framing rule are shared. The button counts what is waiting, and a progress bar runs as it works. Each row then offers its own Save, and Download all as ZIP appears once at least two are done.
One honest warning about consistency. The tool applies the same rule to every photo, not the same face position. A colleague photographed close up and another shot from across the room will still look different, because their faces sit at different scales in the original. If a page needs them to match closely, frame the originals to a similar crop first, then bring them here.
Common snags and quick fixes
These four cover most of the questions people arrive with.
- The corners went white after uploading somewhere. That site filled in the empty parts. Give it the plain rectangular photo and let it draw its own round frame.
- The face sits off to one side and you cannot pull it across. Only the up and down position can be chosen here; sideways is always centred. Trim the photo with a rectangular crop first, then come back.
- The result looks soft. A small original plus a high zoom leaves few real pixels to work from. Lower the zoom, or start from a larger photo.
- The ring hides half the picture. Thickness is a percentage, so 15 is a very wide band. Try 3 to 5 for a normal avatar.
When a different page suits the job
If you want a rectangle rather than a shape, use the Image Cropper, which gives you a box you can drag anywhere and lock to a ratio. If the picture is for an official form, Passport Photo Maker deals with the sizes and margins those forms demand.
If you need the shape to follow the outline of a person or an object rather than a neat geometric figure, that is a masking job for Image Studio. And if all you want is a square photo with a coloured edge, Add Border gets there in fewer clicks.
The photos never go anywhere
Faces are personal, and staff photos often arrive with a promise that they will not be spread around. Nothing here is sent to a server. Your browser reads the files, draws the shapes, and hands the results back to your own downloads folder.
You can prove it in a few seconds. Open the page, go offline, then drop a photo in and press Crop. It works exactly as before, because there is nothing on the other end waiting for your picture. The settings you last used are kept on your own machine so the panel opens the way you left it, and that is the only thing stored.