
Explaining a screen with arrows, steps and a safe blur
This article walks through all ten drawing tools on this page, the side panel that shapes them, and a full worked example of building a three-step guide. It also covers what the blur really does to your pixels, and the small habits that make a marked-up screenshot easy to follow.
Built for the question: where do I click?
Some questions are painful to answer in words. Try telling a parent over the phone which of four gear icons opens the network settings. Try describing to a new colleague where the approval button hides on the third tab. One picture with a red arrow ends the conversation in seconds.
That is the whole point of this page. You paste a screenshot, point at things, number the order, and hide whatever should stay private. The result is a single PNG you can drop into a chat, an email, a ticket or a manual. People reach for it when writing bug reports, onboarding notes, family tech support messages and product feedback.
A tour of the ten tools
The bar above the canvas holds every tool. Most of them work by pressing at one corner and dragging to the other. Two of them place their mark with a single click instead.
- Arrow points from where you start the drag to where you release. Draw it toward the thing you mean.
- Box surrounds a region. It is the calmest way to say look at this whole area.
- Ellipse rings something round or loose, like a badge or an icon cluster.
- Line is a plain stroke with no head, good for underlining or dividing.
- Pen follows your hand freely, for scribbles and rough circles.
- Text stamps whatever is typed in the side panel at the spot you click.
- Step number drops a numbered marker with one click, then counts up on its own.
- Blur scrambles the pixels inside the region you drag.
- Highlight lays a bright wash over a strip, like a marker pen on paper.
- Crop trims the picture to the region you drag, keeping everything already drawn.
The panel that shapes every mark
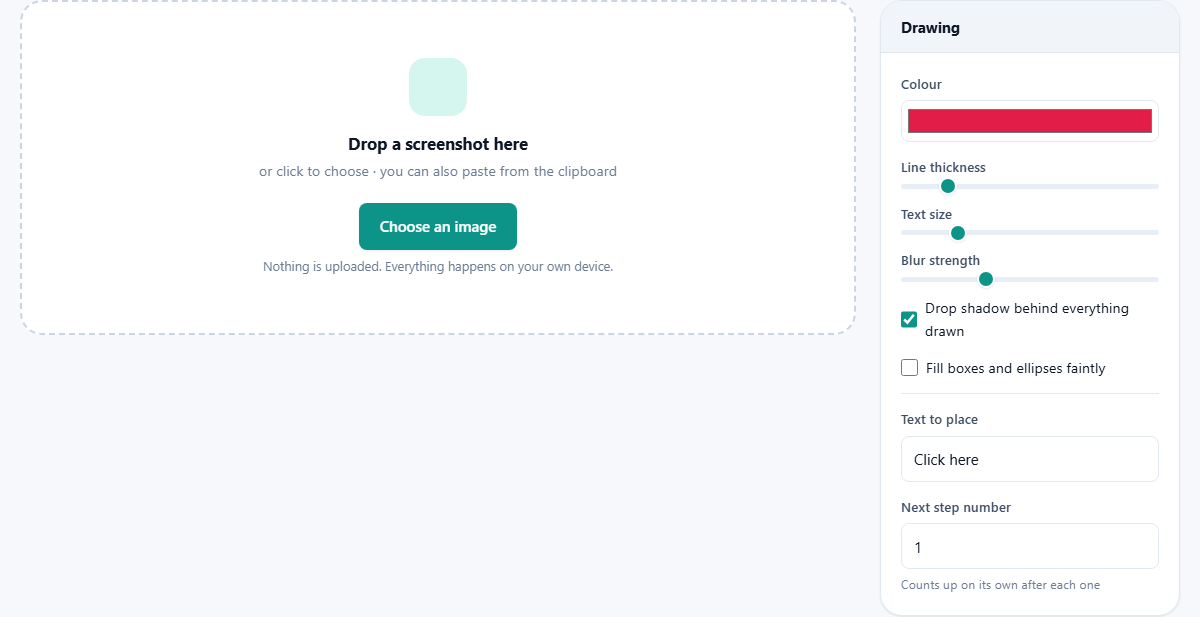
The Drawing panel on the right decides how each new mark looks. Colour sets the ink, and it starts on a strong red because red survives on almost any interface. Line thickness runs from 1 to 20 pixels and starts at 4, which reads well on a normal window. If your screenshot came from a high resolution display, push it higher, since a hairline vanishes when the image is shown smaller.
Text size has its own slider, from 10 up to 90 pixels. Blur strength has one too, and higher values scramble harder. Two checkboxes finish the panel. Drop shadow behind everything drawn is on by default, and it is what keeps a white label readable on a white toolbar. Fill boxes and ellipses faintly adds a light tint inside those shapes, which turns an outline into a soft spotlight.
Type first, click second
The Text tool reverses the order you might expect. You do not click and then get a cursor. You type your words into the Text to place field in the panel, then click the canvas where they should land. The default already says Click here, which is honestly what most annotations need to say.
Step numbers behave the same way but manage themselves. The Next step number field starts at 1, and every marker you place moves it forward, up to 99. So a five-step guide is five clicks in a row. If you missed a spot and need a second number 3, set the field back by hand before clicking.
Worked example: a three-step expense guide
Say a teammate keeps asking how to file a claim. Capture the claims page, then click this page and paste. The screenshot appears on the canvas at once.
Choose Step number and click the profile menu. A 1 appears and the counter moves on. Click the Reports entry for 2, then the New claim button for 3. Switch to Arrow, set thickness to 6, and drag from empty space onto that same button so it cannot be missed. Switch to Text, set the size to 30, and click beside the arrow to stamp the label.
One problem remains: the visible account number in the corner. Pick Blur, raise the strength to 20, and drag across it until the digits are mush. Press Download PNG and send the file. Total time, about a minute.
What the blur really does
This matters enough to be plain about. When you blur a region here, the new scrambled pixels are written into the picture itself. The saved file contains no hidden layer holding the original, so nobody can peel the effect off later.
There is still one honest caveat. Extremely determined software can sometimes guess short, heavily pixelated text, because only so many characters could have produced a given smudge. For a bank detail or a password, the safest move is the Crop tool: cut the frame so the secret is simply not in the file at all. Absence beats disguise every time.
A second run: filing a bug report
Not every job needs numbered steps. Suppose a total on a dashboard is wrong and you have to show a developer which figure you mean. Paste the capture. Set thickness to 3, because a thin line will not cover the small numbers around it, and tick Fill boxes and ellipses faintly.
Choose Box and drag a rectangle around the wrong total. The faint tint inside makes the region obvious without hiding the digits. Switch to Highlight and drag a short band across the date range at the top, since that is the other thing the developer needs to see. Now set Text size to 40, type the expected figure into the Text to place field, and click in the empty margin to the right of the box.
One last pass: the customer names down the left column have nothing to do with the bug. Choose Crop and drag around the chart alone, which removes them from the file entirely. Download the PNG and attach it to the ticket.
The line under the picture
A small note sits below the canvas and it is more useful than its size suggests. Before you draw anything it shows the real width and height of the image in pixels, which is how you can tell a phone screenshot from a wide desktop capture at a glance.
Once you start marking it also counts what you have added, reading one thing drawn, then two things drawn, and so on. That count is the honest record of the layer stack. If you think you drew four marks and it says five, you have a stray shape somewhere, and one Undo will remove the most recent one.
Snags and their fixes
A handful of behaviours surprise people the first time. None of them are faults, but knowing them saves a redraw.
- Crop cannot be taken back. Trimming bakes every mark into the picture and empties the list, so do it last, once you are happy with the marks.
- A very small crop is refused with a short message. Drag a bigger area; a few pixels across is not a picture.
- After a crop the tool jumps back to Arrow. That is deliberate, so a second drag does not trim the image again by accident.
- One pass of blur was not enough. Drag over the same spot again. Each pass works on what is already there, so blurs stack up.
- A quick tap left nothing behind. Very short drags are ignored on purpose, so an accidental click never adds a mark. The pen is the exception, since a dot is a valid stroke.
- Undo after a step number also winds the counter back, so your next click carries on from the right number.
Undo, and the one thing missing
Every mark stays a separate object until you save, and Undo removes them one at a time, newest first. A crooked arrow costs one click and one redraw. Clear all wipes every mark but keeps the screenshot, and New image starts the whole session over.
What you cannot do is grab an existing shape and slide it somewhere else. There is no move handle. Once you know that, the workflow adjusts naturally: get the drag roughly right, and if it is wrong, undo and redo it rather than hunting for a way to nudge it.
Scaled to fit, saved at full size
A 4K screenshot will not fit in the page, so the canvas shows it scaled down while you work. Do not let that worry you. Every arrow, label and blur is recorded against the real coordinates, and the download is rendered at the original resolution. Fine interface text stays as crisp as the capture was.
The output is always a PNG. That is the right call for screenshots, because PNG keeps hard edges and flat colours perfectly, where a photographic format would leave faint ripples around every letter.
When another page fits better
If your only goal is hiding things, and no pointing is involved, the Blur and Redact tool on this site is the better home. It manages many regions at once, offers a solid block that can never be reversed, and saves to JPG or WebP as well.
And if you are composing a graphic rather than explaining a screen, with headings, panels and layered images, a proper design editor is the right instrument. This page is deliberately narrow: one screenshot, some marks, one file out.
Your screenshot stays with you
Screenshots are among the most sensitive files people handle. They catch open tabs, names, balances and half-written messages that were never meant to travel. So it matters that this page does all of its work inside your own browser, using the machine you are sitting at.
There is no upload step, no server render, no account. Pasting a capture here is no more exposed than pasting it into a local document. The only copy that exists is the one you save, containing exactly what you chose to leave visible.