
Holding the Road with Guns and Mortars
Tower Defence is a wave survival game where you place towers beside a fixed road and let them shoot down everything that walks past. This article covers the two tower types, how waves escalate, where to build for maximum coverage, and why the bend in the road is the most valuable piece of ground on the map.
How the game works
Walkers spawn at one end of a winding road and march toward the other. Anything that reaches the far end costs you a life. You buy towers and place them on the grass beside the road. Towers fire automatically at whatever is in range. Killing a walker pays money, which you spend on more towers. Survive every wave and the map is yours.
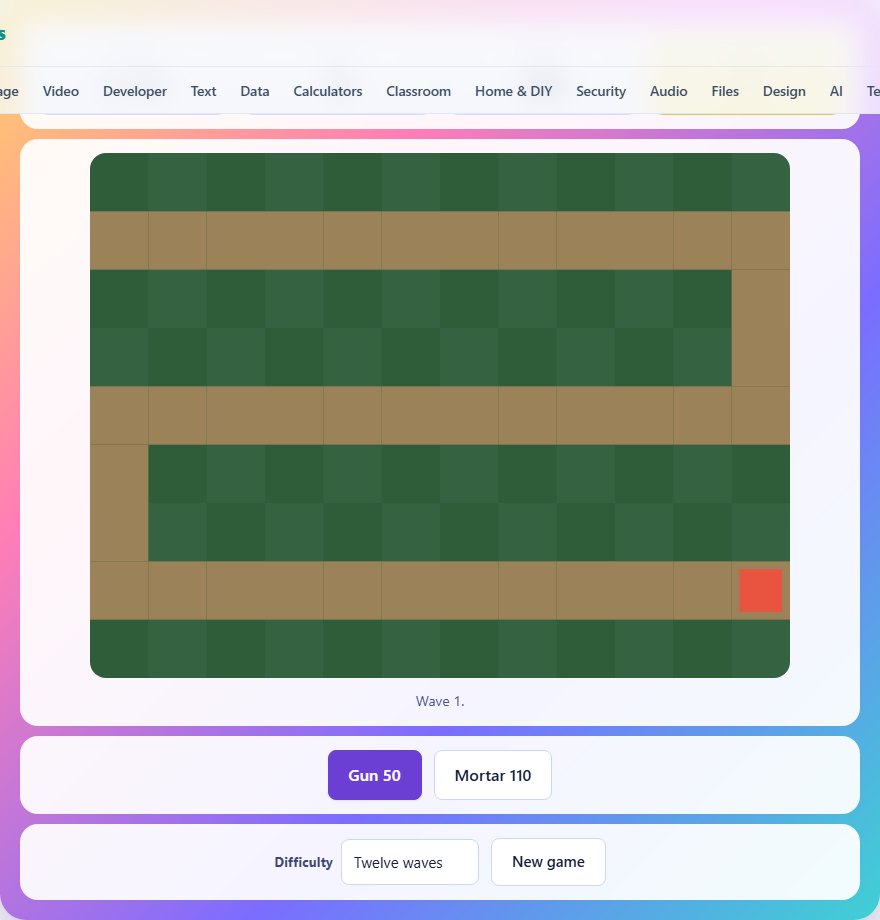
The road follows a fixed snake pattern across the grid, with three horizontal passes connected by vertical joins at the edges. This never changes between games, so once you learn the layout, every session is about refining your placement rather than adapting to a new map.
The two tower types
The Gun costs fifty and fires quickly. It hits a single walker at a time with moderate damage. Its range is two and a half cells. Because it fires fast, it is good at wearing down a single strong walker or picking off stragglers that slip past your main line.
The Mortar costs one hundred and ten and fires slowly. When its shell lands, it damages everything within about one and a half cells of the impact point. The damage tapers with distance, so walkers at the centre of the blast take more than those at the edge. A mortar is wasted on a lone walker, but when several walkers bunch up at a bend, one mortar shot can do more total damage than several gun shots.
Controls and interface
Select a tower type by pressing the Gun or Mortar button below the game area. The button shows the cost next to the name. Then tap any grass cell on the canvas to place the tower. You cannot place towers on the road itself, and you cannot stack two towers on the same cell. A pale circle appears showing the tower's range when you place it.
The Difficulty selector offers three options. Eight waves gives you twenty lives and two hundred and sixty starting money. Twelve waves is the default, with fifteen lives and two hundred and twenty money. Sixteen waves is the hardest, with only ten lives and two hundred starting money. Each setting also adjusts the base health of the walkers.
How waves escalate
Each wave sends more walkers with more health. The number of walkers per wave is five plus twice the wave number, so wave one sends seven and wave twelve sends twenty-nine. Health scales by a factor of about 1.28 per wave, which means by wave ten a single walker has roughly eight times the health it had in wave one.
Every fourth wave is a fast wave. Fast walkers move about fifty percent quicker than normal ones. They are coloured yellow so you can spot them. A line of slow mortars will struggle against fast walkers because the shells take time to land. You need guns near the end of the road to catch the runners.
Targeting and why the end of the road matters
Every tower fires at the walker that is furthest along the road within its range. Not the nearest walker, not the weakest, but the one closest to escaping. This means towers near the end of the road are punching above their weight. They fire at the walker that is about to cost you a life, and every other tower that can see that walker focuses on it too.
This targeting rule has a consequence for placement. A gun placed halfway along the road might spend its shots on a healthy walker that still has a long way to go. The same gun near the final stretch fires on the walker that matters most. Early towers soften the crowd. Late towers finish the job.
Building at the bends
The road doubles back at each side of the grid. At those bends, two horizontal stretches of road run close together, separated by a short vertical join. A tower placed in the crook of a bend covers both stretches at once. It fires down one run and then catches the same walkers coming back on the next.
This is where mortars shine. Walkers slow down slightly as they bunch up at the bend, and the two nearby stretches mean more targets fall within the splash radius. A single mortar at a bend can do the work of two guns placed along a straight section. Your first mortar almost always belongs at a bend.
A spending plan for twelve waves
You start with two hundred and twenty money. One mortar costs one hundred and ten, and one gun costs fifty. A solid opening is to buy one gun and place it at the first bend. That costs fifty and leaves one hundred and seventy. Wave one arrives with seven weak walkers. The gun picks them off and each kill pays around ten, so you end the wave with roughly two hundred and forty.
Now buy a mortar and place it at the second bend. The next few waves fund a second gun for the final stretch. By wave six you should have three or four towers and the kills are paying fifteen or more each. Spend between waves, because that pause is your only building time. By wave eight, add another mortar near the last bend. Waves nine through twelve need concentrated firepower at the end, so save for a late gun if fast walkers are getting through.
Common mistakes that cost lives
Spreading towers evenly along the entire road is a natural impulse, but it wastes money. One tower in a bend covers as much road as two on a straight. Cluster your firepower where the road folds.
Another mistake is building only mortars. They fire slowly. A fast wave can run past a mortar line before the second shell lands. You need at least two guns to handle speed, ideally near the final stretch where the targeting rule concentrates fire.
- Placing towers on straight sections when bends are available
- Building only mortars and getting overrun by fast waves
- Spending all your money early and having nothing left for the harder late waves
- Ignoring the end of the road, where a single gun can save lives the rest of the line misses
Mixing guns and mortars effectively
The strongest layouts use both tower types where each performs best. Guns belong on straight stretches near the end of the road. They fire quickly and finish off walkers that are already hurt from the mortar zone. Mortars belong at bends where walkers bunch up and the splash radius can hit four or five targets at once.
A common ratio is two guns for every mortar. That keeps the cost manageable while giving you enough sustained fire for fast waves. If you have three mortars and only one gun, waves four and eight will overrun you because those fast walkers run through the slow mortar volleys before a second shell fires. Balance matters more than total spending.
Difficulty levels and scoring
On Eight waves you have more money and more lives, so there is room to experiment with placement. Twelve waves is the standard challenge. Sixteen waves demands near-perfect placement because the budget is tighter, the walkers start tougher, and you have only ten lives. A single leaked wave in the teens can end the run.
When you survive every wave, the game records the number of lives you had left. More lives means a better score. There is no selling or upgrading towers. The only decision is what to build and where to put it. That simplicity keeps the game focused on the map itself.
Privacy and device play
The whole game runs entirely inside your browser. The road, the waves, the tower firing, and the scoring all happen on your own device. Nothing is uploaded and there is no account to create. Your best score is saved in your browser and stays on this device only. Once the page has finished loading, you can play with no internet connection at all.