
Surviving all three waves in the alien shooter
How the fleet moves, why it gets faster, what the bomb pattern means for where you stand, and the tactics that turn a panicky last-alien chase into a clean sweep.
Reading the fleet's step timer
The aliens do not glide across the screen. They stand still, then jump 12 pixels sideways all at once. What changes during a game is the wait between jumps. The code counts drawn frames and works the wait out like this. Take 38, multiply it by the share of the fleet still alive, add 4, then take away twice the wave number. Round that to a whole number. The wait is never allowed below 4 frames.
Try it on a fresh wave one. All 32 aliens are alive, so the share is one whole. That gives 38 plus 4 minus 2, which is 40 frames between jumps. On a screen drawing 60 frames a second, that is a jump every two thirds of a second. Shoot half of them and the sum becomes 19 plus 4 minus 2, or 21 frames. With two left the sum rounds to 4, which is also the fastest the timer is ever allowed to go, so the last pair jumps 15 times a second. Wave three starts the same full fleet at 36 frames instead of 40.
The turn is worked out for the whole fleet before any of it moves. The code asks whether the next 12-pixel step would push any living alien past a wall. The left wall sits at 16 pixels. On the right, an alien may not begin a step past 396 pixels. That is the 440-pixel board, less a 16-pixel margin, less the alien's own width of 28. If even one alien would cross, nothing moves on that step. The next step drops every alien 20 pixels and flips the direction. So a turn always costs one wasted step and then one dropping step.
Now for the stopwatch. The eight columns start at 40 pixels and sit 45 apart, so the last one is at 355. The fleet gets three steps to the right before it runs out of room. After that each crossing is five steps, and with the wasted step and the drop a full row costs seven steps. The bottom row starts 164 pixels down, and the game calls it a landing once an alien's foot reaches 434 pixels. That needs 13 drops. Add it up and an untouched wave-one fleet needs 89 steps, or 3,560 frames. At 60 frames a second that is about 59 seconds.
This is what makes your choice of column interesting. Shoot out the rightmost column and 28 aliens are left, so the wait falls to 35 frames and the fleet is quicker. But it is also 45 pixels narrower, so a row now costs 11 steps rather than 7, and the same run to the ground takes about 82 seconds. Take the leftmost column instead and it is about 73 seconds, because the block ends up sitting differently between the walls. Take a middle column and the fleet is just as wide as before, only faster: about 52 seconds, which is sooner than if you had shot nothing at all.
Every figure above is counted in frames, not seconds. The game keeps no clock of its own. It does one round of work per drawn frame, so on a screen running at 120 frames a second the aliens, bombs, bullets and ship all move at double speed. On a slow machine they all crawl together. Play stays fair either way, but the seconds quoted here only hold at 60 frames a second.
How a bomb is chosen and how a hit is judged
Bombs are not on a schedule. On every frame with at least one alien alive, the game rolls a random number. A bomb drops if the roll falls under a threshold of 14 in a thousand, plus 6 more for each wave. So wave one uses 20 in a thousand, wave two 26, and wave three 32. Only one bomb can start on any frame. At 60 frames a second that comes to a little over one bomb a second in wave one, and close to two a second in wave three.
The shooter is picked in two stages. The code sorts the living aliens into columns and keeps only the lowest one in each. It then picks one of those columns at random, with every occupied column equally likely. The bomb leaves from the bottom edge of that alien.
One result of this is easy to miss. The bomb rate depends on the wave and on nothing else. A full grid and a lone survivor shell you at the same rate. Clearing aliens does not slow the fire down; it only changes where the fire comes from. It also packs it tighter. With all eight columns occupied, the turn of any one column comes up once in eight. With two columns left it comes up once in two, so each survivor is bombing you four times as often as it did at the start.
Falling speed matters more than the rate does. A bomb drops 3 pixels a frame in wave one and gains two fifths of a pixel for each wave, so it is close to 4 by wave three. Take a wave-one bomb from the bottom row in its opening spot. It leaves at 184 pixels and the ship's danger band begins at 440, so it falls 256 pixels at 3 a frame, which is about 85 frames. Your ship moves 5 pixels a frame and can sit anywhere from 17 to 423, a span of 406 pixels that takes 82 frames to cross. So at the start of wave one you can just about run the whole width of the board and get away.
Now try the same bomb in wave three, with the fleet five rows lower. It leaves at 284 pixels, falls 156 at close to 4 a frame, and lands in about 41 frames. Your ship covers roughly 205 pixels in that time, which is half the board. Same bomb, half the escape. That gap is why a low fleet feels so much worse than a fast one still up near the top.
Both collision tests are plainer than they look. A bomb counts as a hit when it sits between 440 and 460 pixels down and within 17 pixels of the middle of your ship. That 17 is half the ship's width of 34. Only the centre point of the bomb is tested, though the bomb is drawn 4 pixels wide. So a bomb can shave the corner of your ship on screen and still be scored a miss. Your bullet works the same way. It is drawn 3 pixels wide and 10 tall, but only its tip is checked against the alien's box of 28 by 20.
Nothing slips through a gap, though. A bullet climbs 8 pixels a frame, which is less than an alien's height of 20, so it cannot skip past one. The sideways jump of the fleet is 12 pixels, less than the alien's width of 28, so no alien can hop over a waiting bullet. A bomb falls at most about 4 pixels a frame through a band 21 pixels deep, so it always spends several frames inside the zone that can hit you.
- You cannot shoot a bomb down. The game runs only two collision checks: bullet against alien, and bomb against ship. Bombs and bullets pass straight through each other.
- There are no bunkers or shields to hide behind, and no bonus ship drifting across the top for extra points.
- Every bomb falls straight down. Aliens never aim ahead of you and never fire at an angle.
- The pitch of the kill sound tells you what you hit. It is 500 hertz plus 6 for each point, so the four rows ring at 740, 680, 620 and 560 hertz from the top row down.
- The four rows take the first four colours of the shared game palette: red on top, then orange, yellow and green. Your ship is drawn in that same green as the bottom row.
- The landing line is at 434 pixels and the top of your ship is at 446. The game ends about 12 pixels before an alien would really touch you.
- The marching beep steps through four pitches from 150 hertz upward, but it only sounds on a frame where the fleet moves. When the gap divides by four, as it does at the 40-frame opening of wave one and at the 4-frame floor, every step lands on the same note.
What this game asks you to do
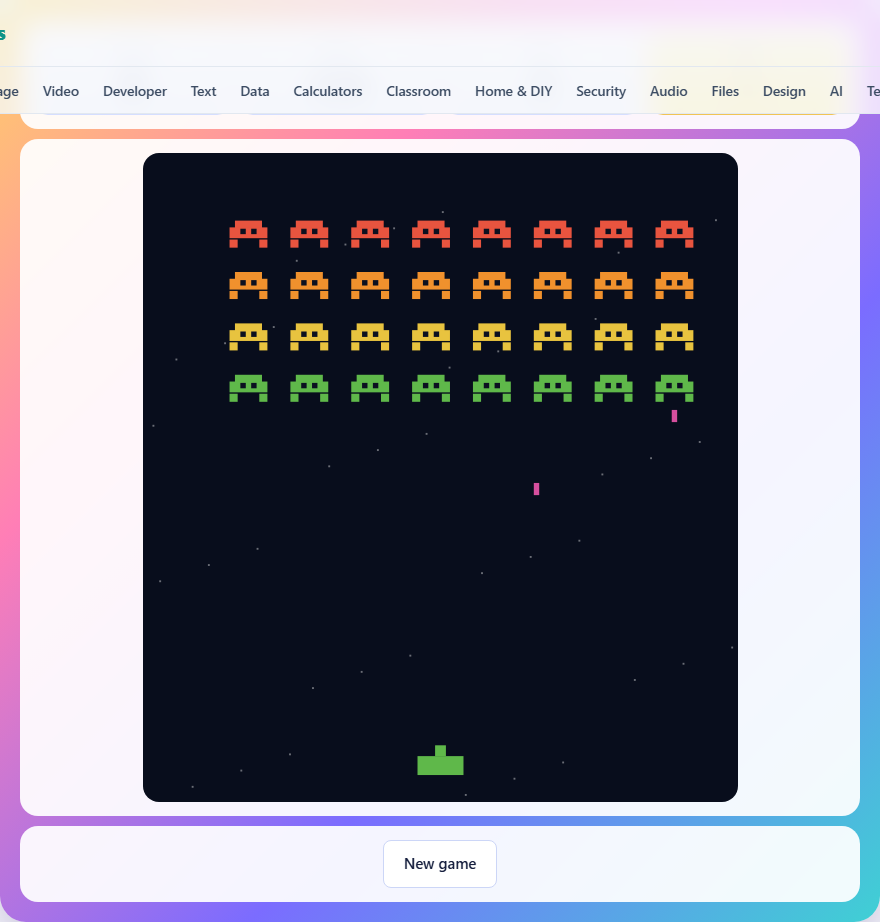
A grid of aliens marches across the top of the screen, drops one row every time it hits a wall, and you sit at the bottom firing upward. Clear the grid and a new wave spawns. Three waves finish the game. You start with three lives and lose one each time an alien bomb hits your ship.
The fleet is arranged in eight columns and four rows, giving thirty-two targets per wave. Each row carries a different point value, with the top row worth the most and the bottom row the least. Across all three waves that adds up to ninety-six aliens standing between you and the end screen.
Controls on keyboard and touchscreen
On a keyboard the left and right arrow keys slide your ship. The A and D keys do the same thing, which helps on a laptop where the arrows are small. The spacebar fires a shot straight up.
On a phone or tablet three buttons appear below the play area. The left and right arrows are held down to move, not tapped, so the ship slides as long as your thumb is on the button. The central Fire button sends one shot each time you press it. The layout is wide enough for two thumbs without crowding.
How the fleet moves and why speed matters
The entire block of aliens steps sideways together. When any alien in the group touches the edge of the screen, the whole formation drops one row and reverses direction. This means a wide fleet barely moves down, while a narrow one ricochets quickly between the walls and descends fast.
The speed rises as aliens die. With a full grid the fleet shuffles slowly enough that you can pick your targets. Once only two or three remain, they fly across the screen at several steps a second. That sudden acceleration near the end of each wave is the real test. If you panic and fire wildly you waste shots, and with a maximum of three bullets on screen at once, a miss leaves you waiting.
Bombs, lives, and what ends a game
Only the lowest alien in each active column can drop a bomb. The bombs fall in a straight line and move a little faster in later waves. You cannot shoot the bombs down; the only defense is to not be underneath when they arrive.
Getting hit by a bomb costs one life. Losing all three ends the game immediately with a score screen. The other way to lose is letting any alien reach the row where your ship sits, which also ends things at once. Between waves you keep whatever lives you have left, so a clean first wave gives you a real cushion for the harder second and third.
Scoring and the high score
Points depend on which row the alien sits in. The top row is worth forty points each, the next thirty, then twenty, then ten at the bottom. Clearing all thirty-two aliens in a wave earns you eight hundred points if you work from the bottom and clear every row in turn, but the total is the same regardless of order since the grid always starts full.
Your highest score is saved in your browser. It stays on that device and is never sent anywhere. You can see it on the game-over screen. Closing the tab or switching off the machine does not lose it, but clearing your browser data will.
Clearing columns instead of rows
The single best habit is to shoot one column out entirely rather than spreading your fire across the whole fleet. Removing a full column means the formation has more empty space on one side, so it travels further before touching a wall and dropping. That extra travel time is the breathing room you need in wave two and three.
Aim for an edge column first. Taking out the leftmost or rightmost column shortens the formation by a full step on one side, which doubles the time before the next drop. If you only thin the middle, the outermost aliens still touch the walls at the same rate and the drops keep coming.
Working the bottom row to cut bomb fire
Since bombs come only from the lowest alien in each column, clearing the bottom row first reduces the number of bombs falling on you. Every bottom-row kill either removes a shooter entirely, if it was the last alien in that column, or promotes a higher alien that was not shooting before.
The trade-off is that bottom-row aliens are worth only ten points, so focusing on them sacrifices early score. In practice the safety is worth more than the points. A player who reaches wave three with three lives intact has a far better chance than one arriving with forty extra points and one life.
Managing the three-shot limit
You may have at most three shots on screen at once. Fire a fourth and nothing happens. This limit means that holding the fire button is not a real plan; you need each shot to land or at least leave the screen quickly.
Short-range shots spend less time in flight, so firing at a lower fleet returns your bullet budget faster. When the aliens are still high up, each miss takes a long time to clear the top edge, which can leave you defenceless. If the fleet is near the top, pause between shots and aim instead of spamming.
Common mistakes new players make
- Standing still while lining up a shot. Bombs fall straight down, and a motionless ship is an easy target. Slide sideways between every shot.
- Chasing the last alien across the screen. The final one or two aliens are extremely fast. Stay near the centre and let them come to you instead of running to the edges where you have nowhere to dodge.
- Ignoring the wave counter and relaxing after the first wave. The second wave drops bombs slightly faster and the fleet moves quicker from the start. The third wave is noticeably harder again.
- Wasting shots at long range when the fleet is still high. Three missed shots leave you unable to fire for a full second, which is plenty of time for a bomb to land.
- Spreading fire evenly across the whole grid. Even damage means the fleet keeps its width, keeps hitting walls, and keeps dropping. Focused fire on one column is almost always better.
The three waves and how they differ
Wave one is gentle. Bombs are rare and the fleet moves slowly. Use it to practise aiming and to build a scoring cushion. Wave two tightens the bomb rate and the fleet starts a step or two faster. By wave three the bombs come frequently and even a full grid moves at a pace that leaves little time for sloppy aim.
Clearing all three waves wins the game and shows your final score alongside how many lives you had left. There is no wave four; the game ends cleanly. You can start a fresh game by pressing the New game button at any time.
Positioning and the centre-of-screen advantage
Your ship moves at a fixed speed, so covering the same distance takes the same time whether the fleet is near or far. That makes the centre of the screen the strongest resting position. From the middle you can reach either wall in roughly the same time, which means you can dodge any bomb that is not directly above you.
The edges are traps. Sitting near the left wall means a bomb on the right gives you twice the distance to cover, and the fleet's last survivors bounce between walls fast enough that you cannot keep up from a corner. After every shot, drift back toward the middle unless you are actively chasing a column.
Everything stays on your machine
The game runs entirely inside the page. No part of your play is sent to a server, there is no login, and no information about your session leaves the browser. Your high score is kept in local storage on the device you are using. If you load the page on a different computer, the score there starts fresh. You can prove it by disconnecting from the internet and playing a full game; nothing changes.