
How to play Shire and draw winning ward boundaries
Shire is a puzzle about drawing boundaries on a map where every vote has already been cast. The villages on the grid are either green or amber, and you cannot change a single one. All you control is where the ward lines go. Each ward must be the same size, must form one connected group, and goes to whichever side has more villages in it. Your job is to make green win a stated number of wards, even though green usually has fewer villages overall. This is gerrymandering turned into a logic puzzle, and the two techniques you need are as old as electoral maps themselves. This guide explains the rules, the controls, and the strategy that makes a minority of votes win a majority of seats.
Rules of the puzzle
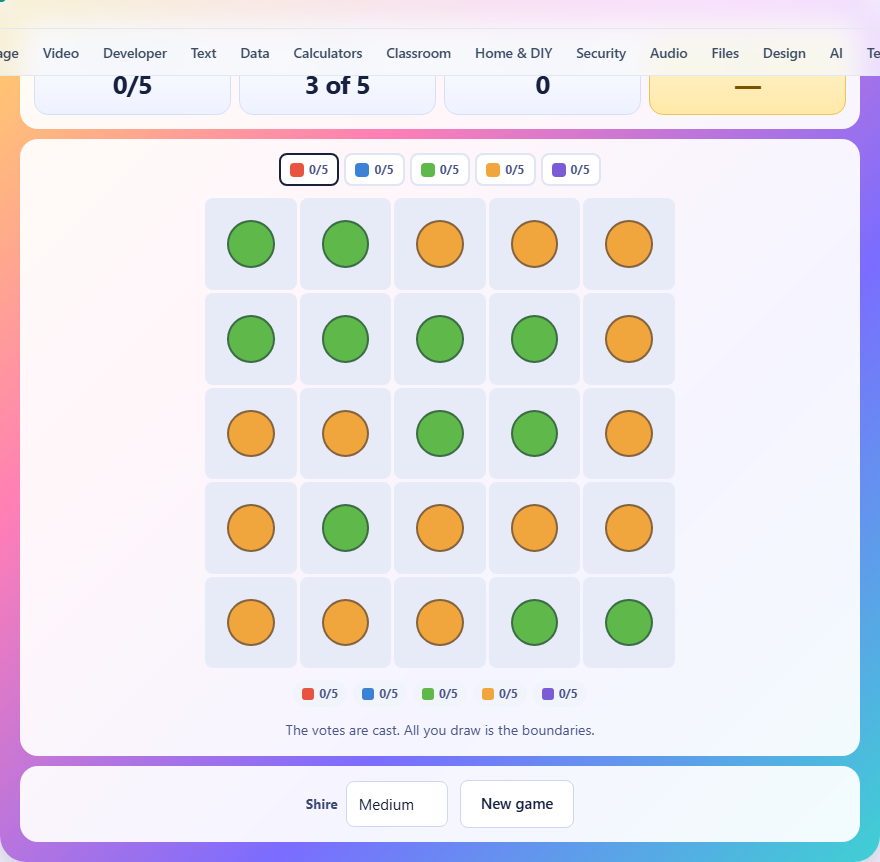
The grid is filled with villages that have already voted. Green dots represent one side and amber dots represent the other. You are told how many wards to create and how many of them green needs to win. All wards must contain the same number of villages, and every village on the map must belong to exactly one ward. A ward goes to whichever side has more villages in it. If a ward is tied, it goes to nobody, which counts against you.
Each ward must be one connected piece, meaning you can walk from any village in the ward to any other village in the same ward by stepping through adjacent villages in that ward. The board refuses to accept a village that would break this rule. You are free to take villages back and try a different layout at any time.
Controls and interface
Above the grid sits a row of colored ward buttons, one for each ward you need to draw. Tap a ward button to select it, then tap villages on the grid to add them to that ward. Each ward button shows how many villages it currently holds out of the required size. When a ward reaches its full size, the button is marked as complete.
Tap an already placed village to remove it from its ward and free it up. The village returns to the unassigned pool and you can assign it to a different ward. The board automatically selects the next unfinished ward after one fills up, so in most cases you can simply tap villages one after another without switching wards manually. A tally at the bottom of the board shows which wards are won by green, which by amber, and which are still incomplete.
Strategy: packing the opposition
Packing is the first of the two core techniques. The idea is to concentrate as many of the opposing side's villages as possible into a single ward, which they win by a huge margin. A ward won five to zero wastes four of those amber votes, because only one was needed to win. Every vote beyond a bare majority is a wasted vote from their perspective, and wasted opposing votes are exactly what you want.
When you start a new puzzle, look for a cluster of amber villages that sit close together on the grid. Draw your sacrifice ward around that cluster. Make it lose as badly as possible. The more amber votes you burn in one ward, the fewer remain to threaten you in the other wards.
Strategy: cracking the rest
Cracking is the second technique and it works in partnership with packing. After you have built one ward that amber wins overwhelmingly, you need to spread the remaining amber villages thinly across the other wards so they never quite reach a majority. If the ward size is five, a split of three green to two amber wins the ward for green. You want every remaining ward to hit roughly that ratio.
This is where the connected-piece rule makes things difficult. You cannot always reach the amber villages you want to dilute, because the ward has to stay joined up as you build it. Long, thin wards that snake across the grid are your best tool here. They are ugly shapes by any standard of compact representation, and that is exactly the point. The puzzle teaches you why real-world gerrymandered districts look the way they do.
Reading the map before you draw
Before placing a single village, count the green and amber dots. Green almost always has fewer villages overall. That is deliberate: a majority winning most wards would teach you nothing about boundary manipulation. Note where the green villages are concentrated and where they are scattered. Scattered green villages are easier to include in multiple wards. Concentrated green clusters are harder to divide without also giving those wards too many amber neighbors.
Also look at the edges and corners of the grid. Villages on the edge have fewer neighbors, which limits how you can connect them into a ward. Edge villages are easier to isolate in a sacrifice ward if they are amber, because the ward does not have to stretch as far to stay connected. Corner villages are the most constrained, since they touch only two other squares. A corner amber village surrounded by more amber neighbors is an ideal anchor for your sacrifice ward, because you can build outward from it and pack a large amber majority into a compact shape.
The three board sizes
The Shire selector offers Small, Medium, and Large. Small uses a three-by-three grid split into three wards of three villages each. It is a good starting point because the map is tiny and you can see every option at a glance. Medium uses a five-by-five grid with five wards of five villages, which introduces real complexity. Large uses a seven-by-seven grid with seven wards of seven, and finding the right boundary set can take several attempts.
On larger boards, the number of possible ward maps grows enormously. The game tests hundreds of random maps at each size before giving you a target, so the target is always achievable. If you are stuck, try erasing everything and starting with the sacrifice ward in a different corner of the map.
Common mistakes to avoid
The most common mistake is trying to make every ward a green win. You will usually need to sacrifice at least one ward to amber. Trying to spread green evenly across all wards dilutes your strength and often results in no wards at all reaching a green majority. Accept the loss early and concentrate your effort on the wards you intend to win.
Another error is drawing compact, square-shaped wards. Compact wards follow the geography of the map, but the puzzle asks you to follow the votes, not the geography. Be willing to draw irregular shapes that reach across the grid to pick up the green villages you need while leaving amber villages in the sacrifice ward.
A third mistake is forgetting that you can undo. Tapping a placed village removes it immediately. The puzzle is designed for trial and error. If a ward layout is not working, pull a few villages out and try a different path.
The history of gerrymandering
The word gerrymander dates to 1812, when the governor of Massachusetts, Elbridge Gerry, approved a redistricting plan whose oddly shaped districts were compared to a salamander by a local newspaper. The techniques of packing and cracking have not changed since then. What the puzzle demonstrates is that the arithmetic is not marginal. A side with fewer than half the votes can routinely take more than half the seats if given full control of the boundary lines. This is why electoral boundary commissions exist in many countries and why the shape of a district is considered a warning sign in redistricting debates. The puzzle strips away the political context and presents the problem as pure geometry. Once you have drawn a few maps, the mechanics become clear, and you start to see why compact shapes and competitive seats are considered signs of a fair map.
Privacy and how the puzzle runs
Everything runs inside your browser. No map data is sent to a server, no information leaves your device, and there is no account to create. Your best score is stored in local storage on this device only and will not follow you to another machine. Once the page has finished loading, you can disconnect from the internet and the puzzle will continue to work without any change.