
How to clear the ring for the least counting in Roundel
Roundel places a ring of beads in front of you, some dark and tarnished, some pale and sound. A red marker sits on the ring. You press a number to count that many beads clockwise from the marker, and the bead you land on is lifted off. Only dark beads may be removed, counting is what costs you, and the ring closes up behind every bead you lift. The goal is to clear all the tarnished beads for as little counting as possible. The game knows the cheapest total and shows it at the top, so you always know how close you are to the best answer. This guide covers the rules, the controls, and the planning that separates a wasteful run from a perfect one.
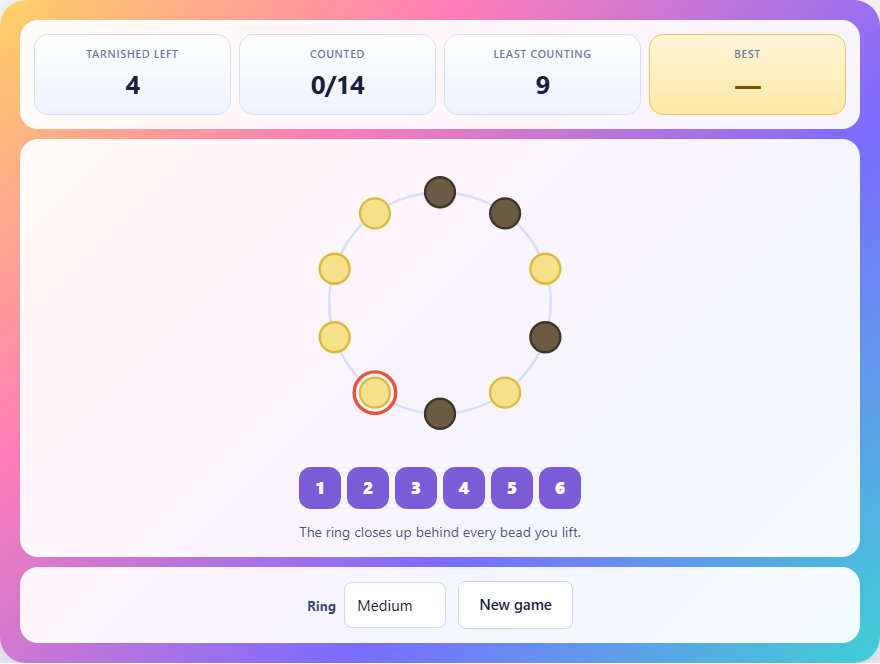
Rules of the game
The ring contains a mix of dark beads and pale beads arranged in a circle. A red marker sits at one position on the ring. You choose a number from the row of buttons below the ring, and the game counts that many beads clockwise from the marker. The bead you land on is lifted off the ring, and the marker moves to where that bead was. If you land on a pale bead, nothing happens and no counting is spent.
Lifted beads are removed from the ring entirely. The remaining beads close up, so the distances between everything change after each removal. A count of three that reached a certain bead before the removal might reach a completely different bead afterward. The game ends when every dark bead has been lifted. Your score is the total amount you counted, and lower is better.
Controls and interface
The ring is drawn as a circle with beads around its edge. Dark beads are visually distinct from pale ones. The red marker shows where counting will start from. Below the ring, a row of numbered buttons lets you choose how far to count. The highest button varies by ring size.
The stats bar shows three figures: how many tarnished beads remain, how much counting you have used out of your budget, and the least counting possible for this particular arrangement. The budget is the optimal solution plus a small margin, so you have room for a few mistakes but not unlimited waste. A level selector labelled Ring lets you pick Small, Medium, or Large. Press New game to get a fresh arrangement.
How scoring and the budget work
Your score is the total amount of counting used to clear every dark bead. The game finds the optimal solution before you start by searching every possible order of removals and every possible count at each step. It uses a cheapest-first search over the state space of which beads are gone and where the marker stands, so the figure shown is exact, not an estimate.
The budget gives you the optimal cost plus a slack allowance. If your total counting reaches the budget before all dark beads are cleared, the game ends and you lose. This means you cannot waste counting on long detours and still finish. Staying close to the optimal path is necessary for survival, and matching it exactly earns you the best possible score.
Take nearby dark beads first
The cheapest possible count for a single bead is one, and that only happens when a dark bead sits immediately next to the marker. Two dark beads in a row next to the marker can be taken for one and one, as long as you approach from the right end of the cluster. This makes clusters of adjacent dark beads extremely cheap to clear.
Reaching the same bead the long way around the ring costs far more. If there are eight beads left and the dark one you want is seven positions clockwise, you pay seven instead of one. Early in the game, when the ring is full, the long way around is very expensive. Clearing the nearest dark bead first almost always saves counting compared to jumping across the ring.
Plan where the marker ends up
Every removal moves the marker to where the bead was. This means your current choice affects the cost of every future choice. A slightly more expensive first count can leave the marker beside a cluster of dark beads, making the next two or three removals very cheap. A cheap first count can strand the marker far from anything useful.
The best approach is to work backwards from where you want to finish. Identify the last dark bead you will need to remove and figure out where the marker needs to be when only that bead remains. Then work out which sequence of removals gets the marker to that position. This backwards planning is what separates the optimal count from a greedy one.
Dealing with pale beads in the way
Pale beads cannot be removed. They stay on the ring for the entire game and must be counted past every time you cross them. A pale bead sitting between two dark ones adds to the cost, because you have to count over it to reach the second dark bead. But once you remove the first dark bead, the ring closes up and the gap changes. With fewer beads on the ring, each count reaches further around than it did before, which can be either helpful or harmful depending on where the remaining dark beads sit.
Sometimes it is worth counting past several pale beads to reach a dark bead that would otherwise be very expensive later. The decision depends on what the removal does to the rest of the ring. After you lift that bead, the pale beads on either side of the gap slide together, and the distances for everything else shift. Counting the beads that remain and tracing the new ring in your head before you press the button is the habit that makes the difference.
Common mistakes and how to avoid them
The most common mistake is always picking the smallest available number without thinking about where the marker will end up. Counting one is cheap, but if it moves the marker away from the remaining dark beads, the next several counts will be expensive enough to wipe out the saving.
Another mistake is forgetting that the ring closes up. Players count the distance to a dark bead, press the button, and land on a pale bead because a lifted bead earlier in the ring shortened the path. After every removal, recount the distances. The ring you see now is not the ring you started with.
A third mistake is spending a large count to reach a lone dark bead on the far side when two smaller counts could get there more cheaply by bouncing off an intermediate dark bead. Removing that intermediate bead along the way is not a detour. It is progress, and it shortens the ring for the final step.
Difficulty levels and ring sizes
The Small ring has eight beads with three dark ones and buttons up to five. The Medium ring has ten beads with four dark ones and buttons up to six. The Large ring has twelve beads with five dark ones and buttons up to seven. Larger rings are harder because there are more beads to count past, more pale beads blocking the way, and more possible orders to consider.
On every size, the game generates a random arrangement and solves it before you start, rejecting arrangements whose optimal cost is too low or too high. This means the puzzle is always challenging but never trivial. The slack in the budget also varies by size, giving a bit more room on larger rings where the margin for error is thinner. The highest numbered button is also larger on bigger rings, which means you can reach further around in a single count, but at a steep price. Using the largest available count is rarely the right move unless a single dark bead is stranded on the far side with nothing else nearby.
Privacy and how the game runs
The entire game runs inside your browser. No moves are sent to a server, no data leaves your device, and there is no account to create. Your best score is saved in your browser's local storage on this device only. Once the page has finished loading, you can disconnect from the internet and the game will keep working without any change.