
Moving wells until every cottage walks to the right one
This article explains how distance decides which well serves which cottage, why moving one well shifts every boundary at once, and the strategies that solve these nearest-point puzzles without wasting moves.
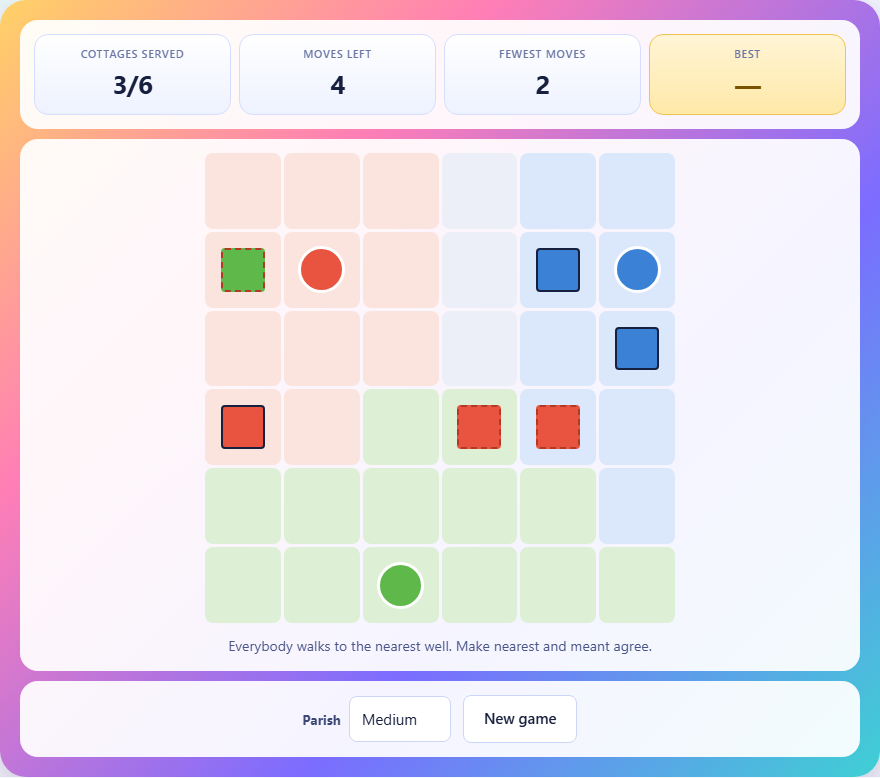
The map and the goal
A grid of squares makes up the parish. Some squares hold cottages, shown as small coloured blocks. Others hold wells, shown as round coloured pins. Each cottage is painted the colour of the well it is supposed to draw water from. Every person in a cottage walks to whichever well is nearest, regardless of colour. Your job is to move the wells until the nearest well for every cottage matches the colour it was painted.
The background shading on the grid shows which well is closest to each square. When a cottage sits in shading that matches its colour, it is being served correctly and it is drawn solid. When it sits in the wrong colour's territory, it has a dashed outline.
How to move a well
Tap a well to pick it up. It gets a highlight to show it is selected. Then tap any empty square to put it down there. The well moves, the boundaries redraw, and the shading updates instantly.
You cannot place a well on a square that already holds a cottage. You cannot stack two wells on the same square. If you tap a well that is already selected, it deselects without using a move. But once you put it down on a new square, that counts as one move whether or not it helped.
Each puzzle shows the fewest moves that could solve it, listed as the par. You have par plus a small cushion. Run out of moves and the puzzle ends.
How distance and boundaries work
Distance is measured in a straight line from the centre of one square to the centre of another. The boundary between two wells sits on the line of points that are exactly the same distance from both. Every square on one side of that line belongs to one well, and every square on the other side belongs to the other.
When you move one well, every boundary it shares with every other well shifts. A single move can change which well is nearest for many squares at once. That is why a move that fixes one cottage often breaks two others. The boundaries are all connected.
A cottage that is exactly the same distance from two wells has no nearest one. It counts as unserved, and the puzzle treats that as wrong. Ties must be broken by moving a well closer.
Strategy: fix the middle, ignore the corners
Cottages near the corners of the grid are easy to serve. They are far from most wells, so only the one closest to them matters. Moving that well a little bit rarely affects anything else in the corner.
Cottages in the middle of the grid are the hard ones. Several wells compete for the same territory there, and every boundary is close. Solve the middle first, then check whether the corners are still correct.
If a cottage in the centre is being served by the wrong well, the fix is usually to move the right well closer to it. But think about what that does to the cottages between the well and the centre. Those cottages might lose their nearest well in the process.
Strategy: plan the whole move before picking up a well
Every move counts, and putting a well back where it was still costs a move. Before you pick up a well, study the map. Find every cottage that is currently wrong. Think about where the wells would need to be for all of them to sit in the right shading.
Sometimes the answer is to move just one well. Sometimes two wells need to swap positions. Sometimes a well needs to shift by only one square in one direction. The key is to see the whole picture before you start tapping.
On the small board with two wells, this planning is quick. On the large board with three wells and eight cottages, it takes real thought. But spending a minute studying the map is better than burning two moves on a guess.
Understanding the shading
The background colour behind every square shows which well is closest. If the grid is split into two colour regions, every square in the blue region is closer to the blue well than to any other. Every square in the red region is closer to the red well.
The boundary between two regions is a straight line sitting exactly halfway between the two wells. Move a well one square to the right, and the boundary shifts half a square to the right. This half-step relationship is useful. It means a well needs to move twice as far as you want the boundary to move.
Watch the shading as you place a well. The moment you tap the target square, the colours repaint. If a cottage that was wrong is now surrounded by the right colour, that one is fixed. If a cottage that was right is now in the wrong colour, you have created a new problem.
The connection to real geography
The regions that the wells carve out are called Voronoi diagrams, named after the mathematician Georgy Voronoy. The idea is older than the name. In 1854, a doctor named John Snow used the same construction to trace a cholera outbreak in London. He drew the area around a water pump in Soho and showed that nearly every death fell inside it. The pump was the source.
The same idea decides which mobile phone tower your phone connects to, which fire station serves your street, and how weather stations divide a landscape into forecast zones. Each region belongs to whichever station is closest, and the boundaries between them are the lines where two stations are equally far away.
In this puzzle the wells play the role of the stations, and the cottages play the role of the people being served. Moving a well is like moving a station, and the entire region map redraws.
Mistakes that waste moves
Most failed attempts come from moving without planning.
- Moving a well onto the square right next to a cottage. Being close is not the same as being nearest. Another well might still be closer from the other side.
- Moving the same well twice. Each move costs one from the budget. If you moved a well to the wrong spot, you just spent two moves to get one result.
- Ignoring ties. A cottage that is exactly between two wells is not served by either one. Move the correct well one square closer to break the tie.
- Fixing cottages one at a time without checking the others. Every well move changes the boundaries for the whole map. Fix one, check all.
- Forgetting that distance is measured from the centre of each square. Two squares that look next to each other might not be closer than a square that is two rows away on a diagonal.
The three parish sizes
Small is a five by five grid with two wells and four cottages. The boundary between two wells is a single line, and the puzzle usually takes two or three moves. This is the best place to learn how distance shapes the map.
Medium is six by six with three wells and six cottages. Three wells create three boundaries, and the interactions between them make the puzzle much harder than small. Moving one well can shift two boundaries at once.
Large is seven by seven with three wells and eight cottages. More cottages means more constraints. A well placement that serves six cottages might leave the last two stranded, and the extra board space gives you more squares to consider for each move. The move budget grows along with the difficulty, but not by much, so you still need to plan carefully before picking up any well.
Everything runs on your device
The distance calculations, the boundary shading, and the move counter all run inside your browser on this page. Nothing is uploaded to any server. There is no account and no sign-up. Your best move count is stored in your browser's local storage on this device alone. Once the page has loaded, the puzzle works offline.