
Balancing beams with the law of the lever
How the hanging mobile puzzle works, why distance matters as much as weight, how fixing one beam can tip the one above it, and the strategies that clear every level before the clock runs out.
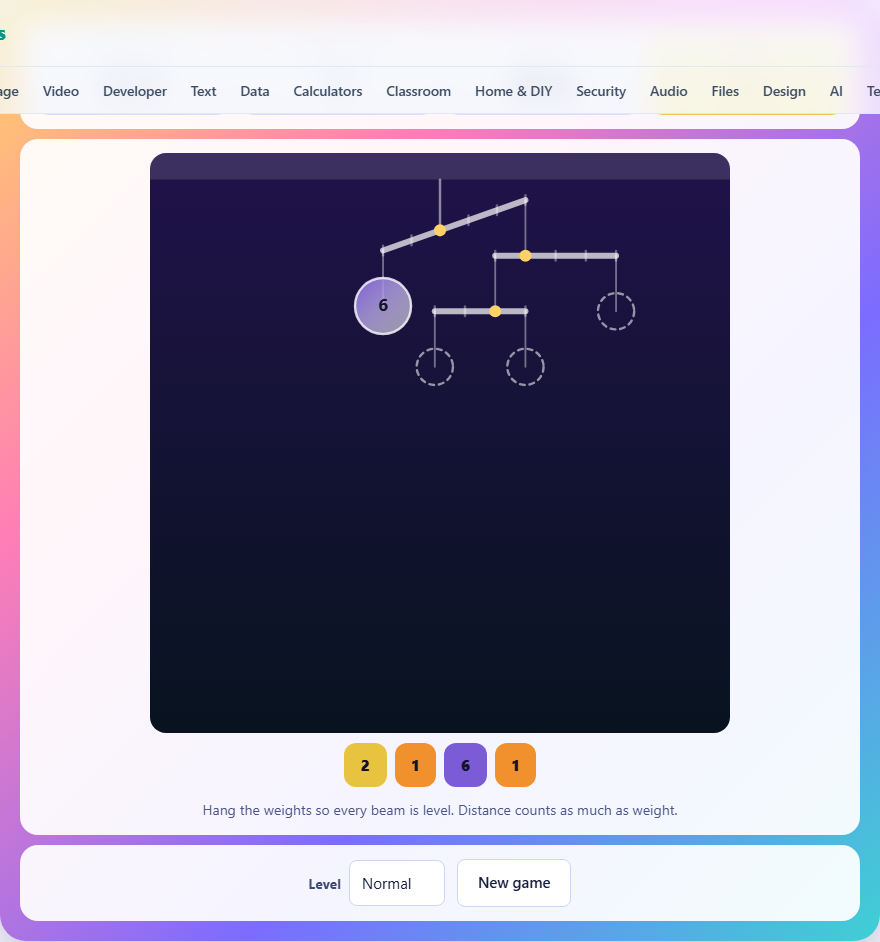
What you are looking at
A mobile hangs from the ceiling. It is made of beams, and each beam has a left arm and a right arm that meet at a pivot. Weights hang from the ends of the beams, and smaller beams can hang from bigger ones. The whole structure works like a tree, with the top beam at the root and everything else dangling below it.
Some of the weights have been taken off and placed in a tray below the mobile. Your job is to hang them back so that every single beam in the mobile sits level at the same time. You are working against a countdown timer, so thinking fast matters.
The rule that decides everything
A beam is level when the weight on one side times its distance from the pivot equals the same figure on the other side. This is the law of the lever. A weight of 2 hung three notches out from the pivot puts 6 units of force on that arm. A weight of 3 hung two notches out also puts 6 units of force. Those two balance perfectly.
The notch marks on each beam show how far out each hook is. Count them before you judge whether a placement makes sense. The arms are rarely the same length on both sides, because the arm lengths are worked out from the weights rather than chosen at random. A beam with a heavy side has a short arm there and a long arm on the light side.
This means you cannot look at the weights alone. A heavy weight hung close to the centre can balance a light weight hung far out. Distance and weight are equal partners in the equation.
Controls for hanging and removing weights
First tap a weight in the tray to pick it up. The selected weight gets a white outline. Then tap an empty hook on the mobile to hang it there. An empty hook shows up as a dashed circle. The beam reacts at once, tilting to show which side is heavier.
To take a weight back off, tap it on the mobile. It returns to the tray and the beam adjusts again. This costs nothing. Only the clock is against you, so feel free to try placements and undo them.
On a phone the controls are the same. Tap a weight in the tray, then tap a hook. The mobile scales to fit your screen.
Difficulty levels, depth, and spare weights
Easy mobiles have two levels of beams, two missing weights, one spare weight in the tray, and a hundred-second timer. Normal adds a third level of beams, removes three weights, keeps one spare, and gives you ninety-five seconds. Hard stays at three levels of beams but removes five weights, puts two spares in the tray, and cuts the time to ninety seconds.
The spare weights are the ones that do not belong anywhere. They look just like the real weights and sit in the tray alongside them. If your last hook refuses to balance no matter what you try, there is a good chance a spare is already hanging somewhere it should not be. Spotting it is part of the puzzle.
Start at the bottom and work up
The most important strategy is to solve the smallest beams first. A beam at the bottom of the mobile has only two hooks and no other beams hanging from it. If both hooks need weights, you can do the multiplication and figure out the answer directly.
Say a bottom beam has one hook two notches to the left and one hook three notches to the right. The left side already holds a 3, giving a force of 6. The right side needs a weight whose value times 3 also equals 6. That is a 2. You look in the tray for a 2, hang it, and the beam turns green.
Once a bottom beam is level, the total weight below it is locked in. That fixed total becomes part of the load on the beam above it, which means the higher beam now has one fewer unknown. Working upward like this peels the puzzle apart one layer at a time.
Cascading loads and why one move tips two beams
Everything hanging below a beam counts towards the load on that beam. If you hang a weight of 4 on a small beam near the bottom, that 4 also adds to the arm of every beam above it, all the way to the ceiling.
This is why you sometimes see a beam flip from green to red when you change something lower down. You did not touch that beam directly, but you changed the total weight hanging beneath one of its arms. The fix is always the same: solve the bottom first, then check upward.
On hard, with five missing weights and three levels of beams, the cascading effect can be hard to track in your head. If you lose track, take all your placed weights back and start over from the bottom. The clock is generous enough to allow one full restart if you move quickly.
Dealing with the spare weights
Every mobile is built balanced and then taken apart, so an answer always exists. The spare weights are there to test whether you are really solving the puzzle or just filling every hook. On easy there is one spare. On hard there are two.
If you fill every hook and one or more beams are still tilted, at least one hook is holding a spare. Look for the beam that refuses to balance and check the arithmetic on both of its arms. The weight that does not fit the equation is the spare. Tap it to send it back to the tray and try a different one.
A quick way to spot a spare early is to count. If there are four empty hooks and six weights in the tray, two of those weights are not needed. Narrow your options before you start hanging.
Reading the tilt for clues
A beam that leans left really is heavy on the left. This is not just a decoration. The game draws the tilt from the actual forces on each arm, so the direction it leans tells you which side has too much weight. If you hang something and the beam tilts sharply toward that side, the weight you chose is too heavy for that position.
Use the tilt as a quick check before you do the full arithmetic. If the beam was leaning right before you placed anything and it flips to lean left after your placement, you overshot. Take the weight back and try a lighter one. If it still leans the same direction but less, you are getting warmer. A beam that sits perfectly flat has balanced. It turns green to confirm it.
On the harder levels, beams higher up tilt as you change things lower down. Keep an eye on the top beam as you work on the bottom. A small shift up there tells you whether your changes below are moving things in the right direction.
Common mistakes when learning the game
- Ignoring arm lengths. Two arms that look similar can be one notch and two notches. Always count the marks before you place a weight.
- Solving the top beam first. The top depends on everything below it, so starting there means everything you do lower down will tip it again.
- Hanging every weight in the tray. The tray always contains at least one spare. If you use them all, at least one placement is wrong.
- Forgetting that taking a weight off is free. If a beam tilts the wrong way after you hang something, just tap the weight to return it. You only lose a few seconds.
- Panicking when time gets low. The arithmetic on each beam is simple multiplication. Calm down, count the notches, and multiply. A correct placement in five seconds beats three wrong guesses in fifteen.
- Not checking above after fixing below. Solving a bottom beam changes the load on the one above it. Always glance upward after every placement.
Your game stays on this device
The puzzle runs entirely in your browser. No moves, weights, or scores leave your machine. Your best time is saved in local storage on this device and will not follow you to a different computer. Once the page finishes loading, you can go offline and the game will keep working. There is no account to create and nothing to sign into.