
Solving island and sea grids with logic alone
How the three rules of this shading puzzle fit together, how to read the board, which squares settle first, and the thinking patterns that carry you through a grid without guessing.
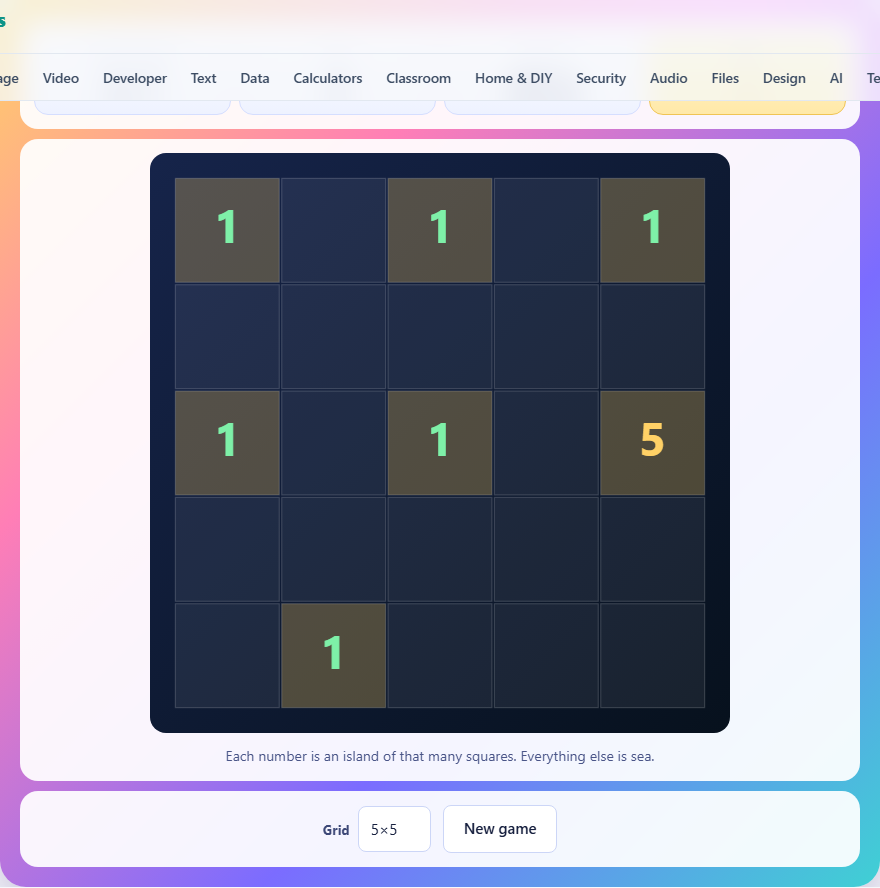
What the puzzle asks you to do
You are given a grid of blank squares. Some of them carry a number. Each number tells you the size of the island it belongs to. An island is a group of white squares joined side by side, and each island holds exactly one number. Every square that is not part of an island is sea.
Three rules govern the sea. First, all the sea must connect into a single piece. There can be no separate pools. Second, the sea may never form a solid two-by-two block anywhere on the board. Third, no two islands may touch each other along a side. Touching at a corner is fine.
Your job is to mark every square as either island or sea so that all three rules hold at the same time. Each puzzle has one answer, and the generator has proved that before it reaches you.
Controls and grid sizes
Tap a square to flood it as sea. Shift-tap a square to mark it as island. Tap again to clear the mark and go back to blank. Right-clicking also marks a square as island, which is handy with a mouse.
The grid selector offers three sizes. The 4 by 4 grid gives you three minutes and a handful of islands. The 5 by 5 grid gives you just over four minutes. The 6 by 6 grid gives you about six and a half minutes and six or more islands. Press New game to deal a fresh board at the chosen size.
A stat bar above the board shows how many islands you have at the right size, how many sea squares you have placed, and how much time is left. The timer counts down, and the game ends when it reaches zero or when every square is filled correctly.
The opening: ones and forced sea
Every board starts with at least a few cells you can settle at once. A square carrying the number one is an island all by itself. It needs no neighbours, so every square touching it on a side must be sea. On a 5 by 5 grid, a one in the middle floods four squares around it in a single step.
After the ones, look for two different numbers sitting close together. Islands may not touch along a side, so any blank square that sits beside two different numbered squares cannot belong to either island. It has to be sea. On tight boards this rule alone can fill a corridor between two islands before you think about island shapes at all.
These two moves are mechanical. They need no reasoning about shapes or connections. Do them first on every board, because they set up everything that follows.
Growing islands to the right size
Once the forced sea is in, turn to the numbered squares that are not ones. A square labelled two needs exactly one more white neighbour. A three needs two more. Look at which blank squares sit next to the number and count how many directions the island could grow.
Sometimes the number has only one direction open. A two sitting in a corner with sea on two sides has only one blank neighbour left. That neighbour must be part of its island, and the squares beyond it must be sea. These forced growths are common after the opening pass, especially on smaller grids.
When an island reaches its full size, seal it by flooding every blank square that touches it. The sooner you seal a finished island, the more sea you lock in, and the more constraints fall on the remaining islands.
The two-by-two rule as a deduction tool
The ban on solid two-by-two blocks of sea is not just a restriction. It is your strongest deduction tool in the middle of a solve. Whenever three squares of a two-by-two group are already sea, the fourth square must be island.
This happens more often than you might expect. On a 5 by 5 grid, once you have flooded the squares around the ones, L-shapes of sea appear in corners and along edges. The cell that would complete the block is forced to be island, and that forced island is usually next to a numbered square that was waiting for exactly one more cell.
Check every corner of every sea patch you place. A quick scan for three-out-of-four blocks is the fastest way to unlock a stalled grid.
Keeping the sea connected
All the sea on the board must form one continuous piece. A sea square is connected to another if you can walk from one to the other through sea, moving only up, down, left, or right. If a group of sea squares gets cut off from the rest, the board is broken.
This rule bites hardest in the late game. As islands grow and close off corridors, a stretch of sea may end up with only one way out. If that exit is blocked by an island, the sea on the far side is stranded. Follow the edges of the sea and ask yourself whether each branch can still reach the main body. If a branch leads into a dead end, something nearby has to stay open.
A practical check is to trace the longest sea path. If it doubles back on itself and the only way to keep it connected is to leave a certain square as sea, then that square is sea no matter what the islands want.
Working a 5 by 5 example step by step
Say the board has a 1 in the top-left corner, a 3 near the centre, and a 2 near the bottom-right. Start with the 1. It is an island on its own, so the squares to its right and below are sea. That is the opening.
Next, look at the 3. It needs two more white cells beyond itself. Count how many blank neighbours it has. If only two are blank and not already sea, those two must join the island. Seal the island by flooding everything touching it.
Now check for two-by-two blocks. The sea you placed around the 1 and the 3 may have created an L of three sea cells somewhere. If so, the fourth cell is island. Use that forced island to reach the 2, which needs one more neighbour. Once every island is the right size and every cell is marked, the timer stops and your remaining seconds are your score.
Common mistakes and how to avoid them
The most frequent error is forgetting the connection rule. You flood a corridor of sea, then place an island that walls it off from the main body. The board fills up, every island is the right size, but the sea has two separate pieces and the puzzle rejects it. Before sealing an island, glance at the sea on both sides of it.
- Flooding a square next to a number whose island is not yet full. That number still needs room to grow, and you just blocked one of its exits.
- Ignoring the two-by-two check until the end. Three-out-of-four blocks stack up fast, and each one you miss is a deduction you lose.
- Trying to guess an island shape instead of reasoning from the edges. Guess less, scan for forced moves more.
- Running out of time because you started in the middle. Always do the mechanical moves first: ones, then between-number sea, then two-by-two checks.
- Marking a square as island when it touches an existing island of a different number. Islands may not share a side, and that mark will have to come off.
Picking the right grid size
The 4 by 4 grid is a good place to learn the three rules. Boards are small enough that every island and every sea path is visible at once, and the three-minute timer is generous. Most 4 by 4 boards can be solved in under a minute once the pattern clicks.
The 5 by 5 grid is where the puzzle gets interesting. Islands start to interfere with each other, and the connection rule begins to matter. Expect to need two or three minutes on your first few attempts.
The 6 by 6 grid is a real challenge. Six or more islands crowd the board, the sea has to wind between them without forming any two-by-two blocks, and the connection constraint is tight. Use the full timer and check your sea paths before committing.
Everything stays on your machine
The board is built inside your browser. No puzzle data, no moves, and no scores leave your device. Your best times are saved in your browser's own storage, so they stay on this machine and are never sent to a server. Once the page has loaded, the game works with no internet connection at all. Close the tab and everything is gone except your saved records.