
Solving fire-spread puzzles by reading the fuel grid
A complete guide to Ember, the logic puzzle where you strike one match and the fire does the rest. Covers the spread rules, the fuel system, how to read a board and predict exactly how many squares will burn, and the thinking that turns guesswork into deduction.
One match, one answer
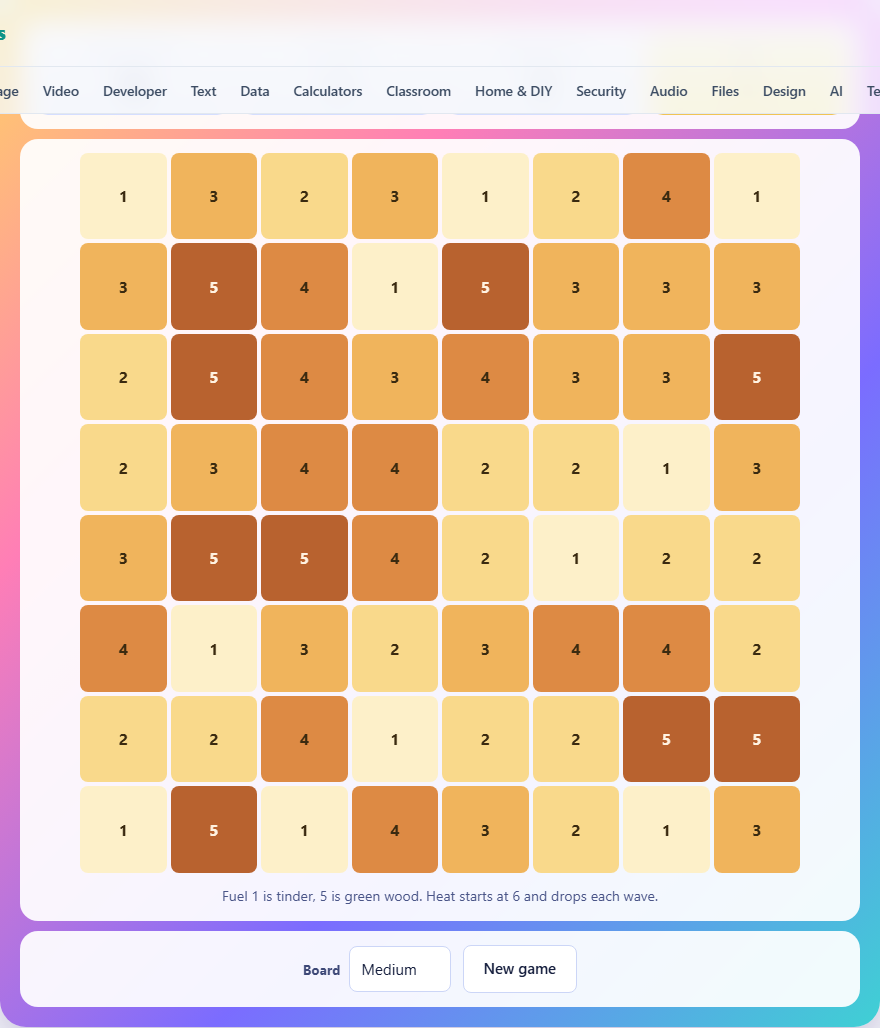
Ember gives you a grid of squares, each holding a fuel number. You tap one square to light it. The fire starts at a fixed heat and spreads outward in waves, dropping by one each wave. Any square whose fuel is no higher than the current heat catches from a burning neighbour. When the heat reaches zero the fire goes out.
The puzzle tells you a target number. Burn exactly that many squares, no more and no fewer. There is always exactly one square on the board that produces the target, and the puzzle is designed so that answer can be found by reading the fuel rather than by trial and error.
This is not a game of speed or reflexes. It is a counting puzzle. You look at the fuel values, trace paths through the grid, figure out which clusters of low fuel are within reach of a given starting point, and pick the one start that gives the exact total asked for.
How fire spreads
The lit square is wave zero. Its neighbours are wave one, their neighbours are wave two, and so on. Fire only moves up, down, left and right, never diagonally. A square two rows down and two columns across is four waves away, not two.
At each wave the heat drops by one. If the starting heat is six, wave one has heat five, wave two has heat four, and by wave six the heat is zero and the fire stops. A square catches only if its fuel is less than or equal to the heat of the wave reaching it. Fuel one catches easily. Fuel five only catches when the heat is still five or higher, which means it must be within one step of the starting square.
The lit square itself always catches, regardless of its own fuel. A match lights anything. This is easy to forget, because everywhere else on the board fuel matters. But the starting square burns even if its fuel is higher than the heat, which means starting on a high-fuel square is a valid and often useful move.
Reading the fuel colours
Each square shows its fuel number. Pale squares have low fuel. They are tinder and will burn from almost any wave that reaches them. Dark squares have high fuel and resist all but the hottest waves, which are the waves closest to the starting point.
On the small board, fuel runs from one to four and heat starts at five. That means fuel-four squares only catch at wave one, the ring right next to the match. On the medium board, fuel goes up to five and heat starts at six. On the large board, fuel goes up to six and heat starts at seven. The ratios stay roughly the same: the highest fuel values only burn when the fire is fresh.
Board sizes and matches
Small is a six by six grid with heat five and three matches. Medium is eight by eight with heat six and three matches. Large is ten by ten with heat seven and only two matches.
The number of matches is how many wrong guesses you get before the puzzle reveals the answer. A wrong guess shows you how many squares you burned and tells you whether it was too many or too few. That feedback narrows things down, but on the large board you only get one wrong try before the second match is your last.
Controls and what you see
Tap any square to light it. The fire plays out wave by wave with a short animation, so you can see exactly where it spread and where it stopped. The stats bar shows the target number, how many squares your last attempt burned, and how many matches you have left.
After the fire finishes, the burned squares stay highlighted. If your total matches the target, the game ends with a win and reports how many matches you had left. If the total is wrong, you get a message saying whether you burned too much or too little, and after a moment the board resets for your next try.
When you run out of matches, the game reveals the correct starting square by its row and column position. A dropdown below the board lets you switch between small, medium, and large boards, and the New game button generates a fresh puzzle.
Choke points and corridors
The key to solving Ember is spotting choke points. A choke point is a single low-fuel square that connects two groups of low-fuel squares. If the fire can pass through it, both groups burn. If the heat has dropped too low by the time the fire reaches the choke point, only the near group burns.
Suppose two pockets of fuel-one squares sit on opposite sides of the board, connected by a corridor of fuel-two squares. Starting near the left pocket burns that pocket easily, but the fire has to travel through the corridor before it reaches the right pocket. If the corridor is long enough, the heat runs out before it gets there. Starting in the middle of the corridor might burn both pockets but with different totals.
When the target is a moderate number, look for a start that reaches one pocket but not the other. When the target is large, look for a start in the middle where the fire can spread in all directions before the heat fades.
Edges and corners reduce the burn
A square in the centre of the board has four neighbours, and each of those has four of its own. The fire fans out in every direction. A square in a corner has only two neighbours, and beyond those the board runs out fast. Starting in a corner wastes heat on squares that do not exist.
If your last try burned too many, move toward the edge. If it burned too few, move toward the middle. This is a rough rule, not a guarantee, because the fuel layout matters more than position. But when two candidate squares have similar fuel around them, the one closer to the edge will burn fewer.
Edge starts are especially useful when the target is a small number. A corner square wastes two of its four possible spreading directions on empty space, which sharply limits how far the fire travels.
The uniqueness guarantee
Every Ember puzzle is generated by simulating a fire from every single square on the board and recording the total for each. The target is chosen only when exactly one starting square produces it. If two squares burn the same number, that number is never used as the target.
Targets at the extreme ends of the range are thrown out too. A target of one or two would be a guess, and a target that covers nearly the whole board would have too many correct answers. The result is a puzzle that always has a solution, and that solution is always unique.
This means you can be certain that any answer you find by reasoning is the only answer. You do not need to check whether some other square also hits the target. If your logic points to one square, that is the square.
Mistakes that waste your matches
- Forgetting that the lit square always burns. You might dismiss a high-fuel square as a starting point, but the match lights it regardless of its fuel.
- Counting diagonal distance as two instead of four. Fire does not spread diagonally. A square two down and two across is four waves away.
- Ignoring the feedback. When the game says you burned too many, starting in a similar spot will burn a similar amount. Move to a different region.
- Not counting the waves. Mentally trace the fire outward one step at a time. Check which squares catch at each step. The total at the end of your mental count should match the target.
- Treating fuel as a wall. High fuel is not a wall. It just needs hotter fire. A fuel-four square right next to the match will catch because the heat is still high there.
Your puzzle stays local
The board is generated and solved entirely in your browser. The fuel values, the target, the correct answer, and every fire simulation all happen on your own machine. Nothing is uploaded and no server is involved. Close the tab and nothing remains anywhere.