
Shading squares into dominoes across room walls
What the three rules actually demand, why rooms alone cannot solve it, how to read the smallest rooms first, and the line of reasoning that cracks a seven by seven grid from the outside in.
Three rules, one grid
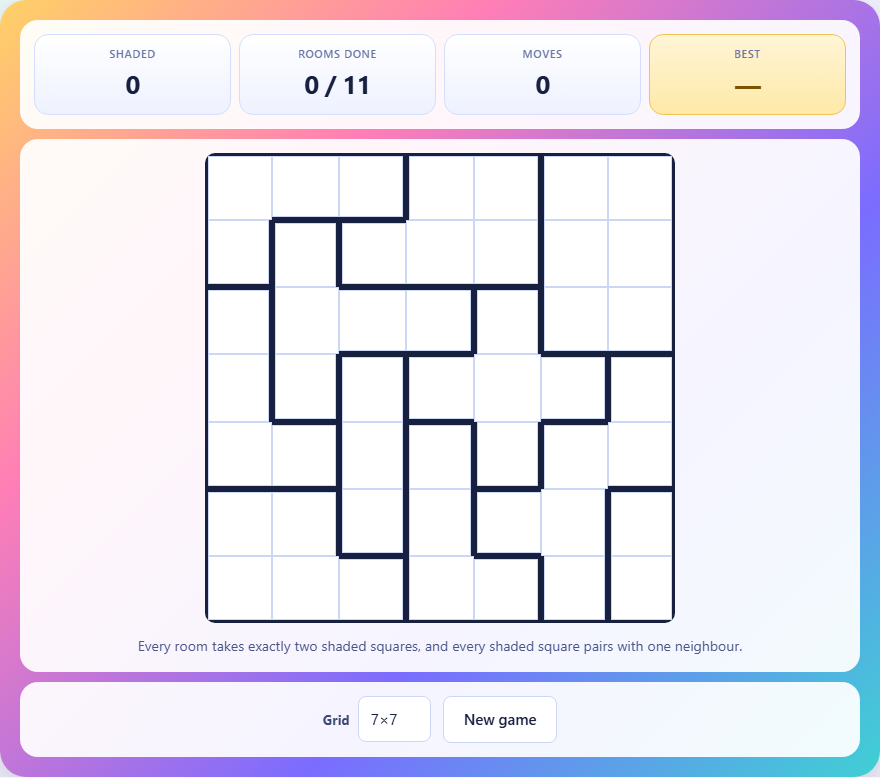
The board is a square grid split into rooms by heavy lines. Your job is to shade some of the squares so that three conditions hold at once. First, every room contains exactly two shaded squares. Not one, not three, but two. Second, every shaded square touches exactly one other shaded square, horizontally or vertically. Third, that pairing means all the shading forms dominoes, each one a block of exactly two squares.
The twist is that a domino does not have to stay inside a room. A shaded square in one room and a shaded square in the room next door can form a domino that crosses the wall between them. Most of the shading in a finished puzzle does exactly that, and telling apart a room whose two squares form their own domino from a room whose two squares belong to two different dominoes reaching in from the outside is the entire puzzle.
Grid sizes and how answers work
Three grid sizes are offered. The six by six is the starting point, the seven by seven is the default, and the eight by eight is the largest. On the six and seven grids, every puzzle has been proved to have exactly one valid shading before it is served. On the eight, the search is slower, and about one in six puzzles has a second valid shading. Either way, any arrangement you find that satisfies all three rules is accepted.
The puzzle checks your work against the rules themselves, not against a stored answer sheet. If you find a different shading that follows every rule, the game counts it as correct.
Controls
Tap any square to shade it. Tap it again to clear it. A correctly paired shaded square shows a solid colour. A shaded square that has no shaded neighbour, or that has two or more, turns red to warn you.
The stats bar tracks three numbers. Shaded tells you how many squares you have filled. Rooms done counts the rooms where exactly two squares are shaded. Moves counts every tap, and your best score is the lowest move count that finishes the puzzle.
The New game button draws a fresh grid at the selected size. Changing the grid size from the dropdown also starts a new game right away.
Start with rooms of two squares
A room that contains only two squares is the easiest thing on the board. The rules say the room needs exactly two shaded squares, and the room has exactly two squares, so both must be shaded. Shade them both immediately.
That placement has consequences. Each of those two shaded squares now has one partner, which means no other shaded square can sit next to them. Every square that borders the pair on the outside is forced to be unshaded. Mark those neighbours as safe to skip and look at the rooms they belong to. Those rooms now have fewer candidates for their own two shaded squares.
A room of three squares is almost as easy. Two of the three must be shaded, so whichever one you can rule out settles the other two. If one of the three squares is already blocked by a neighbour that is part of a finished domino, the other two must be the room's pair.
Why three in a line breaks the rules
This is the one constraint that catches people off guard. If you shade three squares in a row, the middle square has two shaded neighbours, which breaks rule two. A shaded square may only touch one partner. So any time you see three candidate squares lined up in a corridor, at most two of them can be shaded, and they cannot be the two on either side of the middle one unless the middle one stays blank.
The same logic extends. Four in a row means the shading has to break into two separate dominoes with a gap between them. Whenever you are about to shade a square, glance at its neighbours. If two of its neighbours are already shaded, shading it would give it two partners and turn it red.
Think across walls, not inside rooms
The most common mistake is trying to solve each room on its own. A room of five squares needs two shaded, but those two do not have to pair with each other. One might reach left to form a domino with a square in the next room, while the other reaches down to pair with a square in the room below. That cross-room pairing is what makes the puzzle tight.
When you are stuck, look at a wall between two rooms and ask whether a domino should cross it. If the room on one side has already placed one of its two squares and the only valid partner for that square sits in the other room, then a domino must cross the wall. That single deduction often unlocks both rooms at once.
Rooms with many squares are harder to reason about individually, but their walls interact with more neighbours. A large room with six squares shares walls with several neighbours, and each of those neighbouring rooms constrains which squares in the large room are available.
Eliminating squares by neighbour count
A square in a corner of the grid has only two neighbours. If both of those neighbours are already shaded and partnered, that corner square cannot be shaded because it would have no one to pair with. Mark it as dead and move on.
An edge square has three neighbours. An interior square has four. The fewer neighbours a square has, the sooner you can decide its fate, because fewer neighbours means fewer possible partners. Work from the outside of the grid inward.
On a seven by seven board you have forty-nine squares. The border alone accounts for twenty-four of them, each with at most three neighbours. Resolving those edges first leaves a five by five interior where most of the remaining rooms are already partly settled.
Checking the room count as you go
The stats bar shows how many rooms are done out of the total. A room counts as done when it holds exactly two shaded squares. That does not mean those squares are correctly paired. You can have two shaded squares in a room where both turn red because neither has a valid partner. The room counter says done, but the board says wrong.
Use both signals together. If the room count matches the total but red squares remain, you have the right number of shaded cells in every room but the pairing is broken somewhere. Remove the red squares and recheck which of them can form legal dominoes.
If the room counter is stuck short by one, find the room that is still at one shaded square. Its second square must be one of its remaining unshaded cells, and the domino rule will tell you which one.
A worked example on a six by six
The grid loads with roughly eight or nine rooms. You spot a room of two squares in the bottom left. Shade them both. Now the square above the top cell of that pair cannot be shaded because it already has a shaded neighbour that is fully paired.
That blocked square belongs to a room of four. The room needs two shaded squares, and one candidate is now ruled out. Three candidates remain. Check which of them can form valid dominoes. If one of them borders another room's shaded square that still lacks a partner, pairing them across the wall satisfies both rooms at once.
Two rooms are now done. The constraints ripple outward. In fifteen to twenty moves a clean grid can be closed out. The stat bar confirms it: every room at two, every square at one partner.
Mistakes that slow you down
- Shading two squares in a room without checking whether they can form legal dominoes. The room might be done, but one of those squares could be stranded with no partner or forced into an illegal triple.
- Forgetting that no dot means no partner. If a square turns red it has zero or two shaded neighbours. Read the colour and fix the cause rather than shading more squares around it.
- Treating the rooms as independent puzzles. The walls exist to give you cross-room information, and ignoring them throws away most of your clues.
- Working from the middle outward. Interior squares have four neighbours and more options. Start at the edges where the constraints are tighter.
- Not removing wrong placements early. The move counter is your score, but a misplaced shade that stays on the board causes wrong deductions down the line and costs far more moves to clean up later.
Everything runs locally
The puzzle generator and solver both run inside your browser. No grid is fetched from a remote server, and no move you make is sent anywhere. Your best score lives in local storage on this device only. Pull the network cable and start a new game to verify it yourself. The page generates a fresh puzzle without any outside help.