
Planning the perfect route down an isometric pyramid
How the pyramid is built, why the arrows feel diagonal, what a perfect clear looks like, and how to survive the hardest mode where every cube needs two visits.
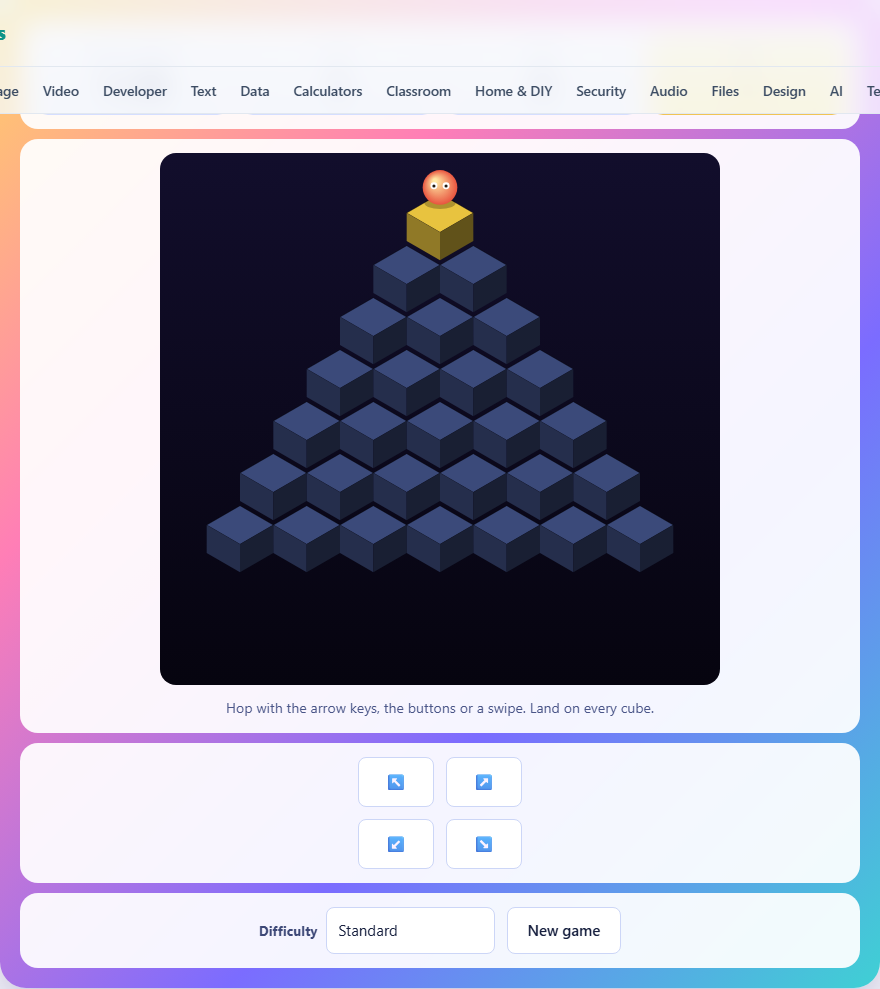
The pyramid and the isometric trick
The playing field is a pyramid of twenty-eight cubes stacked in seven rows. The top row has one cube. The second has two. The seventh has seven. You start on the single cube at the top and hop from there.
The pyramid is drawn in isometric projection, which means you see it from one corner looking down. Each cube appears as a diamond top with two shaded sides. That is the same drawing trick arcade games used in the nineteen eighties. It looks three dimensional on a flat screen without any perspective maths.
The result is that a diagonal hop on the pyramid shows up as a straight movement on the screen. Hopping down-left on the board moves you straight left on the screen. Hopping down-right moves you straight down. It feels odd for about four hops, then it clicks.
Controls: arrows, buttons and swipes
There are three ways to hop. Arrow keys on a keyboard, four directional buttons on the screen, or a swipe on a touch device.
The four directions are up-left, up-right, down-left and down-right. On the keyboard, the left arrow hops up-left and the right arrow hops down-right. The up arrow hops up-right and the down arrow hops down-left. The mapping is consistent once you accept that the pyramid sits at an angle.
On a phone, swipe in the direction you want to go. The game reads swipe gestures and translates them to the same four diagonals. The on-screen buttons are there as a fallback if swiping feels imprecise.
What happens when you land
Every cube starts in a base colour. When you land on one, it changes to a finished colour. The cube you start on counts as landed, so the top cube is already changed when the game begins.
On the standard and gentle settings, one landing is enough. The cube changes and stays changed forever. Landing on it again does nothing useful but costs a hop.
On the hardest setting, each cube needs two separate landings to reach its final colour. It goes through an in-between shade first. That changes the puzzle from finding a single path through every cube into something much harder, because you need to revisit cubes on purpose.
Lives and falling off
If you hop in a direction that would take you past the edge of the pyramid, you fall. You lose a life and return to the top cube. The cubes you have already changed stay changed, so the fall costs you a life and some hops but not your progress.
On the gentle setting you get five lives. On standard and hard you get three. Once your last life is gone, the game is over.
The edge is not marked with a wall or a warning. A hop off the side is treated as a real hop. The game counts it, the character falls, and you restart from the top. The penalty is sharp enough to make you think before pressing.
Counting hops toward a perfect clear
There are twenty-eight cubes on the pyramid. You start on one, so there are twenty-seven left to visit. Each hop lands on exactly one cube. That means a perfect clear takes exactly twenty-seven hops with no falls.
The stat panel tracks three numbers. Cubes changed shows your progress as a fraction. Lives shows how many falls you can survive. Hops counts every hop you have taken, including ones that led to a fall.
The game records your best score as the fewest hops used in a winning game. Lower is better. A perfect twenty-seven is the floor, and anything under thirty-five on standard is a strong result.
The zig-zag path
The simplest route that touches every cube is a snake. Start at the top. Hop down-left to reach the left edge of row two. Hop down-right to reach the right end of the row. Then hop down-left again and keep zig-zagging until you reach the bottom.
This does not work perfectly because the rows get longer as you go down. A clean zig-zag through a row of seven cubes takes six hops, but you entered from the row above and need to exit into the row below. The turns at the edges eat extra hops.
A better plan is to snake down one side of the pyramid first, covering the edge cubes, then work your way back up through the middle. The edge is where falls happen, so clearing it early while you have lives to spare is safer than saving it for last.
Edge cubes are the danger zone
The two sloping edges of the pyramid are where most falls happen. Any cube on the left edge has an empty space to its up-left. Any cube on the right edge has an empty space to its down-right. One wrong press and you are gone.
Clear the edges while you still have lives in hand. If you are on the left edge of row five, hop down-right to get back into the safe middle. Do not try to run along the edge from top to bottom unless you are confident in every keypress.
The top cube is the safest spot on the board. You can hop in any of the two downward directions without falling. The bottom corners are the most dangerous because two of the four directions lead off the edge.
Surviving the two-hop mode
On the hardest setting, each cube needs landing on twice to change fully. That doubles the minimum number of visits from twenty-seven to fifty-four, but you still have only three lives.
The puzzle shifts from path-finding to parity. You need to plan a route that visits every cube at least twice, and you cannot afford to waste hops on cubes that are already finished. A cube that is already fully changed does not break if you land on it, but the hop is wasted.
One approach is to snake down the pyramid, changing every cube once, and then snake back up through the same cubes for the second pass. The return trip follows the same zig-zag in reverse. This works, but it uses the most hops possible.
A tighter plan interleaves the two passes. Hop down to a cube, hop back up to the one you just left, then hop down past it. Each pair of hops changes one cube twice and moves you forward by one. This is harder to execute but uses far fewer total hops.
Mistakes that cost lives
- Pressing an arrow key without checking which edge you are near. On a keyboard it is easy to hit the wrong arrow in a rush. Slow down near the edges.
- Confusing screen directions with board directions. The up arrow does not move you to the top of the screen. It moves you up-right on the pyramid, which is roughly towards the upper right of the screen.
- Ignoring the life counter. Three lives sounds like a lot, but the pyramid has fourteen edge cubes. Each one is a chance to fall, and three mistakes out of fourteen is not generous.
- Wasting hops on already-changed cubes in two-hop mode. The second visit should be planned, not accidental. Each wasted hop pushes your score further from perfect.
- Starting along the edge on your first try. Learn the controls in the safe middle of the pyramid before you challenge the slopes.
Choosing the right difficulty
Gentle mode gives five lives and one-hop cubes. It is the place to learn the controls and get used to the diagonal movement. Mistakes are cheap and the route is forgiving.
Standard mode cuts you to three lives but keeps one-hop cubes. This is where route planning starts to matter. You cannot afford to fall more than twice, so you need a plan before you start hopping.
The hardest mode keeps three lives and adds the two-hop requirement. This is a different game. The route needs to cover every cube twice, and the limited lives mean that even one fall can put a perfect score out of reach. Play standard until you can clear it without falling before you move up.
No data leaves your browser
The entire game runs on your own machine. There is no server keeping score, no account to sign up for, and no data sent anywhere. Your best result is saved in your browser on this device and stays there. After the page loads, you can go offline and everything still works.