
Parity growth puzzles and the art of planting less
This guide walks through every part of a puzzle where adding a seed can shrink the reef instead of growing it. You will learn the odd-neighbour rule, how to read the colour-coded board, and why working from the corners inward solves most boards faster than guessing in the middle.
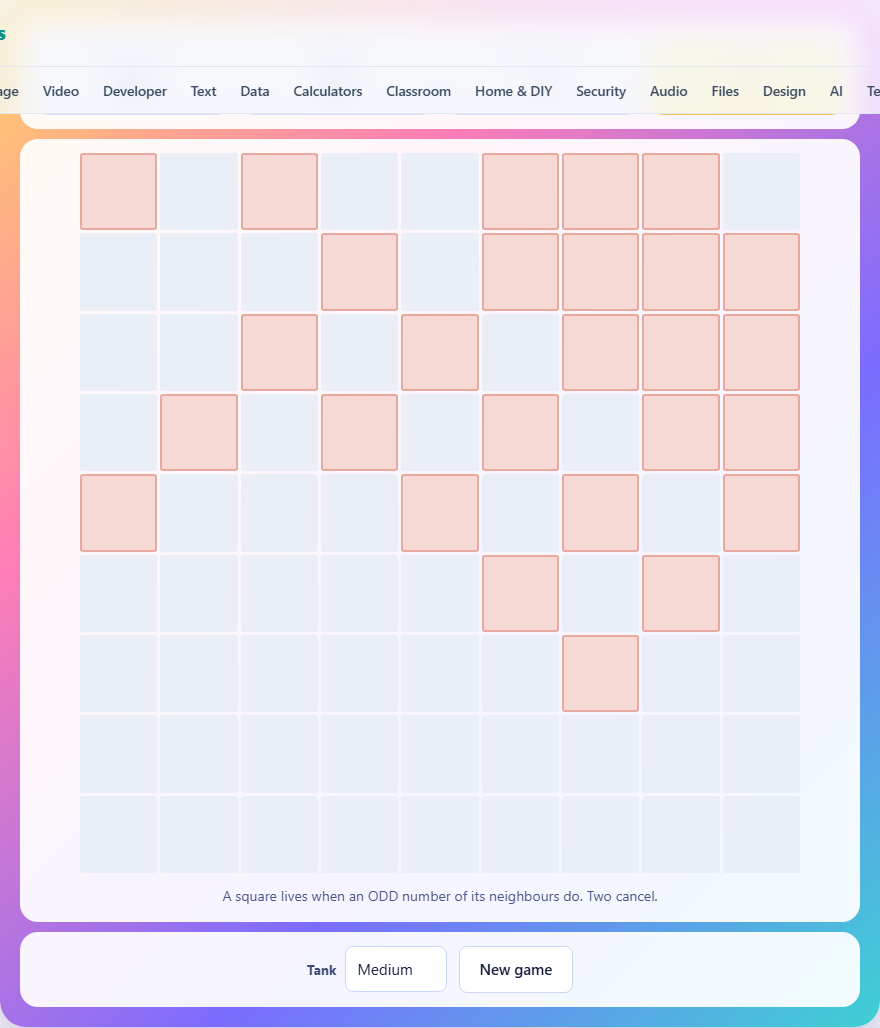
What the rule actually says
Every square on the board looks at its four neighbours - the squares sharing an edge above, below, left and right. Diagonals do not count. If an odd number of those neighbours are alive, the square comes to life. If an even number are alive - including zero - it stays empty or dies.
That single sentence drives the entire puzzle. One neighbour alive means the square grows. Two neighbours alive means they cancel and the square stays blank. Three alive means it grows again, because three is odd. Four alive means another cancellation.
This is not the spreading growth most people expect. In a normal growth game, more neighbours means more growth. Here, two living neighbours are the same as having none at all. The rule is addition modulo two - addition without carrying - and that one mathematical fact changes everything about how patterns behave.
Reading the board colours
The board uses three colours to show you exactly where things stand. Solid red squares are wanted by the outline and alive in your current reef. Those are correct. Pale pink squares are wanted by the outline but still bare. Those are the gaps you need to fill. Blue squares have grown where nothing was asked for. Those are mistakes that need to be removed.
A solved board has no pink and no blue. Every square matches the outline perfectly. The stats bar at the top counts how many squares are right out of the total, so you can track your progress with a number rather than scanning the whole grid.
When you place a seedling, the board redraws instantly. You do not have to press a button to run the seasons. The reef updates in real time, which means you can watch the effect of every single seed the moment you tap it down.
Controls and how a turn works
Tap any square to plant a seedling there. Tap the same square again to lift it. That is the entire interface. There is no drag, no confirm step, and no undo button because tapping a seed a second time already removes it.
The Tank dropdown at the bottom picks the board size. Small gives you a seven-by-seven grid with two seedlings. Medium goes to nine by nine with three seedlings. Large is eleven by eleven with four. More seedlings means more overlapping patterns to untangle, so the difficulty comes from the number of seeds as much as the grid size.
The New Game button generates a fresh outline. Every outline is built by planting real seeds at random positions and running the seasons forward, so a correct solution always exists. The puzzle is finding it.
Why two seeds cancel where they meet
Plant a single seed in an empty area and watch the pattern it makes after the seasons run. It fans out in a folded, diamond-like shape. Now plant a second seed somewhere else and watch its pattern. The two patterns are completely independent except where they overlap.
Where both patterns would place a living square, the two cancel and the square dies. This is because the rule counts neighbours modulo two. One contribution plus one contribution equals two, which is even, which means no life. The overlap vanishes as if neither seed had been planted there.
This is the key insight of the entire game. Two seedlings do not produce twice as much reef. They produce the combination of their two patterns minus every place those patterns overlap. Planting more seeds can genuinely shrink the total reef, which is the opposite of what every instinct tells you.
Starting from the corners
The most reliable strategy is to look at the corners and edges of the outline first. A living square at the far edge of the board could only have been reached by a seedling planted a specific distance away. There are very few positions that could produce growth that far out, and often only one.
Start with the square that is farthest from the centre. Ask yourself: where would a seed have to be for its pattern to reach this spot? Plant it there and check. If the corner matches, that seed is almost certainly correct. Move to the next outermost part of the outline and repeat.
Working inward is much faster than starting in the middle, because the centre of the board can be reached by seeds planted in many different positions. The edges narrow down the options.
Using single-seed patterns as building blocks
Before you try to solve a puzzle, plant one seed on its own and look at the pattern it creates. Then lift it and plant one seed somewhere else. Do this a few times. You will notice that every single seed produces the same shape, just shifted to a different position on the grid.
Once you know that shape, you can look at the target outline and try to decompose it into copies of that shape. If a section of the outline looks exactly like the single-seed pattern, there is probably a seed right at the centre of it. If two of those patterns overlap, the overlapping region will be empty in the outline.
This decomposition approach turns the puzzle from random guessing into pattern recognition. On the small board with only two seeds, you can often spot where both belong just by looking at the outline and mentally subtracting one copy of the pattern from it.
A worked example on the medium board
Suppose you are playing on the nine-by-nine grid with three seedlings. The outline shows a shape that is wide at the top-right and has a thin arm reaching toward the bottom-left. There is a blank gap in the middle where two arms would overlap.
Start with the top-right cluster. It looks like a complete single-seed pattern, so plant a seed at its centre. The board redraws and the top-right section turns solid red. Good.
Now look at the bottom-left arm. It also resembles a single-seed pattern, but slightly trimmed. Plant a seed where its centre would be. Some of the arm goes red, but the gap in the middle now has blue squares - extra growth where the two patterns overlap.
That gap is telling you where the third seed must go. Its pattern needs to cancel the overlap. Plant it at the position that would cover exactly those blue squares. If you chose right, all the blue vanishes and the remaining pink fills in. The board is solved.
Common mistakes beginners make
The most common error is treating this like a normal growth puzzle and assuming that more seeds means more reef. When the board has too much blue, the reflex is to remove seeds. But because of the cancellation rule, adding a seed in the right place can remove growth just as well as lifting one. If you are over-grown, try planting before lifting.
Another frequent mistake is ignoring the edge squares. People tend to focus on the largest cluster in the middle of the outline and guess where its seeds are. But the middle is ambiguous. Multiple seed positions can produce similar-looking centres. The edges are where each seed leaves a unique fingerprint.
A third trap is moving too fast. Because the board updates instantly, it is tempting to tap seeds in and out rapidly. Slow down. Plant one seed, look at what it did, and think about what the remaining seeds need to do before you place the next one.
Differences between the three board sizes
The small board runs two seasons and uses two seedlings on a seven-by-seven grid. Two seeds means only one overlap to worry about, and seven squares is small enough to see the whole pattern at a glance. This is where you learn to read the single-seed shape.
The medium board runs three seasons with three seedlings on a nine-by-nine grid. Three seeds create three possible overlaps - each pair can cancel - and the outline gets richer. Most of the strategic thinking happens at this size.
The large board also runs three seasons but uses four seedlings on an eleven-by-eleven grid. Four seeds create six pairwise overlaps, and the outlines become complex enough that decomposing them into single-seed patterns takes real effort. If you can solve large boards consistently, you have fully understood the parity rule.
Everything stays on your device
The entire puzzle runs inside your browser. No part of the game is sent to a server. There is no account to create and no data to upload. The page works offline once it has loaded, so you can play on a train or a plane with no connection at all.
If you close the tab, nothing is stored and nothing is lost. Open the page again and you get a fresh puzzle. The privacy here is simple: there is nothing on the other end of the wire to begin with.