
Shooting the bug before it reaches you
How the centipede works, why hitting the middle makes things worse, what the mushrooms do to the path it takes, and the tactical habits that keep you alive through later waves.
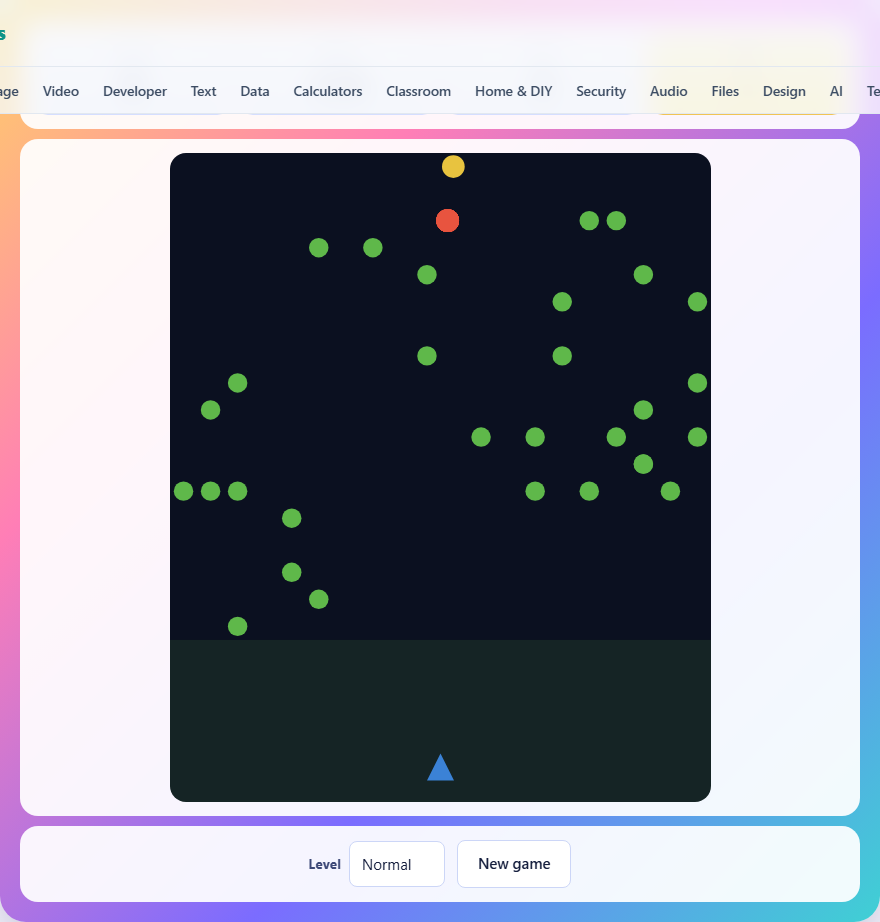
The field and the bug
The screen is a tall rectangle, dark like a night garden. Scattered across it are green mushrooms. A segmented bug enters from the top left and winds its way across the field, row by row. Each time it hits a wall or a mushroom, it turns around and drops down one row. Your ship sits at the bottom, a small triangle that can move within the lowest quarter of the field.
The bug is made of round segments. The front one is the head, coloured yellow. The rest of the body follows behind in red. The whole thing moves as one piece, weaving left and right through the mushroom field and creeping steadily closer to you.
Controls
Arrow keys move your ship. Left and right slide it across the screen. Up and down move it within your zone, which is the bottom quarter of the playing field. You can also use the W, A, S, and D keys for the same directions.
Press the spacebar to fire a shot straight upward. There is a short cooldown between shots, so you cannot hold the button for a stream. Each shot is a single thin bolt that travels fast.
On a phone or tablet, drag your finger to move and tap anywhere to fire. The ship follows your finger and the shot goes straight up from wherever the ship is. The controls feel responsive on both platforms, and the game area scales to fit your screen.
What happens when you hit a segment
Every segment you hit turns into a mushroom where it stood and is removed from the bug. If you hit the head, the bug simply gets one segment shorter and keeps moving. The next segment becomes the new head.
If you hit a segment in the middle, the bug splits into two. The segment behind the hit becomes a new head, and now you have two separate bugs coming at you from different positions. Both halves continue moving on their own, turning at walls and mushrooms just like the original.
This splitting is the central challenge. Each hit in the middle doubles the number of things you have to track. A single long bug is predictable. Four short bugs coming from different directions are not. Where you aim matters far more than how fast you fire.
The mushroom field
Mushrooms are the obstacles that shape the path the bug takes. When the bug hits one, it turns around and drops down a row, just as it does when it hits a wall. A dense cluster of mushrooms near the top makes the bug zigzag slowly in short passes. A cluster near the bottom brings it into your zone fast.
Every segment you shoot becomes a new mushroom. That means successful hits add obstacles to the field. Over time, the mushroom field grows denser, and the bug's path changes. A mushroom in the wrong place can funnel the bug straight down toward you.
You can shoot mushrooms to clear them. Each one takes two shots to destroy. The first shot cracks it and the second removes it. Clearing mushrooms near your zone gives you room to dodge and slows the bug's descent into your area.
Lives, waves, and scoring
You start with three lives. If the bug reaches your ship and touches it, you lose a life. Your ship resets to the centre and the current wave restarts. Lose all three lives and the game is over.
Each wave sends a longer bug. The first wave has about ten segments. Each wave after that adds one more. Clear all the segments in a wave and you earn a bonus of one hundred points plus fifty for every life you still have. Then the next wave starts.
Hitting a bug segment is worth ten points. Hitting a mushroom is worth one. The total is tracked in the stats area along with your current wave number and remaining lives.
The number of waves depends on the difficulty. Easy has three waves, normal has five, and hard has seven. Clearing the final wave wins the game.
The three difficulty levels
Easy starts with fewer mushrooms and a slower bug. The lower speed gives you more time to line up shots and dodge. The shorter wave count means the game is over quickly, which is good for learning the controls.
Normal adds more mushrooms and speeds the bug up. The field is busier, so the bug changes direction more often and its path is harder to predict. Five waves is long enough that you will feel the pressure of later rounds where the bug has fifteen or more segments.
Hard pushes the speed further and scatters even more mushrooms across the field. Seven waves means the final bug is very long, and by that point the mushroom field is so dense from all your hits that the bug reaches your zone almost immediately. The last wave on hard is a test of how well you can clear mushrooms under pressure.
Strategy for shooting the head
Always aim for the head. A hit on the head shortens the bug by one segment without creating a second bug. A hit in the middle creates two bugs and adds a mushroom between them that blocks your line of fire.
The head is the yellow segment at the front. It is easy to spot against the red body. When the bug is moving left to right, the head is on the right end. When it turns and moves right to left, the head flips to the left end. After it drops a row, the head is on whichever side it is now moving toward.
Track the direction of travel and aim just ahead of the head. Because the bug moves steadily, leading your shot by a small amount puts the bolt right where the head will be when it arrives. This takes practice, but it is the difference between a clean kill and a chaotic split.
Clearing mushrooms near your zone
Mushrooms in the top half of the screen are helpful. They slow the bug down by making it zigzag in small passes. Mushrooms in the bottom quarter are dangerous. They steer the bug directly into your area before you have time to react.
After each wave, take a moment before the next one starts to shoot out any mushrooms that have piled up near the bottom. Two shots each. It feels slow, but the room it gives you on the next wave is worth the time.
Pay attention to where your hits leave new mushrooms. If you keep hitting segments near the bottom, you are building a wall that will funnel the next bug straight at you. Try to make your kills higher up the field whenever possible.
Mistakes that cost lives
- Standing still. The bug reaches you faster than you think, especially when mushrooms below are turning it downward. Keep moving side to side even when you are not shooting.
- Spraying shots into the middle of the body. Every mid-body hit creates a split and a new mushroom. Two splits turn one bug into three, and three short bugs are harder to handle than one long one.
- Ignoring mushrooms in your zone. A cluster of mushrooms at the bottom turns your escape route into a dead end. Clear them between waves.
- Forgetting you can move up. Your zone covers the bottom quarter of the field, not just the bottom row. Moving up gives you a better angle on the head and more time to see the bug coming.
- Panicking on later waves. The bug gets longer but it is still just one bug at the start of the wave. Stay calm, aim for the head, and shorten it one segment at a time.
Nothing is sent anywhere
The game runs entirely in your browser and nothing leaves your device. There is no server keeping score, no account to create, and no data uploaded at any point. Your high score is stored locally on this machine and does not follow you to another device. The page works fully offline once it has loaded.