
Aiming, bouncing, and clearing every bubble from the ceiling
How the hex grid works, what makes bubbles pop and fall, how to use wall bounces to reach tight spots, and the thinking that turns a lucky shot into a reliable clear.
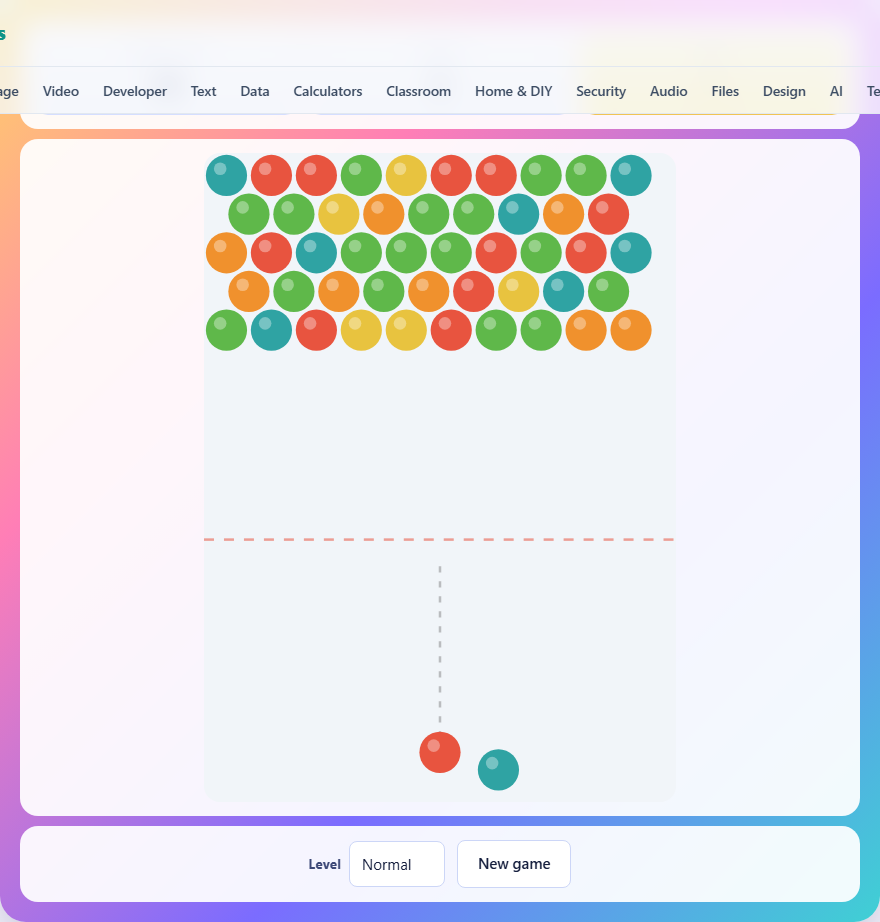
The setup
A cluster of coloured bubbles hangs from the ceiling. At the bottom of the screen sits a launcher holding one bubble, with a second one waiting beside it. A dotted line shows where the next shot will go. A dashed red line runs across the screen about two thirds of the way down. If any bubble reaches that line, the game is over.
Your aim is to clear the entire board. Fire bubbles upward, make groups of three or more of the same colour, and watch them vanish. Anything left hanging in mid-air after a pop falls away too, and those dropped bubbles count toward your total.
How the grid is laid out
The bubbles sit on a hex grid, not a square one. Every other row is shifted half a bubble to the right. This means each bubble has six neighbours instead of four. The offset makes matches feel natural, because colours tend to cluster in organic shapes rather than straight lines.
A row at the top of the grid has ten bubbles. The shifted row below it has nine. They alternate like that all the way down. When a shot lands, it snaps into the nearest free cell that is touching an existing bubble or the ceiling.
Aiming and firing
Move your mouse or drag your finger across the screen. The dotted line follows, showing the angle. Click or tap to fire. The shot travels in a straight line until it hits something.
If the shot hits a side wall, it bounces off and keeps going. It does not lose speed or change colour. This bounce is one of the most useful tools in the game, because it lets you reach spots that are blocked from a direct angle.
You cannot shoot downward. The aim is locked to upward angles. This makes sense, because a downward shot would have nowhere useful to go. If you try to aim past the horizontal, the line stops at a shallow angle and will not go further.
Popping and dropping
When three or more touching bubbles of the same colour are connected, they all pop at once. It does not matter how they are arranged, as long as each one touches at least one other in the group. A line of three pops. A triangle of three pops. A winding chain of five pops.
After the pop, the game checks what is still attached to the ceiling. Any bubble that can no longer trace a path through other bubbles back to the top row falls off. These dropped bubbles are the real prize. Popping three at the bottom of the board removes three. Popping three near the top might drop twenty.
The popped count in the stats area tracks both kinds. Bubbles you matched and bubbles that fell are both added to the total.
The three difficulty levels
Easy starts with four colours and four rows of bubbles. The board is thinner and matches are easier to find, because fewer colours mean larger groups of the same colour sitting next to each other.
Normal adds a fifth colour and a fifth starting row. The board is denser and the colours are more scattered. You need to plan further ahead, because a stray shot that does not match anything adds to the pile without removing anything.
Hard uses six colours and six starting rows. Finding groups of three is harder, and the board starts closer to the danger line. Every wasted shot matters, because you have less room before bubbles reach the cutoff.
Aiming for the ceiling
The biggest clears come from cutting the connection between a large cluster and the ceiling. If a group of fifteen bubbles is hanging from one small stalk near the top, popping that stalk drops all fifteen at once. That single shot is worth five times more than popping three at the bottom.
Look for the narrow points. Trace a cluster upward and find where it is thinnest. That thin spot is your target. Even if the colour there does not match what you are holding, it might be worth parking your current bubble somewhere safe and waiting for the right colour to come along.
The next bubble is always shown beside the launcher. Use that information. If the next bubble matches the colour at the stalk, set up the shot now by clearing a path. If it does not match, spend this turn somewhere useful without wasting it.
Using the walls to your advantage
A bank shot off the side wall can reach places a direct shot cannot. The top corners are the most common example. Bubbles build up in the corners because direct shots cannot get under them at a steep enough angle. A bounce off the wall arcs in from the side and hits the spot cleanly.
To set up a wall shot, aim at the wall at a point that lines up with your target. The angle of reflection is the same as the angle of approach, just like a pool ball. A steep angle in gives a steep angle out. A shallow angle grazes along the wall and does not reach very far across.
Wall shots take practice, but they are worth learning. On a hard board, the corners fill up fast, and the only way to clear them is from the side.
Managing awkward colours
Sometimes the launcher holds a colour that has no useful group to join. Firing it randomly adds a bubble to the board without removing any. That is a net loss. The board grows by one and you are no closer to clearing it.
Instead, park the bubble somewhere harmless. Put it flat against the ceiling in a spot where it will not block future shots and where it might eventually become part of a group. Avoid parking it in the middle of the board, because it clutters the space you need to aim through.
If the same difficult colour keeps coming up and there is no group of it on the board at all, the situation is worse. Each one you add is an orphan that will not pop until two more appear beside it. Spread them along the ceiling where they cause the least harm.
Reading the board as it thins out
Early in the game, the board is crowded and groups are easy to find. The challenge is choosing which group to pop first. Late in the game, the board is thinner and the remaining bubbles are scattered in awkward spots. The challenge shifts to reaching them at all.
When only a handful of bubbles are left, each one matters. A lone bubble stuck to the ceiling is harmless on its own, but if it is the anchor holding three others in mid-air, popping it clears four at once. Trace every remaining cluster back to its root and figure out which single pop would cause the largest cascade.
The bubbles left counter in the stats bar tells you how close you are. When it drops to single digits, every shot should either pop or set up the final clear. A stray shot at that stage adds a bubble that might take two or three more turns to clean up.
Common mistakes that end the game early
- Aiming at the bottom of the board. Popping three down there removes only three bubbles and does nothing about the mass above. Aim as high as you can reach.
- Ignoring the next bubble. The colour waiting beside the launcher tells you what is coming. If it is the colour you need for a big clear, do not waste the current shot on something that blocks the path.
- Building up the edges. Bubbles stuck to the side walls are hard to reach and often serve as the anchor holding a large cluster up. Clear them early.
- Firing without a plan. Every shot that does not pop or set up a future pop adds to the board. Take a moment to trace the line before clicking.
- Forgetting the bounce. If the direct line is blocked, a wall shot might be open. Check both walls before settling for a wasted placement.
The whole game runs on your device
No bubble, no score, and no shot leaves your machine. The game logic runs inside your browser using nothing but the code on this page. There is no server keeping track of your progress, no account, and no login. Your best score sits in local storage on this device only. Once the page has loaded, the game works even when you are not connected to the internet.