
Surviving your own bombs in a maze full of enemies
How the maze is built, why flame travels in straight lines and stops at the first brick, how bomb chains form by accident, what the power-up items do, and the movement tricks that keep you alive long enough to clear every enemy.
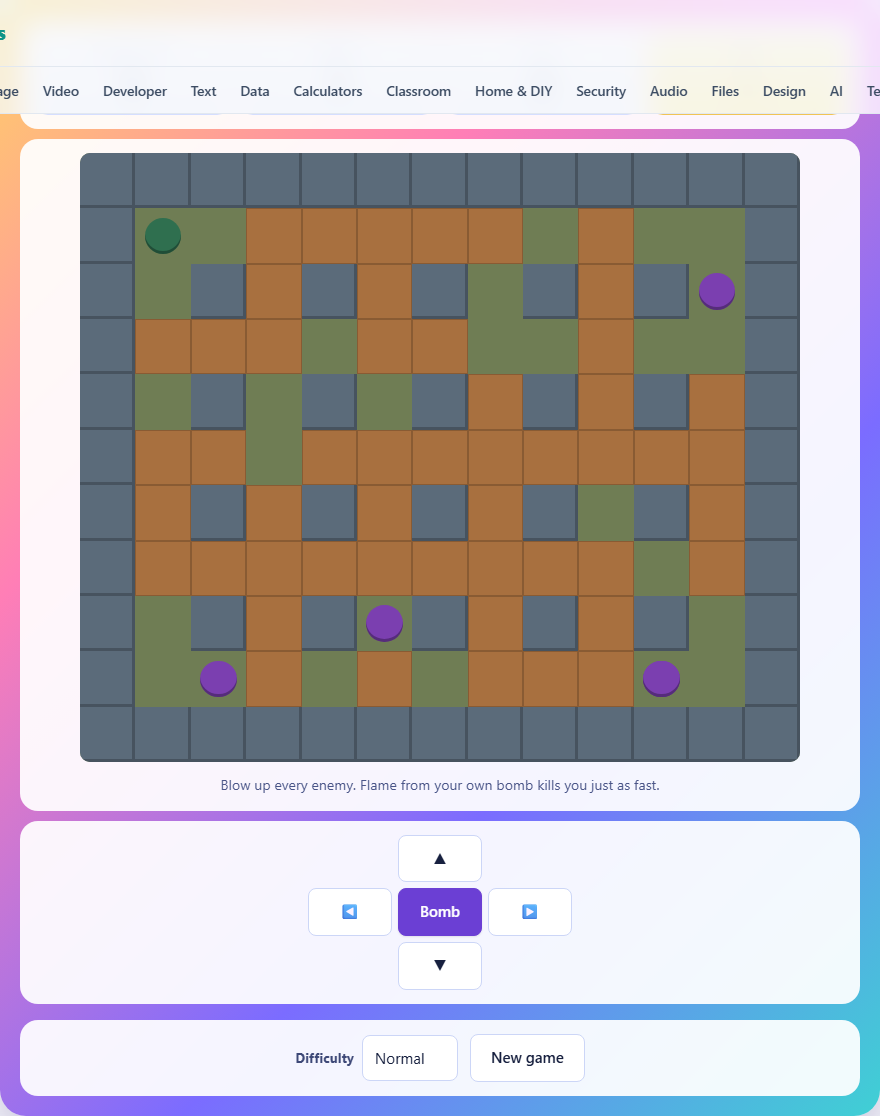
The maze and what it is made of
The playing field is a grid of 13 columns and 11 rows. The outer ring is steel wall. Inside that ring, steel pillars sit on every other square in both directions, forming a regular lattice. The gaps between the pillars are one square wide, creating a network of corridors.
The corridors are filled with soft bricks. A bomb blast destroys a soft brick, opening the path. Steel pillars never break, no matter how many bombs go off beside them. The result is a maze that starts almost completely walled in and gradually opens as you blow things up.
You start in the top-left corner. Three squares around your starting position are always clear so you are not trapped on the first turn. Enemies start in the other corners, with additional ones placed randomly on the board at higher difficulty levels.
Moving and dropping bombs
Use the arrow keys or W, A, S, D to walk one square at a time. Press the space bar or the on-screen Bomb button to leave a bomb on the square where you stand. You can step off the bomb you just placed, but you cannot walk back onto it or onto any other bomb.
On a phone or tablet, the directional buttons below the board move you and the Bomb button drops one. Swiping on the board itself also moves you in the swiped direction.
The bomb has a fuse of about two seconds. When the fuse runs out, the bomb throws flame in four straight lines - up, down, left and right. The flame extends two squares in each direction by default. It stops when it hits a steel pillar or the first soft brick it encounters. That first brick is destroyed, but the flame does not continue past it.
What the flame does and does not do
Flame kills anything in its path. That means enemies, and it means you. Your own bomb is just as lethal to you as it is to anything else. Standing in any square covered by flame when the bomb goes off ends the game immediately.
Flame also triggers other bombs. If a bomb is sitting in a square that gets hit by flame, that bomb explodes immediately regardless of how much fuse it had left. This chain reaction can throw flame much further than a single bomb's range, clearing a wide stretch of the maze in one blast. Chains are powerful, but they are also dangerous because the combined range may reach squares you thought were safe.
Items hidden inside bricks
About one in six soft bricks hides a power-up item. When the brick is destroyed by a blast, the item appears on the now-empty square. Walk over it to pick it up.
There are two types. The extra-bomb item increases the number of bombs you can have on the board at the same time. You start with a limit of one. Each extra-bomb item raises that limit by one, with no cap. Having two or three bombs available at once lets you lay traps and cover more ground.
The fire item extends the range of your blast by one square in every direction. You start at a range of two. Each fire item adds one more square of reach. A range of four or five covers most of a corridor in a single blast, which makes it much easier to catch enemies from a distance.
Both items also add 50 points to your score. Collecting them is always worth the detour.
How enemies move and how to trap them
Enemies walk through the corridors one square at a time. They keep moving in their current direction until something blocks them, then they pick a new open direction at random. When you are within four squares of an enemy, it starts chasing - preferring directions that bring it closer to you.
Enemies will not walk into flame. If a blast is active in a corridor, they turn around rather than stepping into it. You can use this to herd them. Drop a bomb at one end of a corridor and the flame will block that exit. The enemy turns and walks toward the other end, where you can have a second bomb waiting.
Each enemy killed scores 200 points and plays a short sound. The level ends when every enemy is gone. On gentle difficulty there are three enemies. Normal has five. Frantic has seven, and they move more often.
The tick system and why timing is reliable
Everything in the game advances on a fixed clock rather than free-running animation. Each tick is 110 milliseconds. The bomb fuse is 18 ticks. Flame lasts 5 ticks. Enemies move every few ticks depending on the difficulty setting.
This fixed system means the same situation always plays out the same way. If you drop a bomb and walk two squares to the right, the fuse burns down the same number of ticks every time. You can learn the exact timing and rely on it. There is no randomness in how fast a fuse burns or how long a flame lingers.
Escaping your own blast
The corridors between the steel pillars are one square wide. When you drop a bomb in a corridor, the flame shoots in both directions along that corridor. Stepping backward is not enough to escape - you are still in the same line. You must turn a corner before the fuse runs out.
Count the squares to the nearest side turning before you drop the bomb. If the nearest turn is three squares away, you need three ticks of movement to reach it. At one tick per step, and a fuse of eighteen ticks, you have plenty of time. But if you drop a bomb and then hesitate, or if you run into an enemy coming the other way, the margin disappears fast.
A useful habit is to always move in the direction of an open turning immediately after dropping a bomb. Do not stand still and do not walk toward a dead end. The side turning is your escape route, and you should know where it is before you press the button.
Common ways to die and how to avoid them
- Trapping yourself in a dead end. You drop a bomb and walk deeper into a corridor with no side turning. The flame closes off the only exit. Always check that a corridor has a way out before you enter it.
- Bomb chains reaching further than expected. Two bombs close together can produce flame that covers six or eight squares in total. If you place a second bomb within range of the first, expect the chain and move further away than you normally would.
- Walking into your own lingering flame. Flame stays on the ground for five ticks after the explosion. It is easy to assume the blast is over and walk back too early. Wait until the orange glow disappears.
- Forgetting that enemies chase you when close. An enemy four squares away will turn toward you. Dropping a bomb and then running toward a nearby enemy puts you in a corridor with danger at both ends.
- Using all your bombs at once with nowhere to hide. If you have three bombs available and drop them all in a tight area, the overlapping blasts can cover every square around you. Save at least one for a targeted hit and keep the others in reserve.
Difficulty levels and scoring
Gentle starts you with three enemies and fills about 55 percent of the open squares with bricks. The enemies move every five ticks, giving you time to plan. Normal has five enemies, more bricks at 68 percent, and enemies that move every four ticks. Frantic has seven enemies, 78 percent brick coverage, and enemy movement every three ticks - almost as fast as your own steps.
Points come from three sources. Destroying a brick scores 10. Picking up an item scores 50. Killing an enemy scores 200. The total is your final score if you clear the level. There is no time bonus, so there is no rush beyond staying alive.
Nothing is sent anywhere
The maze is generated and the game runs entirely in your browser. No game data is uploaded to a server and no account is needed. Your device handles all the logic, the rendering, and the score tracking. Once the page has loaded, the whole game works without any internet connection.