
Getting the nail in the right place on the first try
Why the centre of the picture sits at eye level rather than the top of the frame, how a wire changes the maths, and how to plan a row or a gallery wall so every frame agrees with every other.
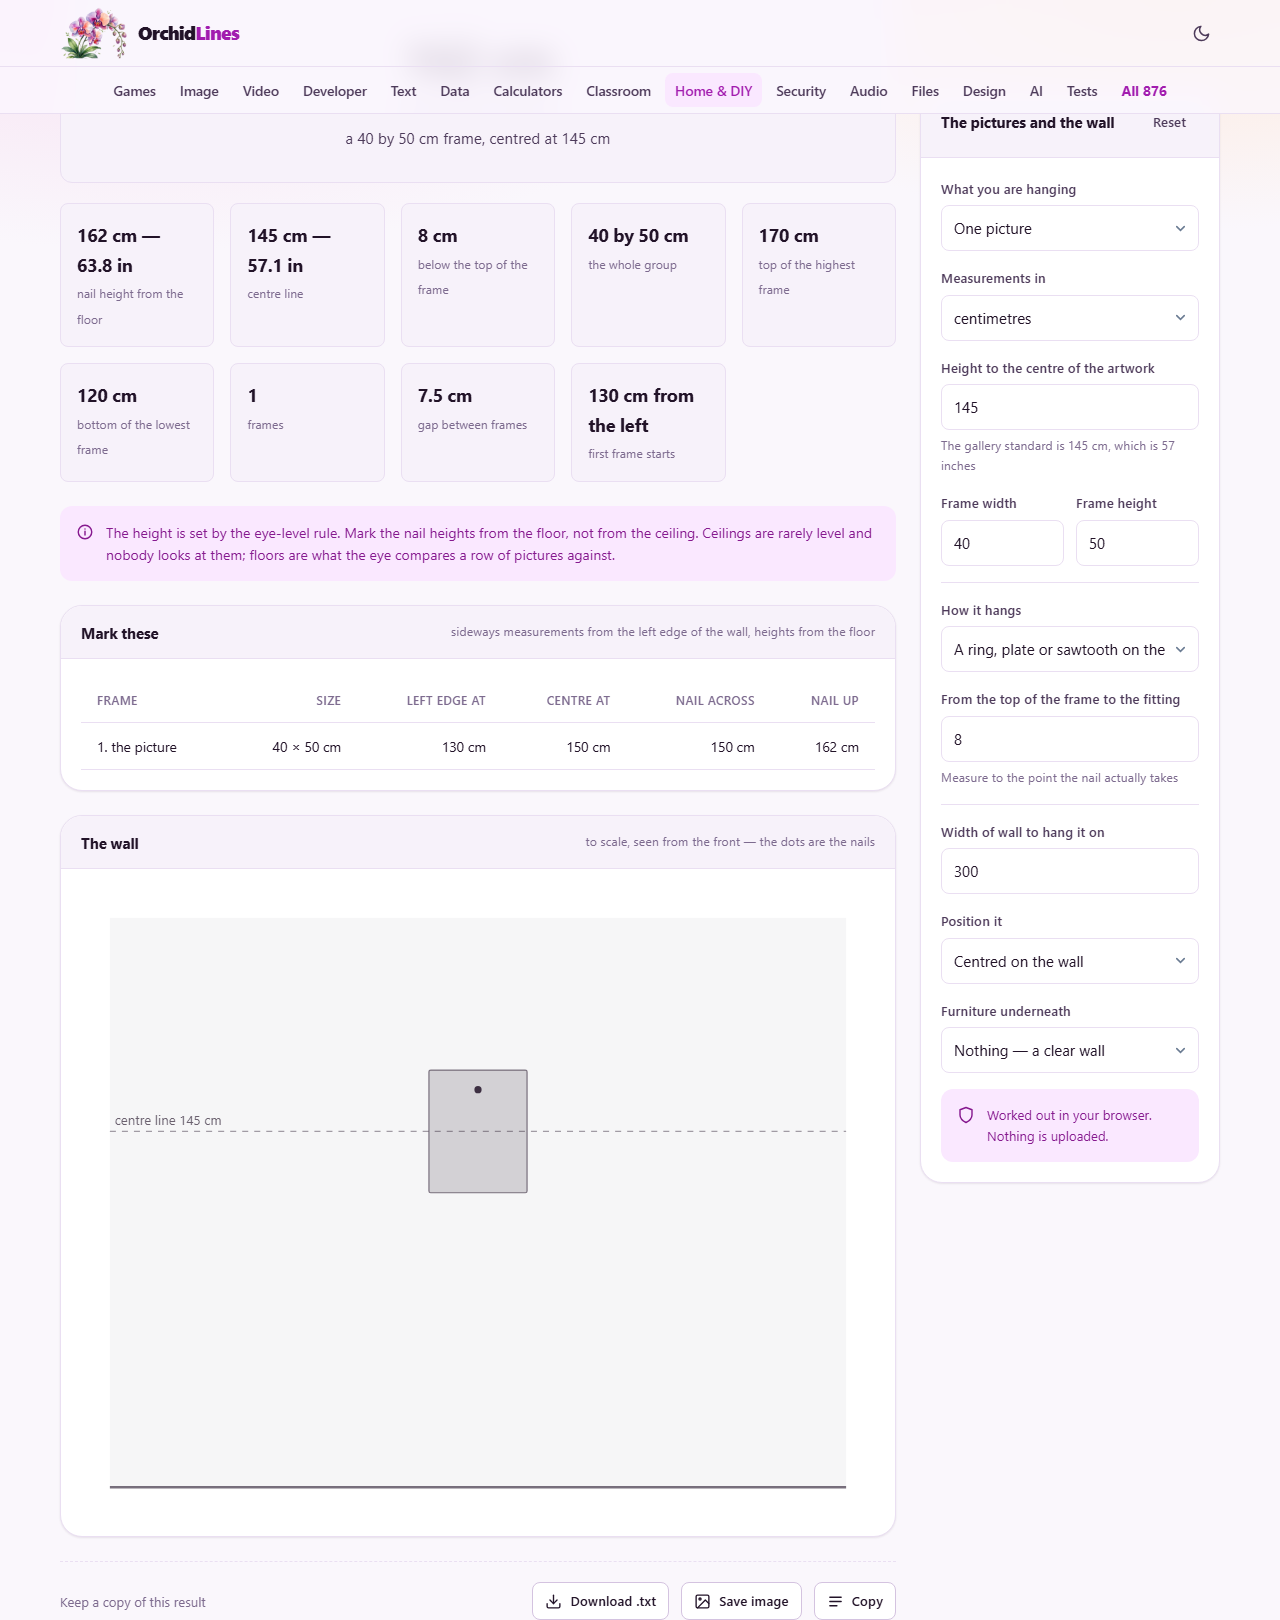
The centre line and where it comes from
Galleries hang pictures so the middle of the artwork sits 145 centimetres from the floor. That is 57 inches. It is not the height of an average person's eyes. It is the point that works whether the viewer is standing across the room or walking past at arm's length, and it is the standard because it settles arguments. Everyone in the house gets the same line, every room agrees with every other, and nobody has to negotiate.
The calculator starts with 145 as the default in Height to the centre of the artwork. You can change it. Some people prefer 150 for a room with high ceilings, or 140 for a hallway where children look at the pictures too. The important thing is to pick one number and use it everywhere.
From centre line to nail height
The centre of the picture is not where the nail goes. The nail is higher. Working out how much higher is the whole point of the calculator, and the answer depends on two things: the height of the frame, and where on the back of the frame the nail actually takes the weight.
Start with the centre line. Add half the frame height. That gets you to the top of the frame. Now subtract the distance from the top of the frame down to the hanging point. The result is the nail height measured from the floor.
For a ring, plate or sawtooth fitting, select A ring, plate or sawtooth on the back under How it hangs. Measure from the top of the frame to the fitting and put that into From the top of the frame to the fitting. The arithmetic is one subtraction and it is done.
Wires make it harder
A wire across the back of a frame changes everything. When the picture hangs slack on the wall, the wire is loose. When you pick it up by the wire to hang it, the wire pulls taut and rises above the points where it is attached. The frame drops lower than you planned by exactly that difference.
To handle this, switch How it hangs to A wire across the back. The calculator asks for three measurements. From the top of the frame to the wire eyes is how far down the screw eyes sit. Between the two eyes is the gap between them, though you can leave this empty and the calculator assumes about six tenths of the frame width. Length of wire between the eyes is measured slack, with the wire hanging loose.
From those three numbers the calculator works out how high the wire rises when it takes the weight, using the geometry of the triangle the taut wire makes. The nail height then accounts for this rise, and the frame lands where you intended.
One hook or two
Number of hooks defaults to one. Switching to two stops the picture from going crooked every time somebody shuts a door or walks past. Two hooks also spread the weight, which matters on plasterboard where a single fixing takes less load than one in solid brick.
With two hooks the wire rises less, because each hook only pulls half the span. The calculator adjusts for this. It also asks Between the two hooks so it can give you two separate positions measured from the left edge of the wall.
For heavy frames, two hooks are almost always the right answer. A large frame on a single hook swings level again after a disturbance, but a heavy one may pull the fixing out of the wall before it gets the chance. Two hooks sitting a third of the frame width apart give the steadiest result.
Hanging a row of different sizes
Switch What you are hanging to A row of pictures. A text box called One frame per line appears. Type each frame as its width and height separated by an x, one per line. You can put a name in front of the numbers, like Holiday photo 30 x 40, and the name shows up in the results.
Gap between frames sets the space between the edges of neighbouring frames. Seven to ten centimetres works for most sizes. Much tighter and the frames feel cramped. Much wider and they stop looking like a group.
Line the frames up by offers three choices. Their centres is the best option for mixed sizes, because it keeps the middles on the same line. Their tops lines up the top edges, which suits a row over a long sideboard. Their bottoms is the least common but works above a sloped staircase where the bottom edge follows the stairs.
Hanging a grid
Switch to A grid for a proper gallery wall of identical frames in rows and columns. Set Columns and Rows to describe the layout. All frames in a grid use the same dimensions, so the single Frame width and Frame height fields apply to every one.
The calculator treats the whole grid as one large rectangle. It centres that rectangle on the wall at the centre line, spaces the frames evenly, and then gives you a nail position for every single frame. The result is a table with a distance from the left and a height from the floor for each nail.
A three by two grid of 30 by 40 centimetre frames with a 7.5 centimetre gap is a common starting point. The overall group is about 105 centimetres wide and 87.5 tall, so it fits comfortably on most walls. Mark every nail position before you drill anything, step back, and check the pencil marks look right as a group.
Positioning on the wall
Width of wall to hang it on tells the calculator how wide the wall is. Position it defaults to Centred on the wall, which puts the middle of the picture or the middle of the group at the midpoint of the wall.
Switch to A set distance from the left and fill in From the left edge if you want the picture off-centre. This is useful when the wall has a light switch on one side or when you are hanging beside a window rather than between two.
The result always gives the nail position as a distance from the left edge of the wall and a distance up from the floor. Measure both from the same corner, mark the spot with a pencil, and do not move the tape in between.
Furniture underneath
Above a sofa, sideboard or headboard the standard centre line sometimes puts the bottom of the frame too close to the furniture. Select A sofa, sideboard or headboard under Furniture underneath and fill in Height of the furniture and Gap above it.
The gap is the clear wall between the top of the furniture and the bottom of the frame. Fifteen to twenty-five centimetres is the normal range. If the standard centre line would put the frame lower than the furniture plus the gap, the calculator raises the group until the clearance is met, and tells you it did so.
Measure from the floor, not the ceiling
Ceilings are rarely level. They change height between rooms, and older houses can be off by several centimetres from one end of a wall to the other. Nobody stands in a doorway comparing a picture to the ceiling, but everyone notices when a row of pictures looks crooked against the floor.
Always measure up from the floor. The floor is what furniture sits on, what people stand on, and what the eye uses as its level reference. A row measured from the floor reads as straight even in a house where the ceiling slopes. If you hang in several rooms, keep the same centre line throughout, and the whole house settles down.
Centimetres or inches
Measurements in lets you switch between centimetres and inches. All the input fields and all the results change together. If your tape is in inches and your wall is in feet, convert the wall width to inches before you type it in, and the nail positions come back in the same unit.
Do not mix units. If the frame is measured in centimetres and the wall in inches, the numbers will be wrong and the picture will end up in the wrong place. Pick one unit and stick with it for everything.
Your measurements stay on your machine
Every calculation runs in your browser on your own device. No measurements are sent to a server, no account is needed, and nothing is stored after you close the tab. You can disconnect from the internet and the calculator keeps working exactly the same way.