
Plan a video shot by shot before you film
This guide shows how to build a printable storyboard and shot list for a video. You will set the frame shape you are filming, write your shots in a simple line format, watch the running time add up against a target, and print or save the finished plan.
What a storyboard is for
A storyboard is a plan of a video drawn as a row of frames, one frame per shot, with a few notes on each. Making it before you film saves the most expensive kind of mistake, which is finding out in the edit that you never captured a shot you needed.
This tool is for anyone planning a video that has a fixed budget or a client waiting. That takes in small marketing teams, teachers, wedding and event filmmakers, and people making short clips for social feeds who want them to look considered.
It draws blank frames at the exact shape you are shooting, and it keeps a tidy shot list beside them. As you type, it adds up the timings so you always know how long the piece is running.
Naming the board
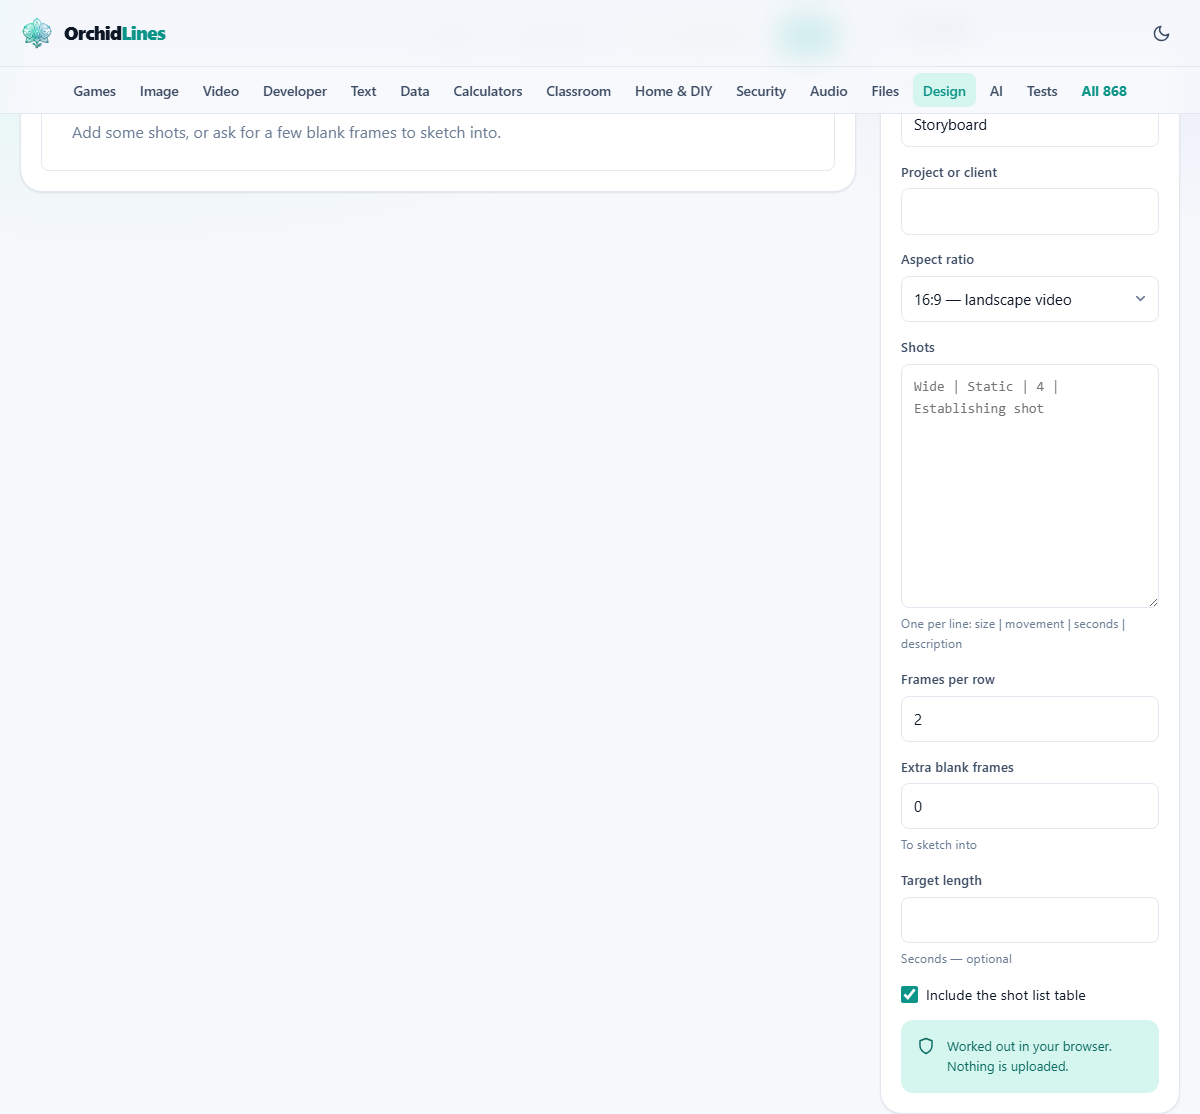
In the panel on the right, the Title box names the board. It starts with a plain default, and you can change it to the name of your project. The Project or client box holds a second line, such as the client name or a short note on the brief, and it can be left empty.
Both lines appear at the top of the printed sheet, next to the frame shape, the number of frames, and the total running time. This little header is what turns a stack of frames into something you can hand around a crew without explaining it.
Choosing the frame shape
The Aspect ratio menu is the most important choice on the page, because it sets the shape of every frame. There is a wide shape for landscape video, a tall one for phones and reels, a square, a portrait shape for social posts, the older boxy shape, and a very wide cinema shape.
Getting this right matters far more than it sounds. If you sketch a wide shot and then film a tall clip for a phone, the sides you carefully drew are simply not there when you shoot. A subject you placed off to one side ends up out of frame.
Drawing the true shape from the start is the cheapest fix in the whole process. It costs nothing on paper, and it saves you from discovering the problem with a camera in your hand and a crew standing around.
Writing your shots
The Shots box takes one shot per line. Each line has four parts, split by upright bars. The order is the shot size, then the camera movement, then the length in seconds, then a short description of the action.
So a line might read as wide, then static, then four, then a note that it is the establishing shot of a workshop, each part divided by a bar. Any part can be left out, and if you type a line with no bars at all, the whole line is simply treated as the description.
The seconds part is a plain number, and it feeds the running total. A Sample button fills the box with a worked set of six shots, so you can see the format and the layout before you write your own.
Frames per row and blank frames
Frames per row sets how many frames sit side by side across the sheet, from one up to four. Two is a common, comfortable choice that leaves each frame big enough to sketch into. A higher number fits more shots on a page, but shrinks each one.
Extra blank frames adds empty frames after your written shots. These are for ideas you have not pinned down in words yet, or simply for room to keep planning on paper once the sheet is printed. You can add a good number of them, so there is always space to think.
Timing and the target
Each shot's seconds are added together and shown at the top of the board and again in the shot list. This quiet running total is one of the most useful things the tool does.
The Target length box lets you set the length you are aiming for, in seconds. The tool then measures your total against it. If you are over, it tells you by how much, and reminds you that cutting a shot on paper is free. If you are under, it points out that there is room for more coverage. If you land on the target, it says so.
A board that adds up to four minutes against a ninety-second brief is a problem you very much want to find now. Catching it here means trimming a line of text, not reshooting or hacking the film about in the edit.
The shot list table
A tick box, Include the shot list table, adds a table underneath the frames. It lists every shot in turn with its number, size, movement, time and action, and it totals the time along the bottom.
The table earns its keep on set, as a checklist you can tick through that is separate from the drawings. Turn it off if you only want the frames on the page.
It pays to use the standard shot names in your lines, such as wide, medium and close-up. They mean the same thing to everyone on a crew, and that shared language is most of what a board is for. A note that just says closer means something different to each person who reads it.
Printing and saving
Two buttons handle the output. Print opens your browser's print window. A storyboard is laid out in black and white on purpose, since boards get drawn on, photocopied and carried around a set, and colour adds nothing while it drains the ink.
If you would rather keep a file than send it to a printer, Save as PDF sits among the destinations in that same window. A saved PDF is handy when you want to mark it up on screen in a reader rather than with a pen.
The Download text button saves the shot list on its own as a plain file called shot-list.txt. It is the list without the drawings, which is ideal for pasting into an email, a message, or a call sheet for the day.
A worked example
Say you are making a ninety-second reel for a furniture maker, shot on a phone. You set the aspect ratio to the tall phone shape and the target length to ninety seconds. You press Sample to see how the format looks, then start writing your own shots over the top.
You type a wide static opening of the workshop at dawn, a push in on hands reaching for a tool, and a close-up of the blade meeting the wood, each as one line with bars between the parts. The total climbs, and the tool tells you that you are well under the target, so there is room for more.
You add a few more shots and a couple of blank frames to sketch into, set the frames per row to two, and press Print. You save it as a PDF, mark it up on your tablet, and take it to the shoot knowing the whole thing already fits in ninety seconds.
Common mistakes and how to dodge them
A few slips come up again and again when people first storyboard. None of them is hard to avoid.
- Guessing the frame shape. Set the aspect ratio to what you will really shoot before you draw anything, or the compositions will not survive the crop.
- One frame for every second. You want one frame per shot, not per second. A ninety-second piece is often somewhere between a dozen and twenty shots.
- Vague shot sizes. A word like closer helps nobody. Lean on the standard names so the whole crew reads them the same way.
- Skipping the timings. Without seconds on each line, the running total cannot help you, and length is exactly the thing a board is best at catching early.
When another tool fits better
This is a planning tool, not an editor. It does not cut video or hold any real footage. Once you are actually filming and editing, a video editor takes over the job, and the storyboard has already done its part before that stage.
For loose, unscripted work such as a documentary or a live event, a full board is often more than you need. A plain shot list can be enough. Turn the frames down, lean on the list, or reach for a simple notes tool if a formal board would only slow you down.
It all runs in your browser
The board, the shots and the timings are all worked out on your own device. Your notes are never uploaded, and there is no account to set up. Everything you type stays inside the page in front of you.
Your work is held in this browser between visits, so you can close it and come back to the same board later. Save the PDF or the text file whenever you want a lasting copy to share, print, or take on the day of the shoot.