
Print grid, dot and lined paper at the exact spacing you want
This page draws graph paper, dot grids, lined sheets and more, at the precise spacing you set, ready to print or save. Below you will find every paper type, what each setting changes, and the single rule that decides whether the printed spacing is right. A worked example and the common slip-ups round it off.
What the printable paper tool does
Shop-bought pads come in whatever spacing the maker chose, which is rarely the one you want. This tool draws the paper instead, in exact millimetres, so a five millimetre grid really is five millimetres when it lands on the page. You pick the type, the spacing and the look, and it makes a clean sheet on the spot.
It helps a wide range of people. A student squaring up a maths graph, a bullet-journal keeper who likes a dot grid, an engineer sketching in isometric, a musician needing staves, or anyone who has run out of lined paper and does not want to buy a whole pad. One sheet or a hundred, it costs nothing but the printing. And because the sheet is drawn to real millimetres, it prints the same on any machine you send it to.
The paper types
The Paper menu picks what gets drawn. Each choice serves a different job, and switching between them redraws the preview at once.
- Squared is classic graph paper, a full grid of lines for maths and plotting.
- Dot grid marks each crossing with a small dot instead of a line, a favourite for journals.
- Lined is plain writing paper with horizontal rules only.
- Cornell notes adds a narrow left column for cues and a summary band at the foot, a note-taking layout.
- Isometric uses a triangular grid for drawing solid objects at fixed angles.
- Hexagonal fills the page with six-sided cells, useful for tiling and games.
- Music manuscript draws staves of five lines for writing notation.
- Semi-log has a log scale up the page for plotting figures that span powers of ten.
- Blank with a margin is an empty sheet with only the margin, for a clean writing area.
Spacing, weight and colour
Spacing sets the gap between lines or dots in millimetres, from 2 to 25, starting at 5. This is the setting the whole tool exists for, so choose it to suit the job: fine for detailed drawing, wide for young writers. It is hidden for the music, semi-log and blank types, which set their own spacing.
Line weight sets how thick the lines are drawn, from 1 for the finest up to 8 for the boldest, starting at 2. Line colour takes any colour value and starts on a soft blue-grey. Keeping the lines pale is worth doing, because a faint grid stays out of the way of your own pen, while heavy black lines fight with what you write. For the squared type, a Heavier line every fifth tick box draws a bolder line at every fifth one to help you count across the grid, and for music, a Staves box sets how many staff lines fill the page, from 4 to 16.
Picking the right spacing
The spacing you choose changes the feel of the paper more than any other setting, so it pays to match it to the task in hand. Because the change is instant, the fastest way to decide is to try two or three values and watch the preview settle. What looks right on the screen at full size is what will print.
- Two to four millimetres suits fine technical drawing and small, neat handwriting.
- Five millimetres is the everyday grid, and the usual pick for school maths.
- Eight to ten millimetres leaves room for larger writing or a young child learning to form letters.
- Wider still works for quick sketches, where you only want a light guide underneath.
Setting up the page
Page margin sets the blank border around the sheet in millimetres, from 0 to 30, starting at 10. Leaving a margin is not just for looks, and the next section explains why it matters for the spacing. Paper size offers A4, Letter, A5 and A3, and Orientation switches between portrait and landscape.
One more tick box, Border round the page, draws a neat frame at the edge of the margin. Turn it on when you want a contained writing area, or leave it off for an open sheet. Every one of these settings shows in the preview straight away, so you see the finished page before you use a drop of ink. That quick feedback makes it easy to compare two setups side by side in your head.
Getting it onto paper
There are three ways to take the sheet away. The Print button opens your browser's own print box, with a reminder to print at full size. From that box you send the page to a printer, or you can choose to save it as a PDF to keep or print later.
The other two buttons work with the drawing as a file. Download saves it as an SVG named paper.svg, a small vector file that prints identically on any printer and can be reused any time. Copy places the same SVG code on your clipboard, ready to paste into another program that reads it. A Reset button returns every setting to its starting value if you want to begin again from a clean slate.
Why print at 100 percent
The exact spacing only survives if you print at full size. If the print box is set to shrink the page to fit, it scales the whole grid down, and a five millimetre square quietly becomes something smaller. Turn any fit-to-page or scaling option off and set the scale to 100 percent.
The margin plays a part here too. Almost every home printer cannot print right to the edge of a sheet; there is a strip a few millimetres wide where the rollers grip. A grid drawn to the very edge is either clipped or, worse, shrunk to fit, which changes the spacing everywhere. A ten millimetre margin and a 100 percent print gives an exact grid every time.
A worked example
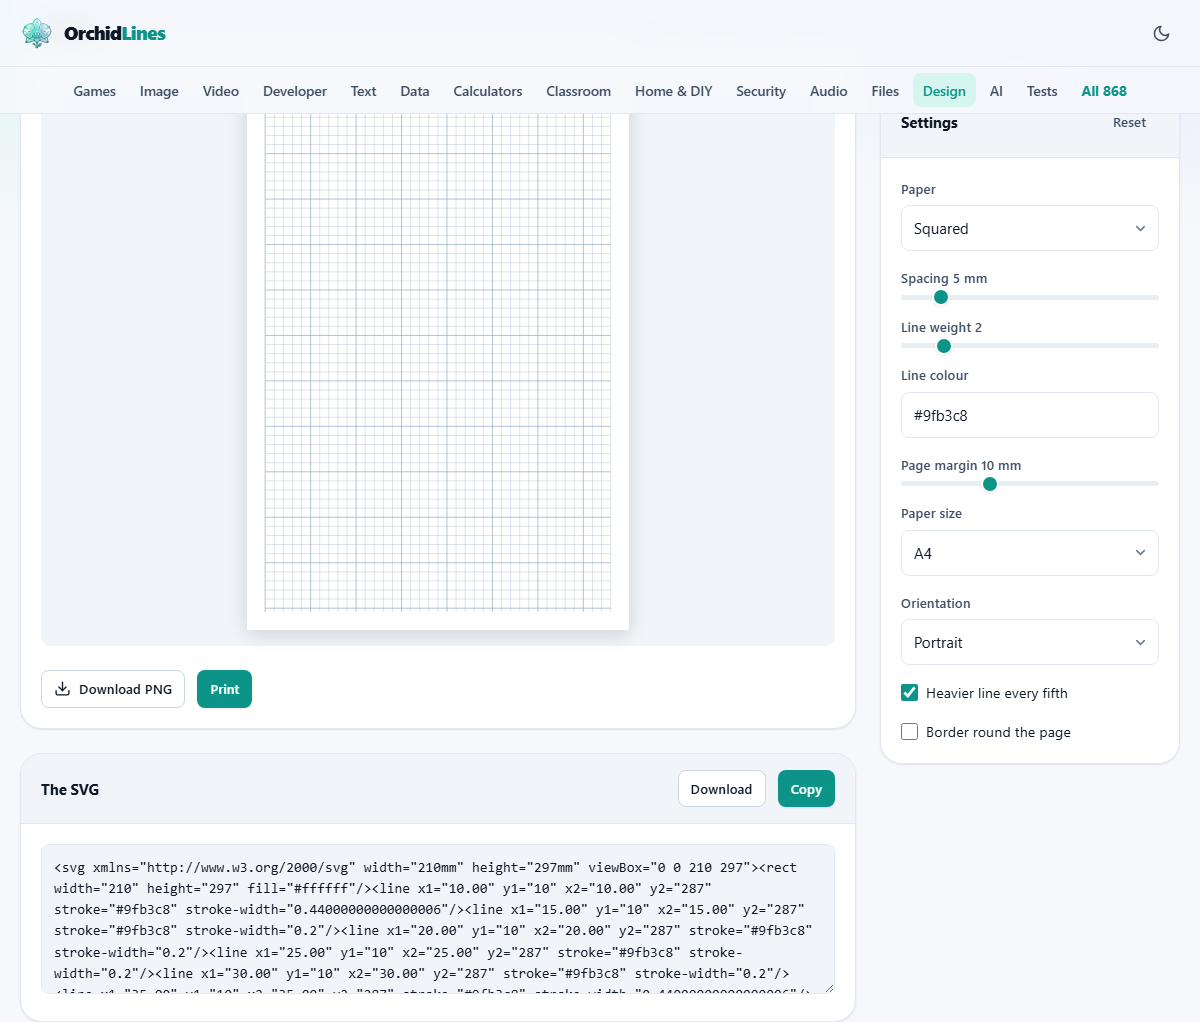
Choose Squared from the Paper menu. Leave Spacing at 5 millimetres, Paper size at A4, and Orientation on portrait. Keep Page margin at 10, the Line colour on its soft blue-grey, and Line weight at 2, with Heavier line every fifth left on. The preview shows a light grid with a bolder line at every fifth, and the note underneath reads 5 mm spacing on A4, 10 mm margin.
Now take it to paper. Press Print, set the scale to 100 percent, and print one sheet. Hold a ruler against it and check that ten squares span exactly 50 millimetres. Once that measures right, you know the setup is good, and you can print as many as you need or press Download to keep the paper.svg for next time. You only ever need to run that ruler check once for a given printer, and after that you can trust it.
Common mistakes and how to fix them
The most common complaint is a printed grid that comes out slightly small. That is the print box scaling the page to fit, and the cure is to turn scaling off and print at actual size. Measuring the first sheet against a ruler catches it before you print a stack.
The second mistake is setting the lines too dark. Black grid lines compete with your own writing and make the page busy; a pale colour reads far better. The third is drawing right to the edge with no margin, which invites the printer to clip or shrink the sheet, so leave at least a small border. A fourth, easy to miss, is choosing landscape when your work wants the taller portrait shape, so glance at the orientation before you print.
When another tool suits better
This tool makes paper to print and write on by hand. It does not let you type or draw on the sheet inside the page, so if you want to fill it in on a screen, you would print it first or open the saved file in a drawing app.
It is also not a charting tool. Semi-log and squared paper give you a grid to plot on yourself, but they will not turn a table of numbers into a finished graph. If you need the chart drawn for you from data, a dedicated chart maker is the better fit, and this paper is for working things out by hand.
Drawn in your browser
The paper is drawn inside your browser as you change the settings, and it never leaves the page until you choose to print or save it. Nothing is uploaded, there is no account, and no sheet you make is recorded anywhere off your machine. The tool works just the same with the network switched off, which is the clearest sign that the drawing happens on your side.
Your last settings are remembered in this browser, so the tool opens on the paper you used before, ready to print again. That memory stays on this one device. Since the sheet is a tiny SVG file, saving it with Download is the simplest way to keep an exact copy you can print on any printer later.