
Badges people can read at arm's length
The help panel above gets you a badge. This guide covers the choices behind it: which box feeds which part of the card, why the photo frame is taller than it is wide, how eight badges land on one sheet, and what to do once the paper leaves the printer. A worked example with real values sits near the end, followed by the faults that spoil a whole sheet.
Days when a printed badge earns its place
A badge makes a small promise. It says this person is meant to be here, and who to ask if they are not. That is worth a lot in a building full of strangers.
Picture a school open day with sixty parents in the corridors. Or a trade fair where the stand staff keep swapping over. Or a workshop taking on eight seasonal packers. The usual answer is a sticky label and a marker pen, which looks exactly as temporary as it is.
This page gives you the other answer without a card printer in the office. Type the details, add a face, and cut up the sheet. The badge is drawn at bank card size, so it drops into any holder you already own.
The person panel, box by box
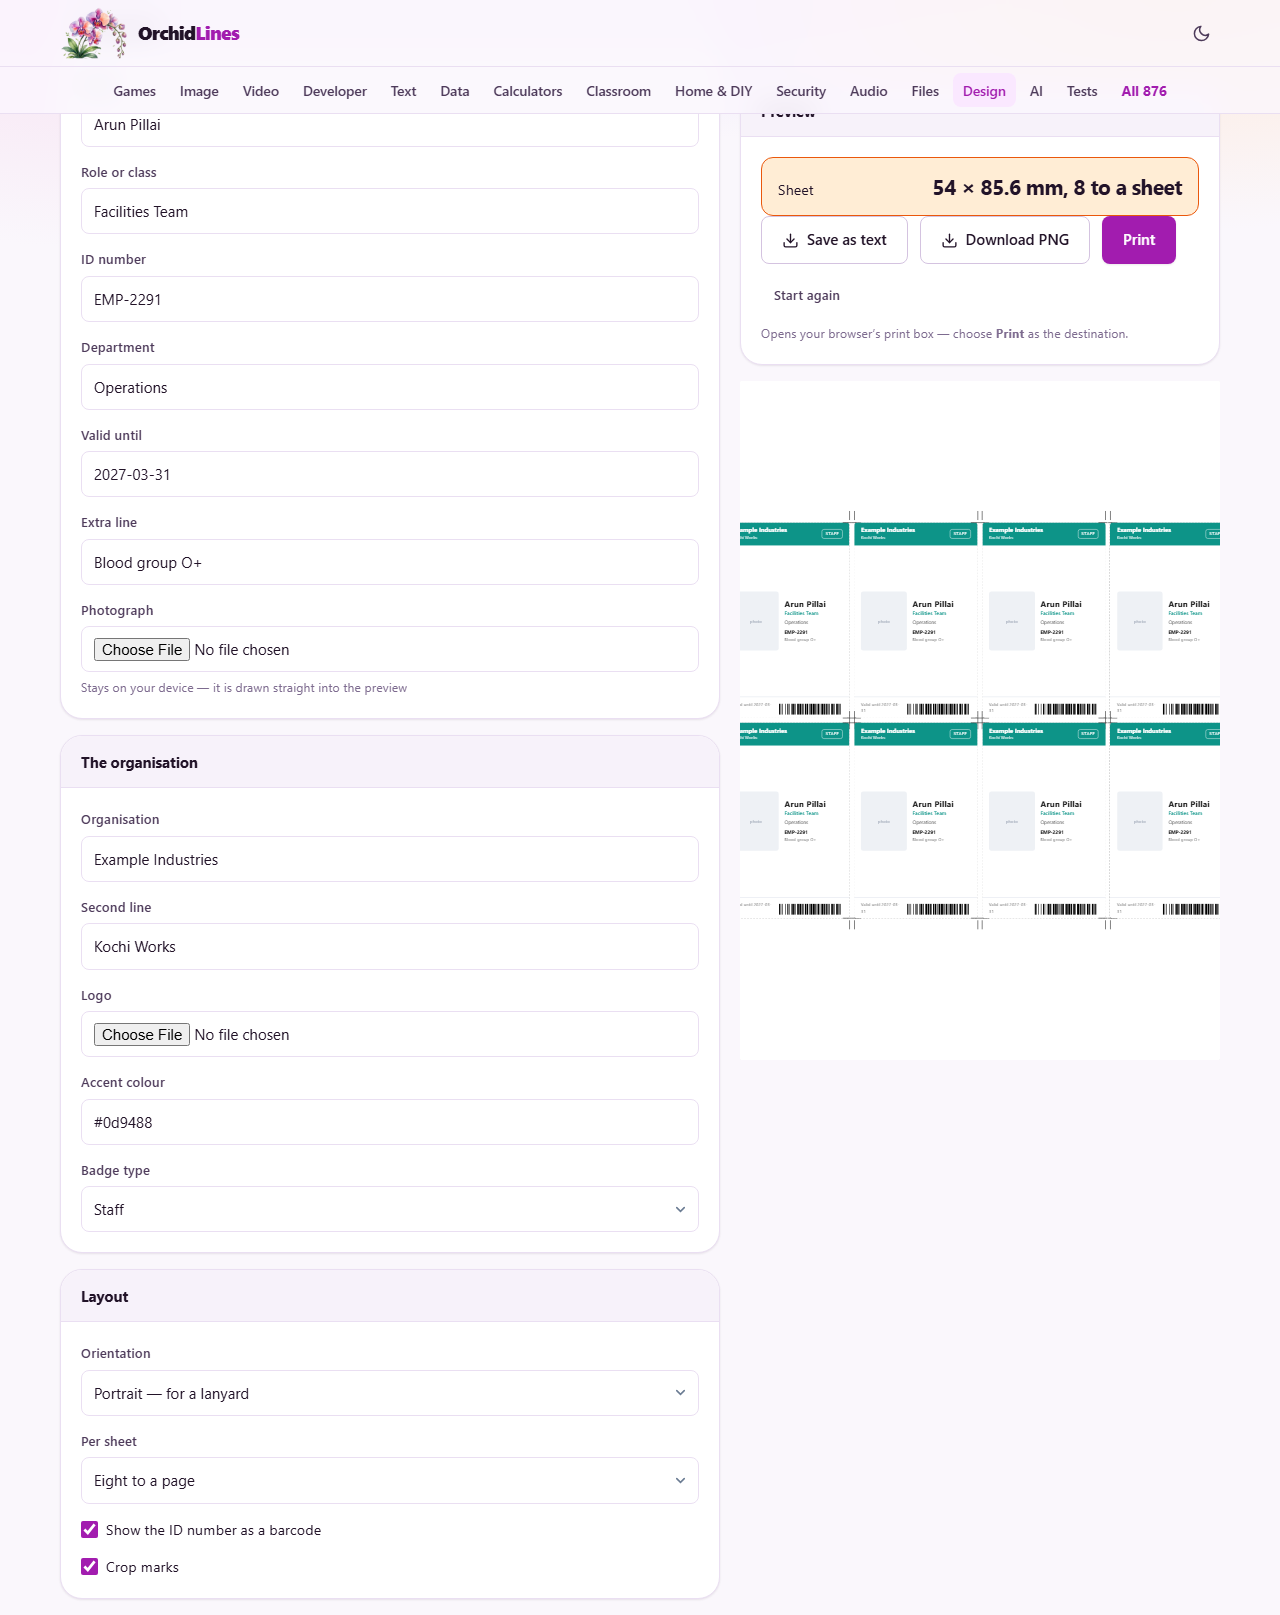
The first panel holds everything about the human being. Each box maps to one line on the card, and an empty box simply leaves that line out.
Name is set largest and sits beside the photo. Use the name people actually say out loud, not the full legal one. Role or class prints under it in your accent colour, so it catches the eye second. Department is a quieter grey line below that.
ID number prints in bold, and it is the value the barcode carries. Valid until is a plain text box, so whatever you type appears after the words Valid until. Extra line gives you one more short line. The example uses a blood group, but a locker number or an allergy note fits just as well.
Photograph opens a file picker. The picture is read straight off your disk and drawn into a frame that is taller than it is wide. The image fills that frame and anything sticking out is trimmed away, so a wide holiday snap loses its left and right edges. Crop to head and shoulders first and the face will sit where you expect.
The organisation panel
The second panel repeats on every badge you make here, so set it up carefully once.
Organisation prints across the top of the card. Second line goes under it in smaller type for a site, campus or branch. Logo takes an image file; upright, it sits on a small white tile inside the coloured band, and wide, it sits beside your name.
Accent colour takes a colour written as a hex code, the short code beginning with a hash that the box already shows. It paints the coloured area and tints the role line. Badge type offers Staff, Student, Visitor and Contractor, and prints that single word on the card. Clear the accent box completely and the badge falls back to a colour chosen to suit the type.
Layout: shape, quantity, stripes and cut lines
Orientation decides which way up the card is. Upright hangs the right way round on a lanyard. Wide is the shape most office passes use. It is the same card size either way, just turned.
The two shapes do not carry the same fields. The upright card shows the second organisation line, the department and the extra line. The wide card leaves those three out, because the space is not there. If any of them matter, stay upright.
Per sheet offers eight to a page, four to a page, or one at actual size. Upright badges pack four across and two down; wide ones pack two across and four down. Every position holds the same badge, so you work through your people one at a time. Eight copies of one badge is not a waste, since replacing a lost pass later becomes a two-second job.
Show the ID number as a barcode draws a stripe code below the details. It uses Code 128, an everyday stripe format that handheld scanners read without any setup. It accepts plain keyboard characters only, so an ID with accented letters produces no stripes; the number is printed as text anyway. Crop marks adds hairlines just outside each corner for your blade to follow. A small readout above the buttons gives the card size and the number per sheet.
What a good badge shows, and what it should never show
A badge is read at a distance, in a hurry, often by someone who has never met the wearer. That should shape what you put on it.
Four things do the real work: a face, a name, the body that issued the card, and a date it stops being valid. The rest is decoration. Keep the role plain, so a receptionist can tell a supplier from a summer student without asking.
- Leave off home addresses, dates of birth and personal phone numbers. A dropped badge should not be a gift to whoever finds it.
- Give visitors a colour of their own and a short expiry. A red band that ran out yesterday is spotted across a room.
- Put a reception phone number on the extra line if you want lost badges returned.
- Match the ID number to whatever your own records use, so scanning it means something later.
Worked example: visitor passes for an open day
A school expects guests on a Saturday morning and wants passes that stand out from staff cards. In the person panel type Priya Menon as the name, Visitor, open day as the role, VIS-0146 as the ID number and Escorted at all times as the department. Valid until reads 12 September 2026. Leave the photo empty and the frame prints a grey box you can staple a picture into.
In the organisation panel type the school name, add Ernakulam campus as the second line, and load the crest as the logo. Set the accent colour to a strong red so nobody mistakes the pass for a staff card, and choose Visitor as the badge type.
In the layout panel choose upright and four to a page, leaving both tick boxes on. The readout reports the card size and four to a sheet. The preview shows four identical passes with hairline marks at their corners and a stripe code above the red footer rule.
Press Print, set the scale to one hundred per cent, and send it to card stock. Cut along the marks and slide each pass into a holder. Change the name and the ID number, print again, and the next four are ready.
From screen to card
Two buttons sit beside the preview and they do different jobs. Print opens your browser's own print box, and a reminder appears telling you to set the scale to one hundred per cent. Shrink the sheet by even a few per cent and the card no longer fits a standard holder.
Download PNG, next to it, writes an image file of the sheet into your downloads with no dialogue at all. Use it when a print shop wants a file, or when you are working on a phone. Save as text keeps only the wording.
For the card itself, stock around two hundred and fifty grams per square metre feels right in the hand and still feeds through most home printers. Use the straightest paper path on offer. Cut with a knife against a metal ruler, since scissors wander. If you laminate, punch the lanyard hole afterwards and keep it clear of the text.
Where a sheet goes wrong
Nearly every ruined sheet comes from one of these, and all of them are quick to undo.
- The printed card is slightly too small for the holder. Page scaling was left on. Force full size and measure the width with a ruler before cutting.
- The face is chopped at the sides. The frame is upright and the photo was wide. Crop the picture to a tall shape first.
- No stripes appear. Either the ID box is empty, the tick box is off, or the number contains characters the stripe format cannot carry.
- The organisation name ends in three dots. It is too long for the band and has been trimmed. Shorten it or move part of it to the second line.
- The photo and logo vanish after a reload. They are deliberately never stored, so pick them again.
- Colours look washed out. Draft mode is on, and the coloured band uses a lot of ink either way.
When another page suits the job better
This maker draws one badge design at card size and repeats it. If you want contact details rather than identity, the Business Card Maker on this site is built for that, including the reverse side.
If the photo itself is the problem, sort it out first. The Passport Photo Maker crops a face to official sizes, and the Background Eraser drops a cluttered background so the portrait looks like a portrait. Come back with a tidy upright image and the badge frame will treat it kindly.
If you only want the stripe code, the Barcode Generator gives it to you on its own at any size. And if the badge must open a door, buy cards with a chip or a hologram. That is a different product, not a different setting.
Your colleagues' faces stay on your machine
Every part of this runs inside the page you are looking at. The photograph is read by your own browser and painted into the preview there. It is not sent anywhere, and no copy exists outside your computer. That is the honest reason to make a staff badge here rather than on a site that asks you to upload a picture of somebody who never agreed to it.
The typed details are remembered in this browser, so tomorrow's badge starts half filled in. The photo and the logo are left out of that saved copy on purpose. Start again clears the details and reloads the page. Since nothing is kept on a server, nobody can recover your work for you, so keep a downloaded image of any design that took effort.