
Making a colouring page out of a real photograph
The help panel above gives you the three quick steps. This longer guide goes deeper. It explains what edge detection really does, why the photo you pick matters far more than any slider, what each control in the Settings panel changes, and how to get a clean page onto paper. A full worked example and a list of common fixes come at the end.
What the tool actually makes
A colouring page is a picture drawn as plain black lines on white paper, with nothing filled in. This tool builds one from a photograph. It looks for the edges in the photo, which are the places where light meets dark, and keeps only those as lines. Everything else is dropped.
The name for this is edge detection. It is not a filter that paints over the photo. It measures where the brightness changes sharply and draws a line at that spot. So the outlines follow the real shapes in the picture, not some random pattern laid on top.
Parents reach for it on a wet afternoon. Teachers turn this week's topic into a worksheet with it. A childminder can make five different pages in a few minutes. Because you start from your own photo, the child colours in their own dog, their own street, or their own face.
The photo matters more than the settings
Edge detection is only as good as the picture you feed it. A clear subject on a plain background gives lovely, clean lines. A busy scene gives a tangle that no child could ever colour.
Good photos have strong shapes, even light, and little clutter. A dog sitting on grass. A face against a wall. A bike leaning on a fence. Poor photos are crowds, leaves, patterned cloth, and anything shot in hard shadow.
If the result looks like scribble, change the photo before you touch a single slider. No setting can rescue a picture that has too much going on. This is the one idea that decides whether you get a good page.
Loading a photo
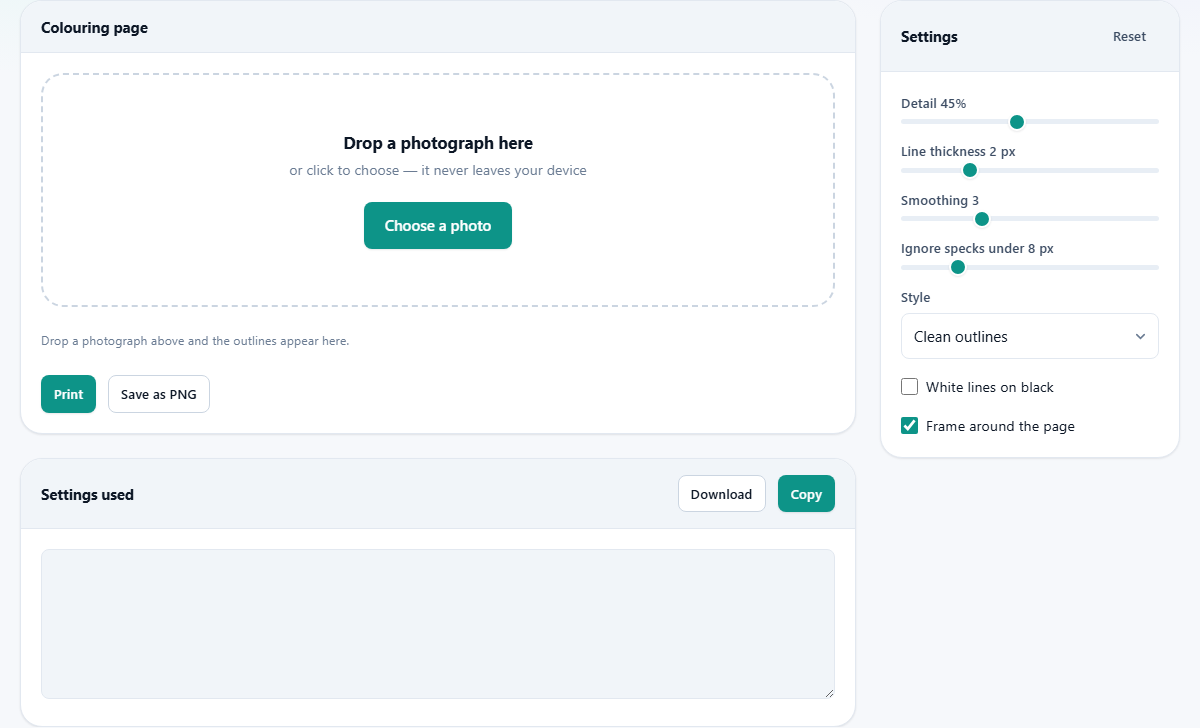
Drop a photo onto the box that says 'Drop a photograph here', or click it to pick a file. Any common image type works. The picture is read on your own machine and is never sent away.
The outlines appear in the 'Colouring page' panel at once. A small grey note under the heading tells you how much of the page is now line. If more than about a fifth of it is ink, the note warns that the page is very busy. If there is almost none, it tells you to raise the detail. In between, it says you have a good amount to colour in.
Very large photos are shrunk so the longest side is 1400 pixels. That keeps the tool quick and is more than enough for printing on a normal sheet.
The four sliders
The Settings panel on the right holds four sliders. Each one changes the drawing as you move it, and the preview keeps up in real time.
- Detail runs from 5 to 95 per cent and starts at 45. Low detail keeps only the boldest lines, which is cleaner and better for little ones. High detail keeps fine texture too, which suits older children. Try this slider first.
- Line thickness runs from 1 to 5 pixels and starts at 2. It makes every line heavier or lighter. Thicker lines are easier to stay inside.
- Smoothing runs from 0 to 10 and starts at 3. It gently blurs the photo before the edges are found, which wipes out tiny broken marks. Raise it on a grainy photo.
- Ignore specks under runs from 0 to 40 pixels and starts at 8. Any mark shorter than this is treated as noise and removed. Raise it to clear a snowstorm of dots, or lower it to keep fine work.
The Style menu and the tick boxes
Below the sliders is a Style menu with three choices: Clean outlines, Sketchy, and Thick lines for young children. That last choice always draws a heavy line, even when the thickness slider is low, because a child under about six cannot follow a thin one. Clean outlines is the plain default.
Two tick boxes finish the panel. 'White lines on black' flips the colours, so you get white outlines on a black page. It looks striking but drinks ink, so it is best kept for one special page. 'Frame around the page' draws a tidy border around the edge, and is switched on to start with.
A Reset button at the top of the panel puts every control back to where it began, in case you have wandered too far and want a fresh start.
Getting it onto paper
Two buttons sit under the picture. Print opens your browser's own print box, ready to send the page to a printer. From that same box you can save the page as a PDF file instead, if you would rather keep a copy than print it straight away.
Save as PNG downloads the page as an image file named colouring-page.png. A PNG is an ordinary picture. You can print it later, send it to a grandparent, or drop it into a document. Choose this if you are not sitting at the printer right now.
The lower panel, headed 'Settings used', lists the exact values behind the current page. Its Copy button puts that text on your clipboard, so you can jot down a combination that worked and set it up again next time.
A worked example
Say you have a photo of a spaniel called Biscuit sitting on the lawn. Drop it in. With the default settings the tool draws the dog's outline, its ears and eyes, and a scatter of grass blades.
The note reports that nine per cent of the page is line and calls it a good amount. But the grass has broken into a hundred tiny marks. Raise Ignore specks under from 8 to 20, and most of them melt away, leaving the dog clean.
Your colourer is four, so pick Thick lines for young children from the Style menu. The outline grows nice and bold. Now lower Detail to 30 to shed the last of the fussy lines. Press Save as PNG, and colouring-page.png drops into your downloads, ready for the printer.
If the page were for a class display rather than a child, you could tick 'White lines on black' for a bolder look, though it drinks far more ink. For a page somebody will actually colour, leave that box clear and keep the frame on.
Paper, size and little hands
The page prints at whatever size your printer is set to, which is usually a full sheet. That is the right size for most colouring. Small children do better with big, simple shapes, so a bold outline filling a whole page beats a detailed one squeezed into a corner.
Crayons and coloured pencils are happy on plain printer paper. Felt tip pens bleed through thin paper, so slip a spare sheet underneath, or print on something a touch heavier. The frame around the edge gives a child a clear line to work up to, which is why it is on by default.
If you are making a set of pages for a party or a rainy week, save each one as a PNG with a clear name before you move on. That way you can print the whole batch in one go later, without loading every photo again.
Common problems and quick fixes
Almost every bad result has a simple cause. Work down this list before you give up on a photo.
- The page is a wall of lines. The photo is too busy. Pick one with a plainer background, or pull Detail down.
- Hundreds of tiny dots cover the page. That is photo grain or texture. Raise Smoothing and raise Ignore specks under together.
- Almost nothing is drawn. The photo is too soft or too dark. Raise Detail until the shapes come through.
- The lines are too thin for a small child. Raise Line thickness, or switch the Style menu to Thick lines for young children.
- Nothing shows up at all. Check that a photo has been dropped in. The tool needs one before it can draw anything.
When another tool suits better
This tool only makes outlines. It throws the colours and the shading away on purpose. If you want to keep the photo and merely lighten it or soften it, that is a job for a photo editor, not for this page.
It also cannot invent a colouring page from nothing. It needs a real photograph to trace. For a page built from clip art or your own hand drawing, reach for a general drawing tool instead. And if you want a poster effect that keeps flat blocks of colour, that is a different kind of picture again.
It all happens on your device
These are usually photos of somebody's children, so where they go really matters. The answer is nowhere. The photo is read, the edges are found, and the page is drawn from start to finish inside your own browser.
Nothing is uploaded to a server. You could switch off your internet before you begin, and every part of the tool would still work. Once you close the tab, the photo is gone from the page and lives only where you first saved it.