
Getting a box that closes on the first try
The help block above covers the printing basics. This guide covers the judgment calls that come before: which of the five styles suits the object in your hand, how much room to leave around it, what every field in the settings rail changes, and how a printed sheet becomes a square, rigid box. A complete worked example sits near the end, followed by a fault-finder.
Five styles, five different jobs
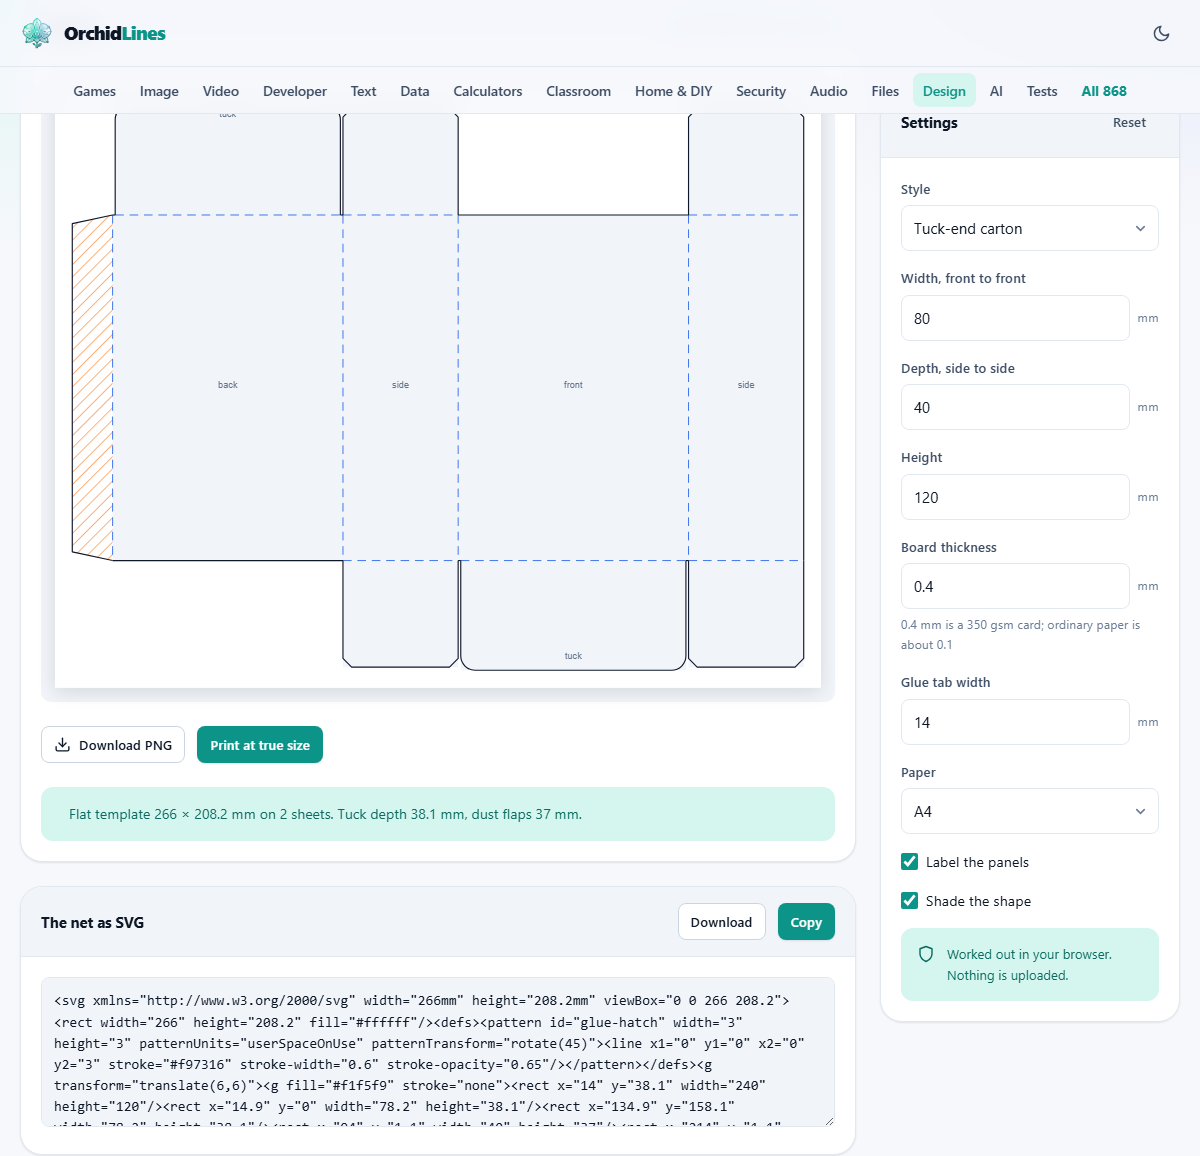
The Style menu is the first and biggest choice, so it pays to know what each option builds. The tuck-end carton is the upright pack that toothpaste and soap arrive in. It glues along one tall seam, and each end closes with a flap that tucks inward. Pick it for anything that slides in from the top and must open again without tearing.
The tray with a lid is a two-part design: an open base with glued corners, plus a slightly larger cover that drops over it. It suits chocolates, soap bars, jewellery and any gift where lifting a lid is part of the moment. The pillow box is a curved pouch that springs closed around flat or soft contents such as vouchers, ribbons or a folded scarf.
The sleeve is an open-ended band that wraps around something else, often a tray you made five minutes earlier. The gift bag stands upright with an open mouth and a folded top edge, and it forgives awkward shapes that no rigid box will take.
Size the space, not the object
The three main fields describe the inside of the finished box. Width runs across the front face, depth runs from front to back, and height runs upward. Width and depth accept up to 600 mm, height up to 800 mm, and the preview redraws the moment a number changes.
Resist typing the exact size of the contents. A box cut to the millimetre grips like a clamp and scuffs whatever goes in. Allow two or three spare millimetres in each direction for hard objects, and five or more for soft things or anything wrapped in tissue. A standard deck of playing cards, roughly 63 by 88 by 20 mm, travels happily in a carton entered as 66 wide, 23 deep and 92 tall.
The thickness question
Board thickness looks like a minor detail. It is not. Card takes up room when it bends, so every flap that must pass inside a wall, and every cover that must pass outside one, is drawn from this figure. Everyday printer paper sits near 0.1 mm, greetings-card stock near 0.4 mm, and the field accepts values up to 3 mm.
Decide on your material before fine-tuning anything else. If you prototype in cheap paper and then switch to heavy card for the real thing, update the thickness and print a fresh net. The geometry genuinely shifts, and the difference is exactly where a cover binds or a tuck rattles.
The quieter settings
Below the main sizes sits a row of fields that each control one part of one style.
- Glue tab width, 5 to 40 mm: the flap that takes the paste along the main seam. Wider means stronger on a tall carton; on a tiny box, narrow it so it cannot reach the far wall.
- Lid depth, 5 to 200 mm: how far the cover's walls reach down the tray. A 15 mm rim lifts off with a finger; a 40 mm rim stays put while the parcel travels.
- Top fold-over on the bag, up to 80 mm: turns the raw upper edge of the gift bag inward, stiffening the mouth and hiding the cut line.
- Curve of the pillow ends, 2 to 120 mm: how much the pillow box swells. Slim curves read as elegant; deeper ones add capacity and roundness.
- Thumb notch in the sleeve: a small scoop cut into the edge so a finger can push out whatever the sleeve holds.
- Crease so the bag folds flat: adds the folds that let a finished bag collapse for storage, the way a shop bag does.
- Label the panels marks each face with its name, which makes a first assembly much quicker. Shade the shape tints the net so it stands out from the empty page.
Paper out, file out
There are two exits. Print at true size sends the net to your printer at its real dimensions, laid onto the sheet chosen in the Paper menu: A4, Letter, A3 or A5. If the net outgrows one sheet, it is carved into several pages, each carrying a pale guide showing where its neighbour rides underneath. Join tiled pieces with tape on the reverse, or glue across the marked overlap for extra strength.
The second exit is the SVG panel, with Download and Copy buttons. Inside that file, cutting lines, folding lines and glue regions live on three separately named layers. A craft cutting machine can therefore be told to blade the first and only crease the second, which produces sharper boxes than any hand tool. The same file opens in any vector editor if you want to add artwork to the panels before making a batch.
Worked example: a lidded tray for a candle tin
Suppose a candle tin measures 72 mm across and 45 mm tall, and it needs a gift box with a lift-off cover. Choose Tray with a lid from the Style menu. Enter 76 for width, 76 for depth and 50 for height, leaving air on every side. The card on the desk is 350 gsm, so set Board thickness to 0.4. Set Lid depth to 25, deep enough to grip without hiding the tray. Leave the glue tab at 14 and the paper on A4.
The preview shows both parts. Look closely: the cover is fractionally wider than the base in both directions. That oversize is the thickness allowance at work, and it is why the finished lid glides on rather than jamming halfway. Print, then lay a ruler on one printed wall and confirm it reads 50 mm before any cutting starts. Score the dashed creases, cut the solid outline, fold every line crisply, and fix the four corner tabs inside the walls. Build the cover the same way, drop it on, and the tin has a proper home.
Habits of people whose boxes come out square
Work in a fixed order: score everything, cut everything, fold everything, and only then reach for glue. Scoring means pressing a groove without cutting through; an empty ballpoint pen pulled along a steel ruler does it perfectly. Cut long straight edges against the ruler too, on a mat, rather than steering scissors down them.
Choose adhesive by material. A glue stick suits paper prototypes. For card, a fast-grab craft glue or narrow double-sided tape wins, because watery paste soaks in and ripples the surface. Hold each seam closed for a slow count of thirty. Rushing the main seam is how a carton ends up twisted.
Fault-finder
Most box failures trace back to one of a handful of causes.
- The cover will not go over the base: the thickness figure was lower than the real card. Enter the true value and cut a new cover.
- The cover falls off too easily: increase Lid depth and remake just that part.
- Folds crack and show white: the crease was never scored, or it runs against the grain of the card. Score harder, or print with the sheet rotated a quarter turn.
- The carton leans once glued: a score wandered off line. Always pull the tool along a ruler, never freehand.
- Printed walls measure a few millimetres short: the print window scaled the page down to fit its margins. Force full scale and measure a panel again.
- A tuck flap wrinkles instead of seating: re-check that width and depth went into the right fields and that the thickness matches the card in the printer.
What to build somewhere else
This maker draws folding cartons from material a home printer can feed. A corrugated shipping box lives outside that world: its board is thicker than the 3 mm the field allows and needs its own crush allowances. A rigid, paper-wrapped presentation box is likewise a different craft, built up from greyboard rather than folded from a net.
Flat mailers, pockets and seed packets have their own template page on this site under envelopes, which thinks in flaps and seals rather than walls. And past a certain size, card itself gives up: a net can always be tiled across many sheets, but a metre-wide span of 300 gsm will sag no matter how cleanly it is cut.
Where your measurements go
Nowhere. The geometry is worked out by the page itself, on your machine; the numbers you type are never transmitted, and no copy of your design exists on any server. The site cannot see your box, which also means it cannot restore it for you later.
So when a design finally fits perfectly, keep the evidence. Download the SVG, or Copy it into a notes file, and put the dimensions in the file name. The next batch of ten then starts from a saved drawing instead of from memory, and the Reset button can clear the page for the next job without costing you anything.